13 best bachmann train track ho
Bachmann is a well-known manufacturer in the world of model trains and model railroad accessories, including their HO scale train track products. Here's what you should know about Bachmann train track HO:
HO Scale: HO (Half O) is one of the most popular model train scales in the world. It's 1:87 in scale, making it smaller than O scale but larger than N scale. Bachmann produces a wide range of HO scale train products, including tracks and accessories.
Track Systems: Bachmann offers various track systems designed for HO scale model trains. These track systems include standard sectional track, which comes in straight and curved pieces, as well as special track components like switches (or turnouts), crossovers, and more. These tracks are typically made of durable materials like nickel-silver or steel alloy for longevity and smooth operation.
Compatibility: Bachmann HO scale tracks are compatible with a wide range of HO scale model trains, including locomotives, freight cars, and passenger cars from different manufacturers.This compatibility allows hobbyists to expand and customize their layouts with ease.
E-Z Track: Bachmann's E-Z Track system is a popular choice for both beginners and experienced model railroaders. It features an integrated roadbed, making it easy to set up and providing a realistic appearance. E-Z Track also includes a snap-fit assembly, eliminating the need for track nails or screws.
Flex Track: In addition to sectional track, Bachmann offers flex track for more flexibility in designing layouts. Flex track can be curved and shaped to create custom track configurations and curves.
Accessories: Bachmann provides a variety of track accessories, such as rerailers, track cleaning kits, trackside buildings, and scenic details to enhance the realism of your model railroad layout.
Power Systems: Bachmann offers various power supply options, including analog DC and digital DCC (Digital Command Control) systems, to control locomotives and accessories on the track.
Availability: Bachmann HO scale train track products are widely available through hobby shops, online retailers, and model railroad enthusiasts' clubs. This accessibility makes it easy for model railroaders to find the track components they need.
In summary, Bachmann's HO scale train track products are a popular choice among model railroaders due to their compatibility, durability, and user-friendly features. Whether you're a beginner looking to start a new hobby or an experienced model railroader expanding your layout, Bachmann's HO scale track systems and accessories offer a range of options to meet your needs.
Below you can find our editor's choice of the best bachmann train track ho on the market
Bachmann Trains - Snap-Fit E-Z TRACK 18” RADIUS CURVED TRACK (4/card) - NICKEL SILVER Rail With Gray Roadbed - HO Scale
Bachmann Trains
Product description
Snap-Fit E-Z TRACK 18” RADIUS CURVED TRACK (4/card) - NICKEL SILVER Rail With Gray Roadbed - HO Scale. Bachmann's exclusive E-Z Track system makes set-up quick, easy and fun. E-Z Track is designed to Snap Together and Stay Together on Floors, Tables and Carpets. This product features Nickel Silver Rail with Gray Roadbed. 18” Radius Curved Track is the basic curve of the E-Z Track system. It can also be placed on the inside of 22” radius curved E-Z Track for double-track mainline realism. Four pieces of track make up one-third (120 degrees) of a 36” diameter circle.
From the Manufacturer
Bachmann's exclusive E-Z Track system makes set-up quick, easy and fun. Nickel Silver Rail. Gray Roadbed. E-Z Track System --Snaps Together, Stays Together on Floors, Tables and Carpets.
- E-Z Track System - Snaps Together, Stays Together on Floors, Tables & Carpets
- Set Up is Quick, Easy and Fun - No Nails, Screws, or Special Tools Needed
- Nickel Silver Rail with Gray Roadbed, Designed to Provide Excellent Conductivity and Durability
- HO Scale 1:87 - Modeled From AAR Track Engineering Dimensions
- Four Pieces of Track Make up one-third (120 degrees) of a 36” Diameter Circle.
- Easy to Use For Both Temporary and Permanent Train Layouts
User questions & answers
| Question: | Can trains/freight cars, etc., other than ho gauge run on these e - z tracks |
| Answer: | All I run is snap fit track. All my engines and switches are DCC |
| Question: | How many are needed for a circle |
| Answer: | 36 inch circle requires 12 pieces of 18" radius track. I do not have any circles smaller than 36" because longer wheel base cars do not work well on smaller circles. |
| Question: | Will these tracks work with HO dcc controller and dcc locomotive |
| Answer: | I don't think so. I have a cot sized blow ground mat I sleep on. Between my gear, and my sleeping arrangement there isn't enough room for much else. |
| Question: | how many sets do i need for a 32 inch circle |
| Answer: | Good price, but seems heavy for long distance backpacking. There are tents that weigh half as much, but cost 3=5 times as much (see Big Agnes, Nemo, REI, etc). On long walks the weight means a lot more than the price. |
Product features
Discover Everything Bachmann Trains Offers to Get Started in Model Railroading
Since 1833, Bachmann has been known for providing innovative design at a good value. We are now one of the world's largest distributor, by volume, of ready-to-run train sets, locomotives, track, and accessories. Bachmann is also the only train company to offer products in all five of the most popular scales: N, HO, On30, O, and Large Scale.
As a distributor of beloved Thomas & Friends products, Bachmann brings the adventures of Thomas the Tank Engine to life with a growing line of complete train sets, separate sale items, and accessories for children from 8 to 80-just add your imagination. Thomas & Friends is available in both HO and Large Scale.
Bachmann's exclusive snap-together E-Z Track System makes track setup quick, easy, and fun. Plasticville U.S.A. and SceneScapes buildings and accessories let you add the finishing touches for the perfect layout.
If You Are Purchasing a Train Set, It Will Include
- Locomotive
- Cars (Rolling Stock)
- E-Z Track – available in either black roadbed with steel alloy rail or gray roadbed with nickel silver rail
- Terminal/Rerailer
- Terminal Wire
- Speed Controller
- Power Supply
- List of Components
Track Assembly
- Decide where to set up your train – a dry, firm, flat surface works best!
- To make sure you have enough working room, make a test track layout by loosely placing track in desired configuration.
- The terminal/rerailer section will later be connected to a power pack and power supply, so place it near an outlet or power strip.
- Install under-track magnet, if your set comes with one. If your set does not come with one, magnets are available separately (HO Item No. 78999; N Scale Item No. 78998).
- Assemble the track by pushing together. Make sure the rail and joiners are seated properly. Be careful that the rail joiners do not slip under the rail without properly connecting. This can cause train derailments and electrical circuit interruptions.
- After track is assembled, double-check for joint connection and fit by lightly running your fingers over the top of the rails in both directions.
- If you detect bumps or distortion on the track surface, recheck the rail joiner fit.
Power Connections
- Power supply and speed control are plug and play; no tools are needed.
- Power is supplied to the track and the locomotive by the power supply, speed controller, terminal wire, and E-Z Track terminal/rerailer.
- First – turn knob on the speed controller counterclockwise until it stops (all the way to the left).
- Next – attach terminal wire to the speed controller by plugging it in where it says 'To Track'.
- Then – plug terminal wire into the E-Z Track terminal rerailer. Firmly push connector onto the track terminals.
- Finally – plug the connecting wire from the power supply into jack on the speed controller labeled 'In'. Then plug power supply into a live wall outlet.
- Some sets may come with a speed controller with two push button connectors. These are used to supply AC power to accessories.
- To make positive and secure connections to these, push in buttons and insert each of the bare ends of the connection wire from your accessory.
- The speed controller is capable of powering one accessory at a time.
Putting the Train on the Track
- Put the locomotive on the track and run the wheels back and forth over the terminal rerailer track.
- When the wheels glide smoothly over the track, you know the wheels are all on the track. If your set comes with a tender, attach it to the locomotive.
- Add the rest of the cars that come with your set by placing them on the track and running them back and forth over the terminal rerailer until they glide smoothly. Then gently push the cars together – they will engage automatically.
- Do not try to connect cars when positioned over an under-track magnet.
How to Use E-Z Mate Couplers (HO and On30 Scale)
- Your set may be equipped with E-Z Mate magnetically operated knuckle couplers that let you perform real railroad switching and yard operations.
- Coupling two cars with E-Z Mate couplers is as easy as pushing them together when they are not over an under-track magnet.
- Uncoupling occurs only when over an under-track magnet and when there is no tension between the cars.
- To uncouple E-Z Mate couplers, stop two couplers directly over the under-track magnet. With no tension between the cars, the couplers will open automatically.
- If cars will not couple, check to be sure cars are not positioned over the uncoupling magnet or parked on a curve.
- If cars will not uncouple, check to be sure the couplers are positioned directly adjacent to the magnet position indicator and that the indicator is placed in line with the center line of the under-track magnet.
- Check that the magnet is secured to the underside of the track and fitted with the steel plate provided.
How to Run Your Train
- Turn the knob on the speed controller clockwise until it stops (all the way to the left).
- Plug in the power supply.
- Begin feeding power to the track by slowly turning the knob on the speed controller clockwise.
- Observe the direction of your train.
- If it moves backwards when the controls indicate forward, stop the train.
- Then simply disconnect, flip, and reconnect the terminal wire to the terminal rerailer track.
- Remember – never leave your train running unattended!
Action Checklist (Troubleshooting If Your Train Doesn’t Run or Stops Running)
- Is the power supply plugged in to a live receptacle?
- Are the wheels on the track?
- Is the wiring secure?
- Is the track properly assembled?
- Is the track properly seated in the rail joiner?
- If your train stops or fails to start, a short circuit may be indicated. If this is the case, Unplug The Power Supply Immediately.
- Common reasons for a short circuit: derailed wheels may cause a short. Check to make sure all wheels are on the track. Also check all connections and make sure there is no metal of any sort across the rails.
- After checking everything carefully, resume operation.
- Please note, your power supply is protected by a circuit breaker that automatically resets after a short circuit is corrected.
- Allow up to 5 minutes for the circuit breaker to reset before resuming operation.
Keep Your Train in Top Operating Condition
- Works better after couple hours of break-in time.
- Train performs best under clean operating conditions.
- Clean wheels and a clean track ensure good electrical contact.
- After about every 8 hours of operation, wipe the track rails and exposed wheels with a soft, lint-free cloth.
- Removal of black residue is normal.
- Do Not Use Steel Wool To Clean Your Track.
- Do not use common solvents, they may damage plastics - use track cleaner.
- After 24 hours of use, light lubrication is required to keep train in top operating condition. Bachmann E-Z Lube or other hobby-grade lubricants are recommended.
Bachmann hopes you enjoy your train for many years to come!

Bachmann Trains - Snap-Fit E-Z TRACK 9” STRAIGHT TRACK (4/card) - STEEL ALLOY Rail With Black Roadbed - HO Scale (44411)
Bachmann Trains
Product description
Snap-Fit E-Z TRACK 9” STRAIGHT TRACK (4/card) - STEEL ALLOY Rail With Black Roadbed - HO Scale. Bachmann's exclusive E-Z Track system makes set-up quick, easy and fun. E-Z Track is designed to Snap Together and Stay Together on Floors, Tables and Carpets. This product features Steel Alloy Rail with Black Roadbed. Four pieces of 9” Straight Track build 36” of railroad.
From the Manufacturer
Bachmann's exclusive E-Z Track system makes set-up quick, easy and fun. Steel Alloy rail. Black roadbed. E-Z Track System - Snaps Together, Stays Together on Floors, Tables and Carpets.
- E-Z Track System - Snaps Together, Stays Together on Floors, Tables & Carpets
- Set Up is Quick, Easy and Fun - No Nails, Screws, or Special Tools Needed
- Steel Alloy Rail with Black Roadbed
- HO Scale 1: 87 - Modeled From AAR Track Engineering Dimensions
- Skill level: Beginner
User questions & answers
| Question: | Will these fit life like trains HO tracks |
| Answer: | Yes this track is HO scale |
| Question: | mine is all in black color, this has the grey base, do you have the one that is all black color |
| Answer: | You will need a DCC electrical system and liquid smoke. |
| Question: | Is this track for HO Models |
| Answer: | I'm not sure I understand your question. HO gauge is HO gauge. Bachman makes other gauge tracks , but to the best of my knowledge the answer to your question is NO. |
| Question: | What does it need for smoke |
| Answer: | For the EZ-Fit nickel silver-grey roadbed track: 18" radius (36" diameter circle) takes 12 pieces of curved 18" radius track. For the 22" radius (44" diameter circle) it takes 16 pieces of 22" radius track. The track comes in 4 packs. |
Product features
Discover Everything Bachmann Trains Offers to Get Started in Model Railroading
Since 1833, Bachmann has been known for providing innovative design at a good value. We are now one of the world's largest distributor, by volume, of ready-to-run train sets, locomotives, track, and accessories. Bachmann is also the only train company to offer products in all five of the most popular scales: N, HO, On30, O, and Large Scale.
As a distributor of beloved Thomas & Friends products, Bachmann brings the adventures of Thomas the Tank Engine to life with a growing line of complete train sets, separate sale items, and accessories for children from 8 to 80-just add your imagination. Thomas & Friends is available in both HO and Large Scale.
Bachmann's exclusive snap-together E-Z Track System makes track setup quick, easy, and fun. Plasticville U.S.A. and SceneScapes buildings and accessories let you add the finishing touches for the perfect layout.
If You Are Purchasing a Train Set, It Will Include
- Locomotive
- Cars (Rolling Stock)
- E-Z Track – available in either black roadbed with steel alloy rail or gray roadbed with nickel silver rail
- Terminal/Rerailer
- Terminal Wire
- Speed Controller
- Power Supply
- List of Components
Track Assembly
- Decide where to set up your train – a dry, firm, flat surface works best!
- To make sure you have enough working room, make a test track layout by loosely placing track in desired configuration.
- The terminal/rerailer section will later be connected to a power pack and power supply, so place it near an outlet or power strip.
- Install under-track magnet, if your set comes with one. If your set does not come with one, magnets are available separately (HO Item No. 78999; N Scale Item No. 78998).
- Assemble the track by pushing together. Make sure the rail and joiners are seated properly. Be careful that the rail joiners do not slip under the rail without properly connecting. This can cause train derailments and electrical circuit interruptions.
- After track is assembled, double-check for joint connection and fit by lightly running your fingers over the top of the rails in both directions.
- If you detect bumps or distortion on the track surface, recheck the rail joiner fit.
Power Connections
- Power supply and speed control are plug and play; no tools are needed.
- Power is supplied to the track and the locomotive by the power supply, speed controller, terminal wire, and E-Z Track terminal/rerailer.
- First – turn knob on the speed controller counterclockwise until it stops (all the way to the left).
- Next – attach terminal wire to the speed controller by plugging it in where it says 'To Track'.
- Then – plug terminal wire into the E-Z Track terminal rerailer. Firmly push connector onto the track terminals.
- Finally – plug the connecting wire from the power supply into jack on the speed controller labeled 'In'. Then plug power supply into a live wall outlet.
- Some sets may come with a speed controller with two push button connectors. These are used to supply AC power to accessories.
- To make positive and secure connections to these, push in buttons and insert each of the bare ends of the connection wire from your accessory.
- The speed controller is capable of powering one accessory at a time.
Putting the Train on the Track
- Put the locomotive on the track and run the wheels back and forth over the terminal rerailer track.
- When the wheels glide smoothly over the track, you know the wheels are all on the track. If your set comes with a tender, attach it to the locomotive.
- Add the rest of the cars that come with your set by placing them on the track and running them back and forth over the terminal rerailer until they glide smoothly. Then gently push the cars together – they will engage automatically.
- Do not try to connect cars when positioned over an under-track magnet.
How to Use E-Z Mate Couplers (HO and On30 Scale)
- Your set may be equipped with E-Z Mate magnetically operated knuckle couplers that let you perform real railroad switching and yard operations.
- Coupling two cars with E-Z Mate couplers is as easy as pushing them together when they are not over an under-track magnet.
- Uncoupling occurs only when over an under-track magnet and when there is no tension between the cars.
- To uncouple E-Z Mate couplers, stop two couplers directly over the under-track magnet. With no tension between the cars, the couplers will open automatically.
- If cars will not couple, check to be sure cars are not positioned over the uncoupling magnet or parked on a curve.
- If cars will not uncouple, check to be sure the couplers are positioned directly adjacent to the magnet position indicator and that the indicator is placed in line with the center line of the under-track magnet.
- Check that the magnet is secured to the underside of the track and fitted with the steel plate provided.
How to Run Your Train
- Turn the knob on the speed controller clockwise until it stops (all the way to the left).
- Plug in the power supply.
- Begin feeding power to the track by slowly turning the knob on the speed controller clockwise.
- Observe the direction of your train.
- If it moves backwards when the controls indicate forward, stop the train.
- Then simply disconnect, flip, and reconnect the terminal wire to the terminal rerailer track.
- Remember – never leave your train running unattended!
Action Checklist (Troubleshooting If Your Train Doesn’t Run or Stops Running)
- Is the power supply plugged in to a live receptacle?
- Are the wheels on the track?
- Is the wiring secure?
- Is the track properly assembled?
- Is the track properly seated in the rail joiner?
- If your train stops or fails to start, a short circuit may be indicated. If this is the case, Unplug The Power Supply Immediately.
- Common reasons for a short circuit: derailed wheels may cause a short. Check to make sure all wheels are on the track. Also check all connections and make sure there is no metal of any sort across the rails.
- After checking everything carefully, resume operation.
- Please note, your power supply is protected by a circuit breaker that automatically resets after a short circuit is corrected.
- Allow up to 5 minutes for the circuit breaker to reset before resuming operation.
Keep Your Train in Top Operating Condition
- Works better after couple hours of break-in time.
- Train performs best under clean operating conditions.
- Clean wheels and a clean track ensure good electrical contact.
- After about every 8 hours of operation, wipe the track rails and exposed wheels with a soft, lint-free cloth.
- Removal of black residue is normal.
- Do Not Use Steel Wool To Clean Your Track.
- Do not use common solvents, they may damage plastics - use track cleaner.
- After 24 hours of use, light lubrication is required to keep train in top operating condition. Bachmann E-Z Lube or other hobby-grade lubricants are recommended.
Bachmann hopes you enjoy your train for many years to come!

Bachmann Trains - Snap-Fit E-Z TRACK 3” STRAIGHT TRACK (4/card) - STEEL ALLOY Rail With Black Roadbed - HO Scale
Bachmann Trains
Product description
Snap-Fit E-Z TRACK 3” STRAIGHT TRACK (4/card) - STEEL ALLOY Rail With Black Roadbed - HO Scale. Bachmann's exclusive E-Z Track system makes set-up quick, easy and fun. E-Z Track is designed to Snap Together and Stay Together on Floors, Tables and Carpets. This product features Steel Alloy Rail with Black Roadbed. Four pieces of track are the equivalent of one and one-third sections of 9” Straight Track E-Z Track. They are designed to provide layout flexibility and can also be used as gap fillers in more sophisticated railroad construction.
From the Manufacturer
Bachmann's exclusive E-Z Track system makes set-up quick, easy and fun. Steel Alloy rail. Black roadbed. E-Z Track System - Snaps Together, Stays Together on Floors, Tables and Carpets.
- E-Z Track System - Snaps Together, Stays Together on Floors, Tables & Carpets
- Set Up is Quick, Easy and Fun - No Nails, Screws, or Special Tools Needed
- Steel Alloy Rail with Black Roadbed
- HO Scale 1:87 - Modeled From AAR Track Engineering Dimensions
- Easy to Use For Both Temporary and Permanent Train Layouts
User questions & answers
| Question: | what bachmann ez track do I want so I can operate 2 trains with saperate power supplies it is straight track with seperation in the middle my |
| Answer: | any train set will run on this track |
| Question: | Is it Ho scale |
| Answer: | Yes this is HO gauge track |
| Question: | What train set works with the snap-fit tracks |
| Answer: | This is an HO scale train track with an exclusive snap-fit E-Z Track® system to make setup quick, easy and fun. |
| Question: | Is this ho gauge |
| Answer: | ours is all black but the long rods/lines down the tracks are silver metal. |
Product features
Discover Everything Bachmann Trains Offers to Get Started in Model Railroading
Since 1833, Bachmann has been known for providing innovative design at a good value. We are now one of the world's largest distributor, by volume, of ready-to-run train sets, locomotives, track, and accessories. Bachmann is also the only train company to offer products in all five of the most popular scales: N, HO, On30, O, and Large Scale.
As a distributor of beloved Thomas & Friends products, Bachmann brings the adventures of Thomas the Tank Engine to life with a growing line of complete train sets, separate sale items, and accessories for children from 8 to 80-just add your imagination. Thomas & Friends is available in both HO and Large Scale.
Bachmann's exclusive snap-together E-Z Track System makes track setup quick, easy, and fun. Plasticville U.S.A. and SceneScapes buildings and accessories let you add the finishing touches for the perfect layout.
If You Are Purchasing a Train Set, It Will Include
- Locomotive
- Cars (Rolling Stock)
- E-Z Track – available in either black roadbed with steel alloy rail or gray roadbed with nickel silver rail
- Terminal/Rerailer
- Terminal Wire
- Speed Controller
- Power Supply
- List of Components
Track Assembly
- Decide where to set up your train – a dry, firm, flat surface works best!
- To make sure you have enough working room, make a test track layout by loosely placing track in desired configuration.
- The terminal/rerailer section will later be connected to a power pack and power supply, so place it near an outlet or power strip.
- Install under-track magnet, if your set comes with one. If your set does not come with one, magnets are available separately (HO Item No. 78999; N Scale Item No. 78998).
- Assemble the track by pushing together. Make sure the rail and joiners are seated properly. Be careful that the rail joiners do not slip under the rail without properly connecting. This can cause train derailments and electrical circuit interruptions.
- After track is assembled, double-check for joint connection and fit by lightly running your fingers over the top of the rails in both directions.
- If you detect bumps or distortion on the track surface, recheck the rail joiner fit.
Power Connections
- Power supply and speed control are plug and play; no tools are needed.
- Power is supplied to the track and the locomotive by the power supply, speed controller, terminal wire, and E-Z Track terminal/rerailer.
- First – turn knob on the speed controller counterclockwise until it stops (all the way to the left).
- Next – attach terminal wire to the speed controller by plugging it in where it says 'To Track'.
- Then – plug terminal wire into the E-Z Track terminal rerailer. Firmly push connector onto the track terminals.
- Finally – plug the connecting wire from the power supply into jack on the speed controller labeled 'IN'. Then plug power supply into a live wall outlet.
- Some sets may come with a speed controller with two push button connectors. These are used to supply AC power to accessories.
- To make positive and secure connections to these, push in buttons and insert each of the bare ends of the connection wire from your accessory.
- The speed controller is capable of powering one accessory at a time.
Putting the Train on the Track
- Put the locomotive on the track and run the wheels back and forth over the terminal rerailer track.
- When the wheels glide smoothly over the track, you know the wheels are all on the track. If your set comes with a tender, attach it to the locomotive.
- Add the rest of the cars that come with your set by placing them on the track and running them back and forth over the terminal rerailer until they glide smoothly. Then gently push the cars together – they will engage automatically.
- Do not try to connect cars when positioned over an under-track magnet.
How to Use E-Z Mate Couplers (HO and On30 Scale)
- Your set may be equipped with E-Z Mate magnetically operated knuckle couplers that let you perform real railroad switching and yard operations.
- Coupling two cars with E-Z Mate couplers is as easy as pushing them together when they are not over an under-track magnet.
- Uncoupling occurs only when over an under-track magnet and when there is no tension between the cars.
- To uncouple E-Z Mate couplers, stop two couplers directly over the under-track magnet. With no tension between the cars, the couplers will open automatically.
- If cars will not couple, check to be sure cars are not positioned over the uncoupling magnet or parked on a curve.
- If cars will not uncouple, check to be sure the couplers are positioned directly adjacent to the magnet position indicator and that the indicator is placed in line with the center line of the under-track magnet.
- Check that the magnet is secured to the underside of the track and fitted with the steel plate provided.
How to Run Your Train
- Turn the knob on the speed controller clockwise until it stops (all the way to the left).
- Plug in the power supply.
- Begin feeding power to the track by slowly turning the knob on the speed controller clockwise.
- Observe the direction of your train.
- If it moves backwards when the controls indicate forward, stop the train.
- Then simply disconnect, flip, and reconnect the terminal wire to the terminal rerailer track.
- Remember – never leave your train running unattended!
Action Checklist (Troubleshooting If Your Train Doesn’t Run or Stops Running)
- Is the power supply plugged in to a live receptacle?
- Are the wheels on the track?
- Is the wiring secure?
- Is the track properly assembled?
- Is the track properly seated in the rail joiner?
- If your train stops or fails to start, a short circuit may be indicated. If this is the case, Unplug the power Supply immediately.
- Common reasons for a short circuit: derailed wheels may cause a short. Check to make sure all wheels are on the track. Also check all connections and make sure there is no metal of any sort across the rails.
- After checking everything carefully, resume operation.
- Please note, your power supply is protected by a circuit breaker that automatically resets after a short circuit is corrected.
- Allow up to 5 minutes for the circuit breaker to reset before resuming operation.
Keep Your Train in Top Operating Condition
- Works better after couple hours of break-in time.
- Train performs best under clean operating conditions.
- Clean wheels and a clean track ensure good electrical contact.
- After about every 8 hours of operation, wipe the track rails and exposed wheels with a soft, lint-free cloth.
- Removal of black residue is normal.
- Do Not Use Steel Wool To Clean Your Track.
- Do not use common solvents, they may damage plastics - use track cleaner.
- After 24 hours of use, light lubrication is required to keep train in top operating condition.
- Do Not Use Common Household Lubricants As They May Damage Your Trains. Bachmann E-Z Lube or other hobby-grade lubricants are recommended.
Bachmann hopes you enjoy your train for many years to come!

Bachmann Trains E-Z TRACK CROSSING GATE - HO Scale
Bachmann Trains
Product description
Bachmann Trains E-Z TRACK CROSSING GATE - HO Scale. This authentic looking crossing gate will add action and detail to your E-Z Track layout. Gates automatically lower as train passes by. Compatible with steel alloy or nickel silver E-Z Track.
From the Manufacturer
Add action to your E-Z Track layout with this automatic crossing gate. Authentic looking crossing grate. For use with Bachmann E-Z Track. Repair inquiries, or general inquiries may also be sent to: Bachmann Customer Service 1400 East Erie Avenue Philadelphia, PA 19124 Bachmann's Service Department is available Monday through Friday from 9 am to 4 pm (All Times Eastern). Customer Service for all scales can be reached toll free by US and Canadian customers at 800-356-3910 or Fax at 215-554-6734. Customers from all other countries should call [Exit Code]-1-215-533-1600.
- Authentic Looking Crossing Gate
- Adds Action and Detail to Your Train Layout
- Gates Automatically Lower As Train Passes By
- Compatible with Bachmann Steel Alloy or Nickel Silver E-Z Track
- HO Scale 1:87
User questions & answers
| Question: | is the track on this item made of silver/nickle or steel? i know its compatible with either |
| Answer: | T=I think it's the nickle type.I had problems with my diesel engine going over it. |
| Question: | Why did it take 6 days to ship out my order |
| Answer: | Postal clearance |
| Question: | The picture shows to gray pieces that elivate the level of the track going in and out.. I did not find them in my kit. Should they be included |
| Answer: | The gray pieces are track sections show for illustrative purposes. They are not included with this set. |
| Question: | Will this work with track on the auto reversing trolley set ? The trolley set claims to work with only auto reversing track |
| Answer: | I think the track has to be connected to an auto-reversing track section or unit of some sort; if that's the case, I imagine this crossing gate could be used with it. |
Product features
Discover Everything Bachmann Trains Offers to Get Started in Model Railroading
Since 1833, Bachmann has been known for providing innovative design at a good value. We are now one of the world's largest distributor, by volume, of ready-to-run train sets, locomotives, track, and accessories. Bachmann is also the only train company to offer products in all five of the most popular scales: N, HO, On30, O, and Large Scale.
As a distributor of beloved Thomas & Friends products, Bachmann brings the adventures of Thomas the Tank Engine to life with a growing line of complete train sets, separate sale items, and accessories for children from 8 to 80-just add your imagination. Thomas & Friends is available in both HO and Large Scale.
Bachmann's exclusive snap-together E-Z Track System makes track setup quick, easy, and fun. Plasticville U.S.A. and SceneScapes buildings and accessories let you add the finishing touches for the perfect layout.
If You Are Purchasing a Train Set, It Will Include
- Locomotive
- Cars (Rolling Stock)
- E-Z Track – available in either black roadbed with steel alloy rail or gray roadbed with nickel silver rail
- Terminal/Rerailer
- Terminal Wire
- Speed Controller
- Power Supply
- List of Components
Track Assembly
- Decide where to set up your train – a dry, firm, flat surface works best!
- To make sure you have enough working room, make a test track layout by loosely placing track in desired configuration.
- The terminal/ Rerailer section will later be connected to a power pack and power supply, so place it near an outlet or power strip.
- Install under-track magnet, if your set comes with one. If your set does not come with one, magnets are available separately (HO Item No. 78999; N Scale Item No. 78998).
- Assemble the track by pushing together. Make sure the rail and joiners are seated properly. Be careful that the rail joiners do not slip under the rail without properly connecting. This can cause train derailments and electrical circuit interruptions.
- After track is assembled, double-check for joint connection and fit by lightly running your fingers over the top of the rails in both directions.
- If you detect bumps or distortion on the track surface, recheck the rail joiner fit.
Power Connections
- Power supply and speed control are plug and play; no tools are needed.
- Power is supplied to the track and the locomotive by the power supply, speed controller, terminal wire, and E-Z Track terminal/rerailer.
- First – turn knob on the speed controller counterclockwise until it stops (all the way to the left).
- Next – attach terminal wire to the speed controller by plugging it in where it says 'To Track'.
- Then – plug terminal wire into the E-Z Track terminal rerailer. Firmly push connector onto the track terminals.
- Finally – plug the connecting wire from the power supply into jack on the speed controller labeled 'IN'. Then plug power supply into a live wall outlet.
- Some sets may come with a speed controller with two push button connectors. These are used to supply AC power to accessories.
- To make positive and secure connections to these, push in buttons and insert each of the bare ends of the connection wire from your accessory.
- The speed controller is capable of powering one accessory at a time.
Putting the Train on the Track
- Put the locomotive on the track and run the wheels back and forth over the terminal Rerailer track.
- When the wheels glide smoothly over the track, you know the wheels are all on the track. If your set comes with a tender, attach it to the locomotive.
- Add the rest of the cars that come with your set by placing them on the track and running them back and forth over the terminal rerailer until they glide smoothly. Then gently push the cars together – they will engage automatically.
- Do not try to connect cars when positioned over an under-track magnet.
How to Use E-Z Mate Couplers (HO and On30 Scale)
- Your set may be equipped with E-Z Mate magnetically operated knuckle couplers that let you perform real railroad switching and yard operations.
- Coupling two cars with E-Z Mate couplers is as easy as pushing them together when they are not over an under-track magnet.
- Uncoupling occurs only when over an under-track magnet and when there is no tension between the cars.
- To uncouple E-Z Mate couplers, stop two couplers directly over the under-track magnet. With no tension between the cars, the couplers will open automatically.
- If cars will not couple, check to be sure cars are not positioned over the uncoupling magnet or parked on a curve.
- If cars will not uncouple, check to be sure the couplers are positioned directly adjacent to the magnet position indicator and that the indicator is placed in line with the center line of the under-track magnet.
- Check that the magnet is secured to the underside of the track and fitted with the steel plate provided.
How to Run Your Train
- Turn the knob on the speed controller clockwise until it stops (all the way to the left).
- Plug in the power supply.
- Begin feeding power to the track by slowly turning the knob on the speed controller clockwise.
- Observe the direction of your train.
- If it moves backwards when the controls indicate forward, stop the train.
- Then simply disconnect, flip, and reconnect the terminal wire to the terminal Rerailer track.
- Remember – never leave your train running unattended!
Action Checklist (Troubleshooting If Your Train Doesn’t Run or Stops Running)
- Is the power supply plugged in to a live receptacle?
- Are the wheels on the track?
- Is the wiring secure?
- Is the track properly assembled?
- Is the track properly seated in the rail joiner?
- If your train stops or fails to start, a short circuit may be indicated. If this is the case, UNPLUG THE POWER SUPPLY IMMEDIATELY.
- Common reasons for a short circuit: derailed wheels may cause a short. Check to make sure all wheels are on the track. Also check all connections and make sure there is no metal of any sort across the rails.
- After checking everything carefully, resume operation.
- Please note, your power supply is protected by a circuit breaker that automatically resets after a short circuit is corrected.
- Allow up to 5 minutes for the circuit breaker to reset before resuming operation.
Keep Your Train in Top Operating Condition
- Works better after couple hours of break-in time.
- Train performs best under clean operating conditions.
- Clean wheels and a clean track ensure good electrical contact.
- After about every 8 hours of operation, wipe the track rails and exposed wheels with a soft, lint-free cloth.
- Removal of black residue is normal.
- Do Not Use Steel Wool To Clean Your Track.
- Do not use common solvents, they may damage plastics - use track cleaner.
- After 24 hours of use, light lubrication is required to keep train in top operating condition. Bachmann E-Z Lube or other hobby-grade lubricants are recommended.
Bachmann hopes you enjoy your train for many years to come!

HO Scale Bachmann Trains Snap-Fit E-Z Track Remote Turnout - Left
Bachmann Trains
Product description
Snap-Fit E-Z TRACK REMOTE TURNOUT - LEFT (1/card) - NICKEL SILVER Rail With Gray Roadbed - HO Scale. Bachmann's exclusive E-Z Track system makes set-up quick, easy and fun. E-Z Track is designed to Snap Together and Stay Together on Floors, Tables and Carpets. This product features Nickel Silver Rail with Gray Roadbed. This is the basic turnout of the E-Z Track system with a turnout radius matching 18” Radius Curved Track. If you have enough room, you may consider purchasing larger E-Z Track turnouts to allow for smoother transitions between tracks during switching operations, and to accommodate locomotives and rolling stock with longer wheel bases. Note: For Powered Operation All analog turnouts (non-DCC) require 16V AC or DC accessory power supply.
From the Manufacturer
Bachmann's exclusive E-Z Track system makes set-up quick, easy and fun. Nickel Silver Rail. Gray Roadbed. E-Z Track System --Snaps Together, Stays Together on Floors, Tables and Carpets.
- E-Z Track System - Snaps Together, Stays Together on Floors, Tables & Carpets
- Set Up is Quick, Easy and Fun - No Nails, Screws, or Special Tools Needed
- Nickel Silver Rail with Gray Roadbed, Designed to Provide Excellent Conductivity and Durability
- HO Scale 1:87 - Modeled From AAR Track Engineering Dimensions
- Basic Turnout With A Turnout Radius Matching 18” Radius Curved Track.
- Easy to Use For Both Temporary and Permanent Train Layouts
User questions & answers
| Question: | can the ez track be taken apart |
| Answer: | Standard DC Power Pack (Transformer). Thanks. D.Coursey |
| Question: | Are these compatible with lionel ez track, o gauge |
| Answer: | Yes, there is a switch included that let's you select which direction the train is going to go. |
| Question: | What type of power pack would you need for a left and rigth turnout |
| Answer: | It does but it not noisy. |
| Question: | Does this forking track come with any sort of switch? How do you set it to determine which way the train goes |
| Answer: | I am not an expert but I can share with you what I have learned so far. Bachman EZ track is ideal for beginners to use cause it snaps together and is already built up so you don't have to lay down cork underneath your track. I have 3 loops on my 4 x 8 layout and have chosen to run them each individually. You just need to make sure you buy the piece of track that has the power supply connections and incorporate this into each of the 2 loops that you make. If you only do a 4 x 8 size you. If you decide to go bigger than a 4 x 8 you may want to look into more powerful power supplier. I suggest you cpntact more expert people or do what I did and watch a lot of YouTube videos. |
| Question: | Does this have joins in the metal rails for the clickticlack noise of the wheels |
| Answer: | Yes, it is. |
Product features
Discover Everything Bachmann Trains Offers to Get Started in Model Railroading
Since 1833, Bachmann has been known for providing innovative design at a good value. We are now one of the world's largest distributor, by volume, of ready-to-run train sets, locomotives, track, and accessories. Bachmann is also the only train company to offer products in all five of the most popular scales: N, HO, On30, O, and Large Scale.
As a distributor of beloved Thomas & Friends products, Bachmann brings the adventures of Thomas the Tank Engine to life with a growing line of complete train sets, separate sale items, and accessories for children from 8 to 80-just add your imagination. Thomas & Friends is available in both HO and Large Scale.
Bachmann's exclusive snap-together E-Z Track System makes track setup quick, easy, and fun. Plasticville U.S.A. and SceneScapes buildings and accessories let you add the finishing touches for the perfect layout.
If You Are Purchasing a Train Set, It Will Include
- Locomotive
- Cars (Rolling Stock)
- E-Z Track – available in either black roadbed with steel alloy rail or gray roadbed with nickel silver rail
- Terminal/Rerailer
- Terminal Wire
- Speed Controller
- Power Supply
- List of Components
Track Assembly
- Decide where to set up your train – a dry, firm, flat surface works best!
- To make sure you have enough working room, make a test track layout by loosely placing track in desired configuration.
- The terminal/rerailer section will later be connected to a power pack and power supply, so place it near an outlet or power strip.
- Install under-track magnet, if your set comes with one. If your set does not come with one, magnets are available separately (HO Item No. 78999; N Scale Item No. 78998).
- Assemble the track by pushing together. Make sure the rail and joiners are seated properly. Be careful that the rail joiners do not slip under the rail without properly connecting. This can cause train derailments and electrical circuit interruptions.
- After track is assembled, double-check for joint connection and fit by lightly running your fingers over the top of the rails in both directions.
- If you detect bumps or distortion on the track surface, recheck the rail joiner fit.
Power Connections
- Power supply and speed control are plug and play; no tools are needed.
- Power is supplied to the track and the locomotive by the power supply, speed controller, terminal wire, and E-Z Track terminal/rerailer.
- First – turn knob on the speed controller counterclockwise until it stops (all the way to the left).
- Next – attach terminal wire to the speed controller by plugging it in where it says 'To Track'.
- Then – plug terminal wire into the E-Z Track terminal rerailer. Firmly push connector onto the track terminals.
- Finally – plug the connecting wire from the power supply into jack on the speed controller labeled 'In'. Then plug power supply into a live wall outlet.
- Some sets may come with a speed controller with two push button connectors. These are used to supply AC power to accessories.
- To make positive and secure connections to these, push in buttons and insert each of the bare ends of the connection wire from your accessory.
- The speed controller is capable of powering one accessory at a time.
Putting the Train on the Track
- Put the locomotive on the track and run the wheels back and forth over the terminal rerailer track.
- When the wheels glide smoothly over the track, you know the wheels are all on the track. If your set comes with a tender, attach it to the locomotive.
- Add the rest of the cars that come with your set by placing them on the track and running them back and forth over the terminal rerailer until they glide smoothly. Then gently push the cars together – they will engage automatically.
- Do not try to connect cars when positioned over an under-track magnet.
How to Use E-Z Mate Couplers (HO and On30 Scale)
- Your set may be equipped with E-Z Mate magnetically operated knuckle couplers that let you perform real railroad switching and yard operations.
- Coupling two cars with E-Z Mate couplers is as easy as pushing them together when they are not over an under-track magnet.
- Uncoupling occurs only when over an under-track magnet and when there is no tension between the cars.
- To uncouple E-Z Mate couplers, stop two couplers directly over the under-track magnet. With no tension between the cars, the couplers will open automatically.
- If cars will not couple, check to be sure cars are not positioned over the uncoupling magnet or parked on a curve.
- If cars will not uncouple, check to be sure the couplers are positioned directly adjacent to the magnet position indicator and that the indicator is placed in line with the center line of the under-track magnet.
- Check that the magnet is secured to the underside of the track and fitted with the steel plate provided.
How to Run Your Train
- Turn the knob on the speed controller clockwise until it stops (all the way to the left).
- Plug in the power supply.
- Begin feeding power to the track by slowly turning the knob on the speed controller clockwise.
- Observe the direction of your train.
- If it moves backwards when the controls indicate forward, stop the train.
- Then simply disconnect, flip, and reconnect the terminal wire to the terminal rerailer track.
- Remember – never leave your train running unattended!
Action Checklist (Troubleshooting If Your Train Doesn’t Run or Stops Running)
- Is the power supply plugged in to a live receptacle?
- Are the wheels on the track?
- Is the wiring secure?
- Is the track properly assembled?
- Is the track properly seated in the rail joiner?
- If your train stops or fails to start, a short circuit may be indicated. If this is the case, Unplug The Power Supply Immediately.
- Common reasons for a short circuit: derailed wheels may cause a short. Check to make sure all wheels are on the track. Also check all connections and make sure there is no metal of any sort across the rails.
- After checking everything carefully, resume operation.
- Please note, your power supply is protected by a circuit breaker that automatically resets after a short circuit is corrected.
- Allow up to 5 minutes for the circuit breaker to reset before resuming operation.
Keep Your Train in Top Operating Condition
- Works better after couple hours of break-in time.
- Train performs best under clean operating conditions.
- Clean wheels and a clean track ensure good electrical contact.
- After about every 8 hours of operation, wipe the track rails and exposed wheels with a soft, lint-free cloth.
- Removal of black residue is normal.
- Do Not Use Steel Wool To Clean Your Track.
- Do not use common solvents, they may damage plastics - use track cleaner.
- After 24 hours of use, light lubrication is required to keep train in top operating condition. Bachmann E-Z Lube or other hobby-grade lubricants are recommended.
Bachmann hopes you enjoy your train for many years to come!
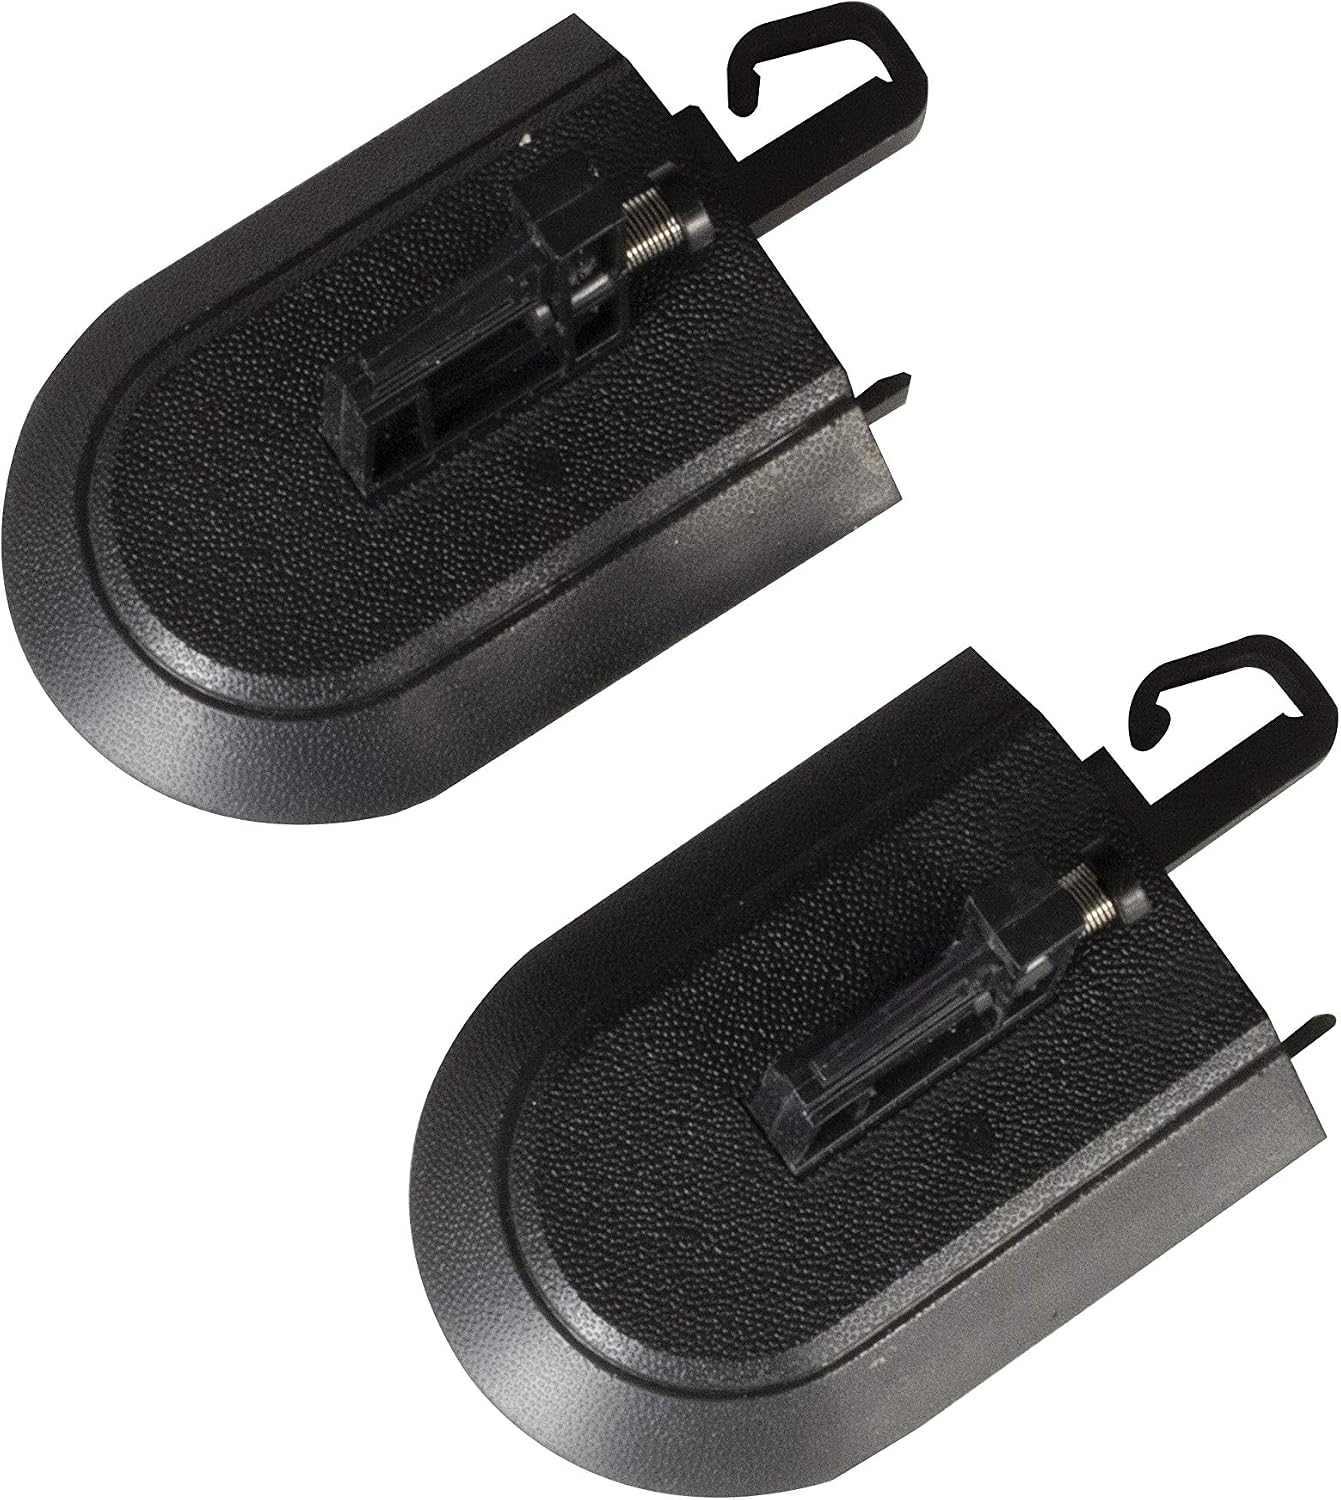
Bachmann Trains - Snap-Fit E-Z TRACK HAYES BUMPERS (2/card) - STEEL ALLOY Rail With Black Roadbed - HO Scale
Bachmann Trains
Product description
Snap-Fit E-Z TRACK HAYES BUMPERS (2/card) - STEEL ALLOY Rail With Black Roadbed - HO Scale. Bachmann's exclusive E-Z Track system makes set-up quick, easy and fun. E-Z Track is designed to Snap Together and Stay Together on Floors, Tables and Carpets. This product features Steel Alloy Rail with Black Roadbed. These bumpers properly finish the ends of your track spurs.
From the Manufacturer
Bachmann's exclusive E-Z Track system makes set-up quick, easy and fun. Steel Alloy rail. Black roadbed. E-Z Track System - Snaps Together, Stays Together on Floors, Tables and Carpets.
- E-Z Track System - Snaps Together, Stays Together on Floors, Tables & Carpets
- Set Up is Quick, Easy and Fun - No Nails, Screws, or Special Tools Needed
- Steel Alloy Rail with Black Roadbed
- HO Scale 1:87 - Modeled From AAR Track Engineering Dimensions
- Easy to Use For Both Temporary and Permanent Train Layouts
User questions & answers
| Question: | what size is it? HO or N gauge |
| Answer: | When I bought them, there were 2 bumpers on the card, just like the image. Each piece is a very short track piece that is too small for a train to run on; they have the bumpers affixed to the surface. |
| Question: | ummm...are the black track and nikel track compadible |
| Answer: | Its available in HO and N scale |
| Question: | How many are there |
| Answer: | Yes, but remove any anchors (nails) and gently, without stressing any length of track use appointed object to slide the interlocking plastic notch out of engagement. I laid 140 ft of track with switches and did not nail or glue the track down as it will stay in place once the circuits are complete. good luck! |
| Question: | Is it HO scale |
| Answer: | No, this is HO scale track and is only compatible with Bachmann's HO E-Z Track models. Thank you for your interest! Y2PLAY Stores - 800-695-4808 |
Product features
Discover Everything Bachmann Trains Offers to Get Started in Model Railroading
Since 1833, Bachmann has been known for providing innovative design at a good value. We are now one of the world's largest distributor, by volume, of ready-to-run train sets, locomotives, track, and accessories. Bachmann is also the only train company to offer products in all five of the most popular scales: N, HO, On30, O, and Large Scale.
As a distributor of beloved Thomas & Friends products, Bachmann brings the adventures of Thomas the Tank Engine to life with a growing line of complete train sets, separate sale items, and accessories for children from 8 to 80-just add your imagination. Thomas & Friends is available in both HO and Large Scale.
Bachmann's exclusive snap-together E-Z Track System makes track setup quick, easy, and fun. Plasticville U.S.A. and SceneScapes buildings and accessories let you add the finishing touches for the perfect layout.
If You Are Purchasing a Train Set, It Will Include
- Locomotive
- Cars (Rolling Stock)
- E-Z Track – available in either black roadbed with steel alloy rail or gray roadbed with nickel silver rail
- Terminal/Rerailer
- Terminal Wire
- Speed Controller
- Power Supply
- List of Components
Track Assembly
- Decide where to set up your train – a dry, firm, flat surface works best!
- To make sure you have enough working room, make a test track layout by loosely placing track in desired configuration.
- The terminal/ Rerailer section will later be connected to a power pack and power supply, so place it near an outlet or power strip.
- Install under-track magnet, if your set comes with one. If your set does not come with one, magnets are available separately (HO Item No. 78999; N Scale Item No. 78998).
- Assemble the track by pushing together. Make sure the rail and joiners are seated properly. Be careful that the rail joiners do not slip under the rail without properly connecting. This can cause train derailments and electrical circuit interruptions.
- After track is assembled, double-check for joint connection and fit by lightly running your fingers over the top of the rails in both directions.
- If you detect bumps or distortion on the track surface, recheck the rail joiner fit.
Power Connections
- Power supply and speed control are plug and play; no tools are needed.
- Power is supplied to the track and the locomotive by the power supply, speed controller, terminal wire, and E-Z Track terminal/rerailer.
- First – turn knob on the speed controller counterclockwise until it stops (all the way to the left).
- Next – attach terminal wire to the speed controller by plugging it in where it says 'To Track'.
- Then – plug terminal wire into the E-Z Track terminal rerailer. Firmly push connector onto the track terminals.
- Finally – plug the connecting wire from the power supply into jack on the speed controller labeled 'IN'. Then plug power supply into a live wall outlet.
- Some sets may come with a speed controller with two push button connectors. These are used to supply AC power to accessories.
- To make positive and secure connections to these, push in buttons and insert each of the bare ends of the connection wire from your accessory.
- The speed controller is capable of powering one accessory at a time.
Putting the Train on the Track
- Put the locomotive on the track and run the wheels back and forth over the terminal Rerailer track.
- When the wheels glide smoothly over the track, you know the wheels are all on the track. If your set comes with a tender, attach it to the locomotive.
- Add the rest of the cars that come with your set by placing them on the track and running them back and forth over the terminal rerailer until they glide smoothly. Then gently push the cars together – they will engage automatically.
- Do not try to connect cars when positioned over an under-track magnet.
How to Use E-Z Mate Couplers (HO and On30 Scale)
- Your set may be equipped with E-Z Mate magnetically operated knuckle couplers that let you perform real railroad switching and yard operations.
- Coupling two cars with E-Z Mate couplers is as easy as pushing them together when they are not over an under-track magnet.
- Uncoupling occurs only when over an under-track magnet and when there is no tension between the cars.
- To uncouple E-Z Mate couplers, stop two couplers directly over the under-track magnet. With no tension between the cars, the couplers will open automatically.
- If cars will not couple, check to be sure cars are not positioned over the uncoupling magnet or parked on a curve.
- If cars will not uncouple, check to be sure the couplers are positioned directly adjacent to the magnet position indicator and that the indicator is placed in line with the center line of the under-track magnet.
- Check that the magnet is secured to the underside of the track and fitted with the steel plate provided.
How to Run Your Train
- Turn the knob on the speed controller clockwise until it stops (all the way to the left).
- Plug in the power supply.
- Begin feeding power to the track by slowly turning the knob on the speed controller clockwise.
- Observe the direction of your train.
- If it moves backwards when the controls indicate forward, stop the train.
- Then simply disconnect, flip, and reconnect the terminal wire to the terminal Rerailer track.
- Remember – never leave your train running unattended!
Action Checklist (Troubleshooting If Your Train Doesn’t Run or Stops Running)
- Is the power supply plugged in to a live receptacle?
- Are the wheels on the track?
- Is the wiring secure?
- Is the track properly assembled?
- Is the track properly seated in the rail joiner?
- If your train stops or fails to start, a short circuit may be indicated. If this is the case, UNPLUG THE POWER SUPPLY IMMEDIATELY.
- Common reasons for a short circuit: derailed wheels may cause a short. Check to make sure all wheels are on the track. Also check all connections and make sure there is no metal of any sort across the rails.
- After checking everything carefully, resume operation.
- Please note, your power supply is protected by a circuit breaker that automatically resets after a short circuit is corrected.
- Allow up to 5 minutes for the circuit breaker to reset before resuming operation.
Keep Your Train in Top Operating Condition
- Works better after couple hours of break-in time.
- Train performs best under clean operating conditions.
- Clean wheels and a clean track ensure good electrical contact.
- After about every 8 hours of operation, wipe the track rails and exposed wheels with a soft, lint-free cloth.
- Removal of black residue is normal.
- Do Not Use Steel Wool To Clean Your Track.
- Do not use common solvents, they may damage plastics - use track cleaner.
- After 24 hours of use, light lubrication is required to keep train in top operating condition. Bachmann E-Z Lube or other hobby-grade lubricants are recommended.
Bachmann hopes you enjoy your train for many years to come!

Bachmann Trains SnapFit EZ TRACK LAYOUT EXPANDER SET NICKEL SILVER Rail With Grey Roadbed HO Scale
Bachmann Trains
Product description
Bachmann Trains Snap-Fit E-Z TRACK LAYOUT EXPANDER SET - NICKEL SILVER Rail With Grey Roadbed - HO Scale. With the E-Z Track Expander Set, you can add to the track included with our train sets or create new configurations of turnouts, branch lines, and double-track mainlines on your existing railroad. Includes; 12 pieces of snap-fit E-Z Track, including 4 pieces of 9" straight, 4 pieces 18" radius curved track, 1 remote turnout - left, 1 remote turnout - right, 2 Hayes bumpers.
From the Manufacturer
With the E-Z Track Expander Set, you can add to the track included with our train sets or create new configurations of turnouts, branch lines, and double-track mainlines on your existing railroad. Offered in steel alloy (with black roadbed) or nickel silver (with gray roadbed) versions.
- 12 pieces of snapfit EZ Track including 4 pieces of 9" straight 4 pieces 18" radius curved track 1 remote turnout left 1 remote turnout right and 2 Hayes bumpers
- EZ Track System Snaps Together Stays Together on Floors Tables & Carpets
- Set Up is Quick Easy and Fun No Nails Screws or Special Tools Needed
- Nickel Silver Rail with Gray Roadbed Designed to Provide Excellent Conductivity and Durability
- HO Scale 1:87 Modeled From AAR Track Engineering Dimensions
User questions & answers
| Question: | Is this "N" scale track |
| Answer: | NO it is not included |
| Question: | are the turn outs remote control electric |
| Answer: | The expander set does not include a power box. |
| Question: | Is the 32-page track plan booklet included |
| Answer: | These are HO, but if you are, as Bachmann suggests, going to use these for On30 narrow gauge (Bachmann sells a LOT of On30 rolling stock and motive power, but no E-Z track specifically for On30) you should know that the bumpers are only about 55% the size of O scale equipment, look out-of-scale, and probably won't work as bumpers for O narrow gauge. Also, when used for On30 gauge (the distance between rails is very close to right for 2 1/2 foot gauge) the E-Z Track in HO's ties are way too close together. I've removed the bumpers from the track, and replaced with home-made and rustic replacements. Also, it looks like Amazon has posted the wrong photo, instead showing Bachmann E-Z Track curved track sections. |
| Question: | Does it come witha power box to drive the train |
| Answer: | Yes, they are exactly the same size, I don't believe the black track is plated though, so if you're using it in a humid area, you'll have to run steel wool over it from time to time to remove surface rust. I have both on my layout and have never had a problem with either. |
Product features
Discover Everything Bachmann Trains Offers to Get Started in Model Railroading
Since 1833, Bachmann has been known for providing innovative design at a good value. We are now one of the world's largest distributor, by volume, of ready-to-run train sets, locomotives, track, and accessories. Bachmann is also the only train company to offer products in all five of the most popular scales: N, HO, On30, O, and Large Scale.
As a distributor of beloved Thomas & Friends products, Bachmann brings the adventures of Thomas the Tank Engine to life with a growing line of complete train sets, separate sale items, and accessories for children from 8 to 80-just add your imagination. Thomas & Friends is available in both HO and Large Scale.
Bachmann's exclusive snap-together E-Z Track System makes track setup quick, easy, and fun. Plasticville U.S.A. and SceneScapes buildings and accessories let you add the finishing touches for the perfect layout.
If You Are Purchasing a Train Set, It Will Include
- Locomotive
- Cars (Rolling Stock)
- E-Z Track – available in either black roadbed with steel alloy rail or gray roadbed with nickel silver rail
- Terminal/Rerailer
- Terminal Wire
- Speed Controller
- Power Supply
- List of Components
Track Assembly
- Decide where to set up your train – a dry, firm, flat surface works best!
- To make sure you have enough working room, make a test track layout by loosely placing track in desired configuration.
- The terminal/rerailer section will later be connected to a power pack and power supply, so place it near an outlet or power strip.
- Install under-track magnet, if your set comes with one. If your set does not come with one, magnets are available separately (HO Item No. 78999; N Scale Item No. 78998).
- Assemble the track by pushing together. Make sure the rail and joiners are seated properly. Be careful that the rail joiners do not slip under the rail without properly connecting. This can cause train derailments and electrical circuit interruptions.
- After track is assembled, double-check for joint connection and fit by lightly running your fingers over the top of the rails in both directions.
- If you detect bumps or distortion on the track surface, recheck the rail joiner fit.
Power Connections
- Power supply and speed control are plug and play; no tools are needed.
- Power is supplied to the track and the locomotive by the power supply, speed controller, terminal wire, and E-Z Track terminal/rerailer.
- First – turn knob on the speed controller counterclockwise until it stops (all the way to the left).
- Next – attach terminal wire to the speed controller by plugging it in where it says 'To Track'.
- Then – plug terminal wire into the E-Z Track terminal rerailer. Firmly push connector onto the track terminals.
- Finally – plug the connecting wire from the power supply into jack on the speed controller labeled 'In'. Then plug power supply into a live wall outlet.
- Some sets may come with a speed controller with two push button connectors. These are used to supply AC power to accessories.
- To make positive and secure connections to these, push in buttons and insert each of the bare ends of the connection wire from your accessory.
- The speed controller is capable of powering one accessory at a time.
Putting the Train on the Track
- Put the locomotive on the track and run the wheels back and forth over the terminal rerailer track.
- When the wheels glide smoothly over the track, you know the wheels are all on the track. If your set comes with a tender, attach it to the locomotive.
- Add the rest of the cars that come with your set by placing them on the track and running them back and forth over the terminal rerailer until they glide smoothly. Then gently push the cars together – they will engage automatically.
- Do not try to connect cars when positioned over an under-track magnet.
How to Use E-Z Mate Couplers (HO and On30 Scale)
- Your set may be equipped with E-Z Mate magnetically operated knuckle couplers that let you perform real railroad switching and yard operations.
- Coupling two cars with E-Z Mate couplers is as easy as pushing them together when they are not over an under-track magnet.
- Uncoupling occurs only when over an under-track magnet and when there is no tension between the cars.
- To uncouple E-Z Mate couplers, stop two couplers directly over the under-track magnet. With no tension between the cars, the couplers will open automatically.
- If cars will not couple, check to be sure cars are not positioned over the uncoupling magnet or parked on a curve.
- If cars will not uncouple, check to be sure the couplers are positioned directly adjacent to the magnet position indicator and that the indicator is placed in line with the center line of the under-track magnet.
- Check that the magnet is secured to the underside of the track and fitted with the steel plate provided.
How to Run Your Train
- Turn the knob on the speed controller clockwise until it stops (all the way to the left).
- Plug in the power supply.
- Begin feeding power to the track by slowly turning the knob on the speed controller clockwise.
- Observe the direction of your train.
- If it moves backwards when the controls indicate forward, stop the train.
- Then simply disconnect, flip, and reconnect the terminal wire to the terminal rerailer track.
- Remember – never leave your train running unattended!
Action Checklist (Troubleshooting If Your Train Doesn’t Run or Stops Running)
- Is the power supply plugged in to a live receptacle?
- Are the wheels on the track?
- Is the wiring secure?
- Is the track properly assembled?
- Is the track properly seated in the rail joiner?
- If your train stops or fails to start, a short circuit may be indicated. If this is the case, Unplug The Power Supply Immediately.
- Common reasons for a short circuit: derailed wheels may cause a short. Check to make sure all wheels are on the track. Also check all connections and make sure there is no metal of any sort across the rails.
- After checking everything carefully, resume operation.
- Please note, your power supply is protected by a circuit breaker that automatically resets after a short circuit is corrected.
- Allow up to 5 minutes for the circuit breaker to reset before resuming operation.
Keep Your Train in Top Operating Condition
- Works better after couple hours of break-in time.
- Train performs best under clean operating conditions.
- Clean wheels and a clean track ensure good electrical contact.
- After about every 8 hours of operation, wipe the track rails and exposed wheels with a soft, lint-free cloth.
- Removal of black residue is normal.
- Do Not Use Steel Wool To Clean Your Track.
- Do not use common solvents, they may damage plastics - use track cleaner.
- After 24 hours of use, light lubrication is required to keep train in top operating condition. Bachmann E-Z Lube or other hobby-grade lubricants are recommended.
Bachmann hopes you enjoy your train for many years to come!

Bachmann Trains - Snap-Fit E-Z TRACK 9” STRAIGHT TERMINAL RERAILER w/WIRE (1/card) - STEEL ALLOY Rail With Black Roadbed - HO Scale
Bachmann Trains
Product description
Snap-Fit E-Z TRACK 9” STRAIGHT TERMINAL RERAILER w/WIRE (1/card) - STEEL ALLOY Rail With Black Roadbed - HO Scale. Bachmann's exclusive E-Z Track system makes set-up quick, easy and fun. E-Z Track is designed to Snap Together and Stay Together on Floors, Tables and Carpets. This product features Steel Alloy Rail with Black Roadbed. The terminal rerailer is connected via terminal wires to a power pack, which provides current to power the layout. In addition to making power connections, the terminal rerailer is designed to correct derailments that sometimes occur during normal railroad operations. It can also be used to help properly align wheels on the track when assembling a train for operation. If you want to use the rerailer to help place cars on the track, you should install it so that it is easily accessible. Otherwise, it should be installed after a difficult section of track (turnout, crossing, “S” curve, etc.) where derailments may occur. Also available in the E-Z Track system is a 9” Straight Rerailer (Steel Alloy) if you need a rerailer but do not need to make power connections.
From the Manufacturer
Bachmann's exclusive E-Z Track system makes set-up quick, easy and fun. Steel Alloy rail. Black roadbed. E-Z Track System - Snaps Together, Stays Together on Floors, Tables and Carpets.
- E-Z Track System - Snaps Together, Stays Together on Floors, Tables & Carpets
- Set Up is Quick, Easy and Fun - No Nails, Screws, or Special Tools Needed
- Steel Alloy Rail with Black Roadbed
- HO Scale 1:87 - Modeled From AAR Track Engineering Dimensions
- Designed for Power Connections and to Help Correct Derailments
- Easy to Use For Both Temporary and Permanent Train Layouts
User questions & answers
| Question: | Is there a wire to go from rerailer to rerailer |
| Answer: | One end connects to the track and the other end connects to the controller. |
| Question: | Does this rerailer work with HO trains |
| Answer: | Mine was HO scale and is currently in use. I don't know if Bachman makes a kit like this in N-scale. I did look on the internet and found most every other package configuration but none like this HO pack. It is common to find 10's of thousands more items for HO scale than most other scales. In my limited two year experience N-scale is the second most popular scale. If you contact Bachman Industries they may help you more. Their phone number is 1-800-356-3910. I hope this or their web site will help. I hope you have a terrific year modeling your trains! |
| Question: | I notice that the terminal wite has spades on the other side. So where does one connect them |
| Answer: | the 14 that i purchased from various sources were wired for electric control. currently using 6 of them and control them manually as they are close to the operator's station and easily reached. rich |
Product features
Discover Everything Bachmann Trains Offers to Get Started in Model Railroading
Since 1833, Bachmann has been known for providing innovative design at a good value. We are now one of the world's largest distributor, by volume, of ready-to-run train sets, locomotives, track, and accessories. Bachmann is also the only train company to offer products in all five of the most popular scales: N, HO, On30, O, and Large Scale.
As a distributor of beloved Thomas & Friends products, Bachmann brings the adventures of Thomas the Tank Engine to life with a growing line of complete train sets, separate sale items, and accessories for children from 8 to 80-just add your imagination. Thomas & Friends is available in both HO and Large Scale.
Bachmann's exclusive snap-together E-Z Track System makes track setup quick, easy, and fun. Plasticville U.S.A. and SceneScapes buildings and accessories let you add the finishing touches for the perfect layout.
If You Are Purchasing a Train Set, It Will Include
- Locomotive
- Cars (Rolling Stock)
- E-Z Track – available in either black roadbed with steel alloy rail or gray roadbed with nickel silver rail
- Terminal/Rerailer
- Terminal Wire
- Speed Controller
- Power Supply
- List of Components
Track Assembly
- Decide where to set up your train – a dry, firm, flat surface works best!
- To make sure you have enough working room, make a test track layout by loosely placing track in desired configuration.
- The terminal/rerailer section will later be connected to a power pack and power supply, so place it near an outlet or power strip.
- Install under-track magnet, if your set comes with one. If your set does not come with one, magnets are available separately (HO Item No. 78999; N Scale Item No. 78998).
- Assemble the track by pushing together. Make sure the rail and joiners are seated properly. Be careful that the rail joiners do not slip under the rail without properly connecting. This can cause train derailments and electrical circuit interruptions.
- After track is assembled, double-check for joint connection and fit by lightly running your fingers over the top of the rails in both directions.
- If you detect bumps or distortion on the track surface, recheck the rail joiner fit.
Power Connections
- Power supply and speed control are plug and play; no tools are needed.
- Power is supplied to the track and the locomotive by the power supply, speed controller, terminal wire, and E-Z Track terminal/rerailer.
- First – turn knob on the speed controller counterclockwise until it stops (all the way to the left).
- Next – attach terminal wire to the speed controller by plugging it in where it says 'To Track'.
- Then – plug terminal wire into the E-Z Track terminal rerailer. Firmly push connector onto the track terminals.
- Finally – plug the connecting wire from the power supply into jack on the speed controller labeled 'IN'. Then plug power supply into a live wall outlet.
- Some sets may come with a speed controller with two push button connectors. These are used to supply AC power to accessories.
- To make positive and secure connections to these, push in buttons and insert each of the bare ends of the connection wire from your accessory.
- The speed controller is capable of powering one accessory at a time.
Putting the Train on the Track
- Put the locomotive on the track and run the wheels back and forth over the terminal rerailer track.
- When the wheels glide smoothly over the track, you know the wheels are all on the track. If your set comes with a tender, attach it to the locomotive.
- Add the rest of the cars that come with your set by placing them on the track and running them back and forth over the terminal rerailer until they glide smoothly. Then gently push the cars together – they will engage automatically.
- Do not try to connect cars when positioned over an under-track magnet.
How to Use E-Z Mate Couplers (HO and On30 Scale)
- Your set may be equipped with E-Z Mate magnetically operated knuckle couplers that let you perform real railroad switching and yard operations.
- Coupling two cars with E-Z Mate couplers is as easy as pushing them together when they are not over an under-track magnet.
- Uncoupling occurs only when over an under-track magnet and when there is no tension between the cars.
- To uncouple E-Z Mate couplers, stop two couplers directly over the under-track magnet. With no tension between the cars, the couplers will open automatically.
- If cars will not couple, check to be sure cars are not positioned over the uncoupling magnet or parked on a curve.
- If cars will not uncouple, check to be sure the couplers are positioned directly adjacent to the magnet position indicator and that the indicator is placed in line with the center line of the under-track magnet.
- Check that the magnet is secured to the underside of the track and fitted with the steel plate provided.
How to Run Your Train
- Turn the knob on the speed controller clockwise until it stops (all the way to the left).
- Plug in the power supply.
- Begin feeding power to the track by slowly turning the knob on the speed controller clockwise.
- Observe the direction of your train.
- If it moves backwards when the controls indicate forward, stop the train.
- Then simply disconnect, flip, and reconnect the terminal wire to the terminal rerailer track.
- Remember – never leave your train running unattended!
Action Checklist (Troubleshooting If Your Train Doesn’t Run or Stops Running)
- Is the power supply plugged in to a live receptacle?
- Are the wheels on the track?
- Is the wiring secure?
- Is the track properly assembled?
- Is the track properly seated in the rail joiner?
- If your train stops or fails to start, a short circuit may be indicated. If this is the case, Unplug the power Supply immediately.
- Common reasons for a short circuit: derailed wheels may cause a short. Check to make sure all wheels are on the track. Also check all connections and make sure there is no metal of any sort across the rails.
- After checking everything carefully, resume operation.
- Please note, your power supply is protected by a circuit breaker that automatically resets after a short circuit is corrected.
- Allow up to 5 minutes for the circuit breaker to reset before resuming operation.
Keep Your Train in Top Operating Condition
- Works better after couple hours of break-in time.
- Train performs best under clean operating conditions.
- Clean wheels and a clean track ensure good electrical contact.
- After about every 8 hours of operation, wipe the track rails and exposed wheels with a soft, lint-free cloth.
- Removal of black residue is normal.
- Do Not Use Steel Wool To Clean Your Track.
- Do not use common solvents, they may damage plastics - use track cleaner.
- After 24 hours of use, light lubrication is required to keep train in top operating condition.
- Do Not Use Common Household Lubricants As They May Damage Your Trains. Bachmann E-Z Lube or other hobby-grade lubricants are recommended.
Bachmann hopes you enjoy your train for many years to come!

Bachmann Trains - Snap-Fit E-Z Track 9” Straight Terminal Rerailer w/Wire (1/card) - Nickel Silver Rail With Gray Roadbed - HO Scale
Bachmann Trains
Product description
Snap-Fit E-Z Track 9” Straight Terminal Rerailer with Wire (1/card) – Nickel Silver Rail with Gray Roadbed - HO Scale. Bachmann's exclusive E-Z Track system makes set-up quick, easy and fun. E-Z Track is designed to Snap Together and Stay Together on Floors, Tables and Carpets. This product features Nickel Silver Rail with Gray Roadbed, Designed to Provide Excellent Conductivity and Durability. The terminal rerailer is connected via terminal wires to a power pack, which provides current to power the layout. In addition to making power connections, the terminal rerailer is also designed to correct derailments that sometimes occur during normal railroad operations. It can also be used to help properly align wheels on the track when first assembling a train for operation. If you want to use the rerailer to help place cars on the track, you should install it so that it is easily accessible. Otherwise, it should be installed after a difficult section of track (turnout, crossing, “S” curve, etc.) where derailments may occur. Also available in the E-Z Track system is a 9” Straight Rerailer if you need a rerailer but do not need to make power connections.
From the Manufacturer
Bachmann's exclusive E-Z Track system makes set-up quick, easy and fun. Nickel Silver Rail. Gray Roadbed. E-Z Track System --Snaps Together, Stays Together on Floors, Tables and Carpets.
- E-Z Track System - Snaps Together, Stays Together on Floors, Tables & Carpets
- Set Up is Quick, Easy and Fun - No Nails, Screws, or Special Tools Needed
- Nickel Silver Rail with Gray Roadbed, Designed to Provide Excellent Conductivity and Durability
- Easy to Use For Both Temporary and Permanent Train Layouts
- HO Scale 1:87 - Modeled From AAR Track Engineering Dimensions
User questions & answers
| Question: | Will this work with Hogwarts fastrack |
| Answer: | Kind of, there is not a track per say, but two pieces from the transformer that connect to the metal tracks. just google your question you will find it. |
| Question: | Could one of these be used to take power from the track to power remote switches, since my controller has no aux. outputs |
| Answer: | I did not know it ha name. I would call it TERMINAL POWER SUPPLY WIRE. |
| Question: | Is there something similar for a g scale track? If so, I can't find it anywhere |
| Answer: | Not sure why you would want to do that,,but there are two plugs on the rerailer ..one on each side,,so you could possibly hook them up (In parallel) for sure,,you might have to solder some of the connector wires together or you could solder wires from each of the two prong plugs! |
| Question: | Whats the name of red wire |
| Answer: | Yes...it is at HO scale. |
Product features
Discover Everything Bachmann Trains Offers to Get Started in Model Railroading
Since 1833, Bachmann has been known for providing innovative design at a good value. We are now one of the world's largest distributor, by volume, of ready-to-run train sets, locomotives, track, and accessories. Bachmann is also the only train company to offer products in all five of the most popular scales: N, HO, On30, O, and Large Scale.
As a distributor of beloved Thomas & Friends products, Bachmann brings the adventures of Thomas the Tank Engine to life with a growing line of complete train sets, separate sale items, and accessories for children from 8 to 80-just add your imagination. Thomas & Friends is available in both HO and Large Scale.
Bachmann's exclusive snap-together E-Z Track System makes track setup quick, easy, and fun. Plasticville U.S.A. and SceneScapes buildings and accessories let you add the finishing touches for the perfect layout.
If You Are Purchasing a Train Set, It Will Include
- Locomotive
- Cars (Rolling Stock)
- E-Z Track – available in either black roadbed with steel alloy rail or gray roadbed with nickel silver rail
- Terminal/Rerailer
- Terminal Wire
- Speed Controller
- Power Supply
- List of Components
Track Assembly
- Decide where to set up your train – a dry, firm, flat surface works best!
- To make sure you have enough working room, make a test track layout by loosely placing track in desired configuration.
- The terminal/rerailer section will later be connected to a power pack and power supply, so place it near an outlet or power strip.
- Install under-track magnet, if your set comes with one. If your set does not come with one, magnets are available separately (HO Item No. 78999; N Scale Item No. 78998).
- Assemble the track by pushing together. Make sure the rail and joiners are seated properly. Be careful that the rail joiners do not slip under the rail without properly connecting. This can cause train derailments and electrical circuit interruptions.
- After track is assembled, double-check for joint connection and fit by lightly running your fingers over the top of the rails in both directions.
- If you detect bumps or distortion on the track surface, recheck the rail joiner fit.
Power Connections
- Power supply and speed control are plug and play; no tools are needed.
- Power is supplied to the track and the locomotive by the power supply, speed controller, terminal wire, and E-Z Track terminal/rerailer.
- First – turn knob on the speed controller counterclockwise until it stops (all the way to the left).
- Next – attach terminal wire to the speed controller by plugging it in where it says 'To Track'.
- Then – plug terminal wire into the E-Z Track terminal rerailer. Firmly push connector onto the track terminals.
- Finally – plug the connecting wire from the power supply into jack on the speed controller labeled 'In'. Then plug power supply into a live wall outlet.
- Some sets may come with a speed controller with two push button connectors. These are used to supply AC power to accessories.
- To make positive and secure connections to these, push in buttons and insert each of the bare ends of the connection wire from your accessory.
- The speed controller is capable of powering one accessory at a time.
Putting the Train on the Track
- Put the locomotive on the track and run the wheels back and forth over the terminal rerailer track.
- When the wheels glide smoothly over the track, you know the wheels are all on the track. If your set comes with a tender, attach it to the locomotive.
- Add the rest of the cars that come with your set by placing them on the track and running them back and forth over the terminal rerailer until they glide smoothly. Then gently push the cars together – they will engage automatically.
- Do not try to connect cars when positioned over an under-track magnet.
How to Use E-Z Mate Couplers (HO and On30 Scale)
- Your set may be equipped with E-Z Mate magnetically operated knuckle couplers that let you perform real railroad switching and yard operations.
- Coupling two cars with E-Z Mate couplers is as easy as pushing them together when they are not over an under-track magnet.
- Uncoupling occurs only when over an under-track magnet and when there is no tension between the cars.
- To uncouple E-Z Mate couplers, stop two couplers directly over the under-track magnet. With no tension between the cars, the couplers will open automatically.
- If cars will not couple, check to be sure cars are not positioned over the uncoupling magnet or parked on a curve.
- If cars will not uncouple, check to be sure the couplers are positioned directly adjacent to the magnet position indicator and that the indicator is placed in line with the center line of the under-track magnet.
- Check that the magnet is secured to the underside of the track and fitted with the steel plate provided.
How to Run Your Train
- Turn the knob on the speed controller clockwise until it stops (all the way to the left).
- Plug in the power supply.
- Begin feeding power to the track by slowly turning the knob on the speed controller clockwise.
- Observe the direction of your train.
- If it moves backwards when the controls indicate forward, stop the train.
- Then simply disconnect, flip, and reconnect the terminal wire to the terminal rerailer track.
- Remember – never leave your train running unattended!
Action Checklist (Troubleshooting If Your Train Doesn’t Run or Stops Running)
- Is the power supply plugged in to a live receptacle?
- Are the wheels on the track?
- Is the wiring secure?
- Is the track properly assembled?
- Is the track properly seated in the rail joiner?
- If your train stops or fails to start, a short circuit may be indicated. If this is the case, Unplug The Power Supply Immediately.
- Common reasons for a short circuit: derailed wheels may cause a short. Check to make sure all wheels are on the track. Also check all connections and make sure there is no metal of any sort across the rails.
- After checking everything carefully, resume operation.
- Please note, your power supply is protected by a circuit breaker that automatically resets after a short circuit is corrected.
- Allow up to 5 minutes for the circuit breaker to reset before resuming operation.
Keep Your Train in Top Operating Condition
- Works better after couple hours of break-in time.
- Train performs best under clean operating conditions.
- Clean wheels and a clean track ensure good electrical contact.
- After about every 8 hours of operation, wipe the track rails and exposed wheels with a soft, lint-free cloth.
- Removal of black residue is normal.
- Do Not Use Steel Wool To Clean Your Track.
- Do not use common solvents, they may damage plastics - use track cleaner.
- After 24 hours of use, light lubrication is required to keep train in top operating condition. Bachmann E-Z Lube or other hobby-grade lubricants are recommended.
Bachmann hopes you enjoy your train for many years to come!

Bachmann Trains - Snap-Fit E-Z TRACK E-Z TRACK CONNECTOR ASSORTMENT - Contains 2 each .75", 1", 1.25", 1.5" and 2" straight (card) - NICKEL SILVER Rail With Gray Roadbed - HO Scale
Bachmann Trains
Product description
Snap-Fit E-Z TRACK E-Z TRACK CONNECTOR ASSORTMENT - Contains 2 each .75", 1", 1.25", 1.5" and 2" straight (card) - NICKEL SILVER Rail With Gray Roadbed - HO Scale. Bachmann's exclusive E-Z Track system makes set-up quick, easy and fun. E-Z Track is designed to Snap Together and Stay Together on Floors, Tables and Carpets. This product features Nickel Silver Rail with Gray Roadbed.
From the Manufacturer
Contains 2 each, .75", 1", 1.25", 1.5" and 2" straight Bachmann's exclusive E-Z Track system makes set-up quick, easy and fun. Nickel Silver Rail. Gray Roadbed. E-Z Track System --Snaps Together, Stays Together on Floors, Tables and carpets.. Nickel Silver Rail. Gray roadbed. E-Z track system--snaps together, stays together on floors, tables and carpets. No nails, screws or special tools needed. Modeled from AAR track engineering dimensions.
- E-Z Track System - Snaps Together, Stays Together on Floors, Tables & Carpets
- Set Up is Quick, Easy and Fun - No Nails, Screws, or Special Tools Needed
- Nickel Silver Rail with Gray Roadbed, Designed to Provide Excellent Conductivity and Durability
- HO Scale 1:87 - Modeled From AAR Track Engineering Dimensions
- Easy to Use For Both Temporary and Permanent Train Layouts
User questions & answers
| Question: | What gauge are they |
| Answer: | 2 of each in picture/description |
| Question: | Does ea track assortment come in black roadbed |
| Answer: | Hi, you just plug the tracks together as you see in the picture with "two metal rail track connectors". You probably have to purchase the metal track connectors separately, but they are inexpensive and its an item you will use a lot of if you expand your layout using E-Z Tracks. The hook shaped extensions are actually flexible and are intended to lock the other E-Z Track, just as the other E-Z Track is designed to lock into it. It should be noted that you must also be sure to "perfectly align" and slip both the rail joining pins into each end of the metal joining "connector" for each rail. Make sure it is a smooth connection by running your finger over the connection. If it isn't, it will cause a derailment of your train. This can be corrected by either reconnecting, using a different "connector", or a little very fine metal sand paper on a block of wood to take out the rough spots... this is stuff not in the instructions !!! |
| Question: | Any |
| Answer: | Fastrack is Lionel's O-gauge track. This is HO. So, no, they can't work together. This is half the size. |
| Question: | How do you connect power to Bachmann e-z track |
| Answer: | It might work but, auxiliary output has a steady power supply. If you use track power it changes with the setting on your controller, besides aux power is A/C and track power is DC |
Product features
Discover Everything Bachmann Trains Offers to Get Started in Model Railroading
Since 1833, Bachmann has been known for providing innovative design at a good value. We are now one of the world's largest distributor, by volume, of ready-to-run train sets, locomotives, track, and accessories. Bachmann is also the only train company to offer products in all five of the most popular scales: N, HO, On30, O, and Large Scale.
As a distributor of beloved Thomas & Friends products, Bachmann brings the adventures of Thomas the Tank Engine to life with a growing line of complete train sets, separate sale items, and accessories for children from 8 to 80-just add your imagination. Thomas & Friends is available in both HO and Large Scale.
Bachmann's exclusive snap-together E-Z Track System makes track setup quick, easy, and fun. Plasticville U.S.A. and SceneScapes buildings and accessories let you add the finishing touches for the perfect layout.
If You Are Purchasing a Train Set, It Will Include
- Locomotive
- Cars (Rolling Stock)
- E-Z Track – available in either black roadbed with steel alloy rail or gray roadbed with nickel silver rail
- Terminal/Rerailer
- Terminal Wire
- Speed Controller
- Power Supply
- List of Components
Track Assembly
- Decide where to set up your train – a dry, firm, flat surface works best!
- To make sure you have enough working room, make a test track layout by loosely placing track in desired configuration.
- The terminal/rerailer section will later be connected to a power pack and power supply, so place it near an outlet or power strip.
- Install under-track magnet, if your set comes with one. If your set does not come with one, magnets are available separately (HO Item No. 78999; N Scale Item No. 78998).
- Assemble the track by pushing together. Make sure the rail and joiners are seated properly. Be careful that the rail joiners do not slip under the rail without properly connecting. This can cause train derailments and electrical circuit interruptions.
- After track is assembled, double-check for joint connection and fit by lightly running your fingers over the top of the rails in both directions.
- If you detect bumps or distortion on the track surface, recheck the rail joiner fit.
Power Connections
- Power supply and speed control are plug and play; no tools are needed.
- Power is supplied to the track and the locomotive by the power supply, speed controller, terminal wire, and E-Z Track terminal/rerailer.
- First – turn knob on the speed controller counterclockwise until it stops (all the way to the left).
- Next – attach terminal wire to the speed controller by plugging it in where it says 'To Track'.
- Then – plug terminal wire into the E-Z Track terminal rerailer. Firmly push connector onto the track terminals.
- Finally – plug the connecting wire from the power supply into jack on the speed controller labeled 'In'. Then plug power supply into a live wall outlet.
- Some sets may come with a speed controller with two push button connectors. These are used to supply AC power to accessories.
- To make positive and secure connections to these, push in buttons and insert each of the bare ends of the connection wire from your accessory.
- The speed controller is capable of powering one accessory at a time.
Putting the Train on the Track
- Put the locomotive on the track and run the wheels back and forth over the terminal rerailer track.
- When the wheels glide smoothly over the track, you know the wheels are all on the track. If your set comes with a tender, attach it to the locomotive.
- Add the rest of the cars that come with your set by placing them on the track and running them back and forth over the terminal rerailer until they glide smoothly. Then gently push the cars together – they will engage automatically.
- Do not try to connect cars when positioned over an under-track magnet.
How to Use E-Z Mate Couplers (HO and On30 Scale)
- Your set may be equipped with E-Z Mate magnetically operated knuckle couplers that let you perform real railroad switching and yard operations.
- Coupling two cars with E-Z Mate couplers is as easy as pushing them together when they are not over an under-track magnet.
- Uncoupling occurs only when over an under-track magnet and when there is no tension between the cars.
- To uncouple E-Z Mate couplers, stop two couplers directly over the under-track magnet. With no tension between the cars, the couplers will open automatically.
- If cars will not couple, check to be sure cars are not positioned over the uncoupling magnet or parked on a curve.
- If cars will not uncouple, check to be sure the couplers are positioned directly adjacent to the magnet position indicator and that the indicator is placed in line with the center line of the under-track magnet.
- Check that the magnet is secured to the underside of the track and fitted with the steel plate provided.
How to Run Your Train
- Turn the knob on the speed controller clockwise until it stops (all the way to the left).
- Plug in the power supply.
- Begin feeding power to the track by slowly turning the knob on the speed controller clockwise.
- Observe the direction of your train.
- If it moves backwards when the controls indicate forward, stop the train.
- Then simply disconnect, flip, and reconnect the terminal wire to the terminal rerailer track.
- Remember – never leave your train running unattended!
Action Checklist (Troubleshooting If Your Train Doesn’t Run or Stops Running)
- Is the power supply plugged in to a live receptacle?
- Are the wheels on the track?
- Is the wiring secure?
- Is the track properly assembled?
- Is the track properly seated in the rail joiner?
- If your train stops or fails to start, a short circuit may be indicated. If this is the case, Unplug The Power Supply Immediately.
- Common reasons for a short circuit: derailed wheels may cause a short. Check to make sure all wheels are on the track. Also check all connections and make sure there is no metal of any sort across the rails.
- After checking everything carefully, resume operation.
- Please note, your power supply is protected by a circuit breaker that automatically resets after a short circuit is corrected.
- Allow up to 5 minutes for the circuit breaker to reset before resuming operation.
Keep Your Train in Top Operating Condition
- Works better after couple hours of break-in time.
- Train performs best under clean operating conditions.
- Clean wheels and a clean track ensure good electrical contact.
- After about every 8 hours of operation, wipe the track rails and exposed wheels with a soft, lint-free cloth.
- Removal of black residue is normal.
- Do Not Use Steel Wool To Clean Your Track.
- Do not use common solvents, they may damage plastics - use track cleaner.
- After 24 hours of use, light lubrication is required to keep train in top operating condition. Bachmann E-Z Lube or other hobby-grade lubricants are recommended.
Bachmann hopes you enjoy your train for many years to come!
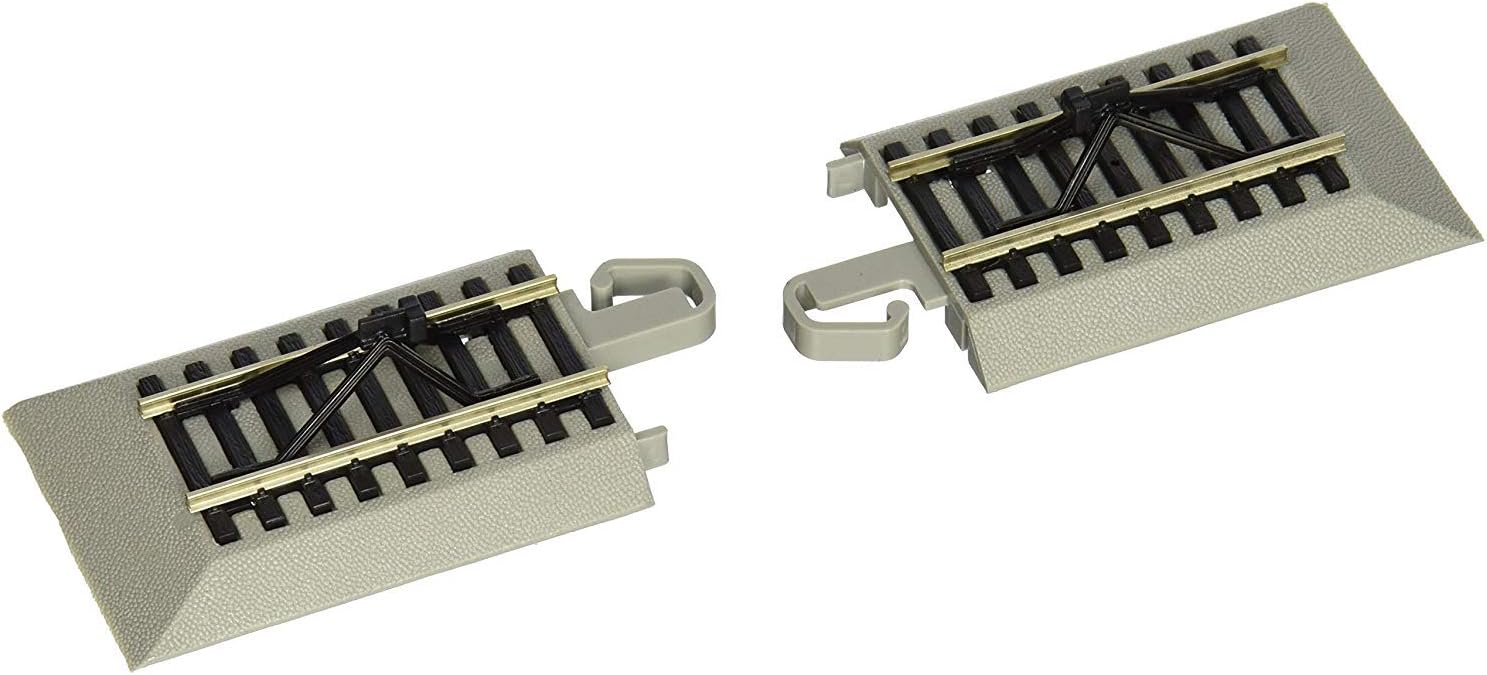
Bachmann Trains - Snap-Fit E-Z TRACK HAYES BUMPERS (2/card) - NICKEL SILVER Rail With Gray Roadbed - HO Scale
Bachmann Trains
Product description
Snap-Fit E-Z TRACK HAYES BUMPERS (2/card) - NICKEL SILVER Rail With Gray Roadbed - HO Scale. Bachmann's exclusive E-Z Track system makes set-up quick, easy and fun. E-Z Track is designed to Snap Together and Stay Together on Floors, Tables and Carpets. This product features Nickel Silver Rail with Gray Roadbed.. These bumpers properly finish the ends of your track spurs.
From the Manufacturer
Bachmann's exclusive E-Z Track system makes set-up quick, easy and fun. Nickel Silver Rail. Gray Roadbed. E-Z Track System --Snaps Together, Stays Together on Floors, Tables and Carpets.
- E-Z Track System - Snaps Together, Stays Together on Floors, Tables & Carpets
- Set Up is Quick, Easy and Fun - No Nails, Screws, or Special Tools Needed
- Nickel Silver Rail with Gray Roadbed, Designed to Provide Excellent Conductivity and Durability
- HO Scale 1:87 - Modeled From AAR Track Engineering Dimensions
- Easy to Use For Both Temporary and Permanent Train Layouts
User questions & answers
| Question: | Is it ho scale or n scale |
| Answer: | Yes. Bachmann item #44591 is the HO scale bumpers. |
| Question: | Do i need this when replacing old track with E-Z track |
| Answer: | We bought these for our son's HO scale track system. |
| Question: | Are Bachmann snap fit E-Z Bumpers for a HO scale train |
| Answer: | These Bachmann pieces of track are HO gauge which is the most common US gauge. |
| Question: | What is the actual scale |
| Answer: | Hello. Unfortunately, no these are not available in black roadbed. Most Bachmann E-Z Track is now made in gray roadbed only. Thank you for your interest! Y2PLAY Stores - 800-695-4808. |
Product features
Discover Everything Bachmann Trains Offers to Get Started in Model Railroading
Since 1833, Bachmann has been known for providing innovative design at a good value. We are now one of the world's largest distributor, by volume, of ready-to-run train sets, locomotives, track, and accessories. Bachmann is also the only train company to offer products in all five of the most popular scales: N, HO, On30, O, and Large Scale.
As a distributor of beloved Thomas & Friends products, Bachmann brings the adventures of Thomas the Tank Engine to life with a growing line of complete train sets, separate sale items, and accessories for children from 8 to 80-just add your imagination. Thomas & Friends is available in both HO and Large Scale.
Bachmann's exclusive snap-together E-Z Track System makes track setup quick, easy, and fun. Plasticville U.S.A. and SceneScapes buildings and accessories let you add the finishing touches for the perfect layout.
If You Are Purchasing a Train Set, It Will Include
- Locomotive
- Cars (Rolling Stock)
- E-Z Track – available in either black roadbed with steel alloy rail or gray roadbed with nickel silver rail
- Terminal/Rerailer
- Terminal Wire
- Speed Controller
- Power Supply
- List of Components
Track Assembly
- Decide where to set up your train – a dry, firm, flat surface works best!
- To make sure you have enough working room, make a test track layout by loosely placing track in desired configuration.
- The terminal/rerailer section will later be connected to a power pack and power supply, so place it near an outlet or power strip.
- Install under-track magnet, if your set comes with one. If your set does not come with one, magnets are available separately (HO Item No. 78999; N Scale Item No. 78998).
- Assemble the track by pushing together. Make sure the rail and joiners are seated properly. Be careful that the rail joiners do not slip under the rail without properly connecting. This can cause train derailments and electrical circuit interruptions.
- After track is assembled, double-check for joint connection and fit by lightly running your fingers over the top of the rails in both directions.
- If you detect bumps or distortion on the track surface, recheck the rail joiner fit.
Power Connections
- Power supply and speed control are plug and play; no tools are needed.
- Power is supplied to the track and the locomotive by the power supply, speed controller, terminal wire, and E-Z Track terminal/rerailer.
- First – turn knob on the speed controller counterclockwise until it stops (all the way to the left).
- Next – attach terminal wire to the speed controller by plugging it in where it says 'To Track'.
- Then – plug terminal wire into the E-Z Track terminal rerailer. Firmly push connector onto the track terminals.
- Finally – plug the connecting wire from the power supply into jack on the speed controller labeled 'In'. Then plug power supply into a live wall outlet.
- Some sets may come with a speed controller with two push button connectors. These are used to supply AC power to accessories.
- To make positive and secure connections to these, push in buttons and insert each of the bare ends of the connection wire from your accessory.
- The speed controller is capable of powering one accessory at a time.
Putting the Train on the Track
- Put the locomotive on the track and run the wheels back and forth over the terminal rerailer track.
- When the wheels glide smoothly over the track, you know the wheels are all on the track. If your set comes with a tender, attach it to the locomotive.
- Add the rest of the cars that come with your set by placing them on the track and running them back and forth over the terminal rerailer until they glide smoothly. Then gently push the cars together – they will engage automatically.
- Do not try to connect cars when positioned over an under-track magnet.
How to Use E-Z Mate Couplers (HO and On30 Scale)
- Your set may be equipped with E-Z Mate magnetically operated knuckle couplers that let you perform real railroad switching and yard operations.
- Coupling two cars with E-Z Mate couplers is as easy as pushing them together when they are not over an under-track magnet.
- Uncoupling occurs only when over an under-track magnet and when there is no tension between the cars.
- To uncouple E-Z Mate couplers, stop two couplers directly over the under-track magnet. With no tension between the cars, the couplers will open automatically.
- If cars will not couple, check to be sure cars are not positioned over the uncoupling magnet or parked on a curve.
- If cars will not uncouple, check to be sure the couplers are positioned directly adjacent to the magnet position indicator and that the indicator is placed in line with the center line of the under-track magnet.
- Check that the magnet is secured to the underside of the track and fitted with the steel plate provided.
How to Run Your Train
- Turn the knob on the speed controller clockwise until it stops (all the way to the left).
- Plug in the power supply.
- Begin feeding power to the track by slowly turning the knob on the speed controller clockwise.
- Observe the direction of your train.
- If it moves backwards when the controls indicate forward, stop the train.
- Then simply disconnect, flip, and reconnect the terminal wire to the terminal rerailer track.
- Remember – never leave your train running unattended!
Action Checklist (Troubleshooting If Your Train Doesn’t Run or Stops Running)
- Is the power supply plugged in to a live receptacle?
- Are the wheels on the track?
- Is the wiring secure?
- Is the track properly assembled?
- Is the track properly seated in the rail joiner?
- If your train stops or fails to start, a short circuit may be indicated. If this is the case, Unplug The Power Supply Immediately.
- Common reasons for a short circuit: derailed wheels may cause a short. Check to make sure all wheels are on the track. Also check all connections and make sure there is no metal of any sort across the rails.
- After checking everything carefully, resume operation.
- Please note, your power supply is protected by a circuit breaker that automatically resets after a short circuit is corrected.
- Allow up to 5 minutes for the circuit breaker to reset before resuming operation.
Keep Your Train in Top Operating Condition
- Works better after couple hours of break-in time.
- Train performs best under clean operating conditions.
- Clean wheels and a clean track ensure good electrical contact.
- After about every 8 hours of operation, wipe the track rails and exposed wheels with a soft, lint-free cloth.
- Removal of black residue is normal.
- Do Not Use Steel Wool To Clean Your Track.
- Do not use common solvents, they may damage plastics - use track cleaner.
- After 24 hours of use, light lubrication is required to keep train in top operating condition. Bachmann E-Z Lube or other hobby-grade lubricants are recommended.
Bachmann hopes you enjoy your train for many years to come!

Bachmann Trains 14 PC. E-Z TRACK GRADUATED PIER SET - HO Scale
Bachmann Trains
Product description
Bachmann Trains 14 PC. E-Z TRACK GRADUATED PIER SET - HO Scale. Create an over/under figure “8” layout or similar configurations. Compatible with steel alloy and nickel silver E-Z Track (3 1/8" vertical clearance under the tallest pier)
From the Manufacturer
Graduated Pier Set for use with Bachmann Snap-Fit E-Z Track. Use With All Bachmann E-Z Track. Gradually Raises Roadbed. Molded In Plastic.
- For use with Steel Alloy and Nickel Silver Bachmann E Z Track
- Customize your layout
- Gradually raises roadbed
- 3.125 inches of vertical clearance under the tallest pier
- Use With HO Scale Train Layouts
User questions & answers
| Question: | Please your guidence.... does it works with the h0 c track of maerklin |
| Answer: | Would not think so as it is marked as HO scale. I'm sure you could use it separately, but would look quite different if you have N scale next to it. |
| Question: | do the tracks have to be arranged in a figure |
| Answer: | just the piers.., tracks are extra. |
| Question: | Will this work with an N scale train |
| Answer: | these are two different scales. ho is the most popular and is 1:87 ration while n scale is smaller at 1:148 |
| Question: | does it come with track or just the piers |
| Answer: | If you are replacing all of your track then you will need these bumpers on dead end sidings. |
Product features
Discover Everything Bachmann Trains Offers to Get Started in Model Railroading
Since 1833, Bachmann has been known for providing innovative design at a good value. We are now one of the world's largest distributor, by volume, of ready-to-run train sets, locomotives, track, and accessories. Bachmann is also the only train company to offer products in all five of the most popular scales: N, HO, On30, O, and Large Scale.
As a distributor of beloved Thomas & Friends products, Bachmann brings the adventures of Thomas the Tank Engine to life with a growing line of complete train sets, separate sale items, and accessories for children from 8 to 80-just add your imagination. Thomas & Friends is available in both HO and Large Scale.
Bachmann's exclusive snap-together E-Z Track System makes track setup quick, easy, and fun. Plasticville U.S.A. and SceneScapes buildings and accessories let you add the finishing touches for the perfect layout.
If You Are Purchasing a Train Set, It Will Include
- Locomotive
- Cars (Rolling Stock)
- E-Z Track – available in either black roadbed with steel alloy rail or gray roadbed with nickel silver rail
- Terminal/Rerailer
- Terminal Wire
- Speed Controller
- Power Supply
- List of Components
Track Assembly
- Decide where to set up your train – a dry, firm, flat surface works best!
- To make sure you have enough working room, make a test track layout by loosely placing track in desired configuration.
- The terminal/rerailer section will later be connected to a power pack and power supply, so place it near an outlet or power strip.
- Install under-track magnet, if your set comes with one. If your set does not come with one, magnets are available separately (HO Item No. 78999; N Scale Item No. 78998).
- Assemble the track by pushing together. Make sure the rail and joiners are seated properly. Be careful that the rail joiners do not slip under the rail without properly connecting. This can cause train derailments and electrical circuit interruptions.
- After track is assembled, double-check for joint connection and fit by lightly running your fingers over the top of the rails in both directions.
- If you detect bumps or distortion on the track surface, recheck the rail joiner fit.
Power Connections
- Power supply and speed control are plug and play; no tools are needed.
- Power is supplied to the track and the locomotive by the power supply, speed controller, terminal wire, and E-Z Track terminal/rerailer.
- First – turn knob on the speed controller counterclockwise until it stops (all the way to the left).
- Next – attach terminal wire to the speed controller by plugging it in where it says 'To Track'.
- Then – plug terminal wire into the E-Z Track terminal rerailer. Firmly push connector onto the track terminals.
- Finally – plug the connecting wire from the power supply into jack on the speed controller labeled 'In'. Then plug power supply into a live wall outlet.
- Some sets may come with a speed controller with two push button connectors. These are used to supply AC power to accessories.
- To make positive and secure connections to these, push in buttons and insert each of the bare ends of the connection wire from your accessory.
- The speed controller is capable of powering one accessory at a time.
Putting the Train on the Track
- Put the locomotive on the track and run the wheels back and forth over the terminal rerailer track.
- When the wheels glide smoothly over the track, you know the wheels are all on the track. If your set comes with a tender, attach it to the locomotive.
- Add the rest of the cars that come with your set by placing them on the track and running them back and forth over the terminal rerailer until they glide smoothly. Then gently push the cars together – they will engage automatically.
- Do not try to connect cars when positioned over an under-track magnet.
How to Use E-Z Mate Couplers (HO and On30 Scale)
- Your set may be equipped with E-Z Mate magnetically operated knuckle couplers that let you perform real railroad switching and yard operations.
- Coupling two cars with E-Z Mate couplers is as easy as pushing them together when they are not over an under-track magnet.
- Uncoupling occurs only when over an under-track magnet and when there is no tension between the cars.
- To uncouple E-Z Mate couplers, stop two couplers directly over the under-track magnet. With no tension between the cars, the couplers will open automatically.
- If cars will not couple, check to be sure cars are not positioned over the uncoupling magnet or parked on a curve.
- If cars will not uncouple, check to be sure the couplers are positioned directly adjacent to the magnet position indicator and that the indicator is placed in line with the center line of the under-track magnet.
- Check that the magnet is secured to the underside of the track and fitted with the steel plate provided.
How to Run Your Train
- Turn the knob on the speed controller clockwise until it stops (all the way to the left).
- Plug in the power supply.
- Begin feeding power to the track by slowly turning the knob on the speed controller clockwise.
- Observe the direction of your train.
- If it moves backwards when the controls indicate forward, stop the train.
- Then simply disconnect, flip, and reconnect the terminal wire to the terminal rerailer track.
- Remember – never leave your train running unattended!
Action Checklist (Troubleshooting If Your Train Doesn’t Run or Stops Running)
- Is the power supply plugged in to a live receptacle?
- Are the wheels on the track?
- Is the wiring secure?
- Is the track properly assembled?
- Is the track properly seated in the rail joiner?
- If your train stops or fails to start, a short circuit may be indicated. If this is the case, Unplug The Power Supply Immediately.
- Common reasons for a short circuit: derailed wheels may cause a short. Check to make sure all wheels are on the track. Also check all connections and make sure there is no metal of any sort across the rails.
- After checking everything carefully, resume operation.
- Please note, your power supply is protected by a circuit breaker that automatically resets after a short circuit is corrected.
- Allow up to 5 minutes for the circuit breaker to reset before resuming operation.
Keep Your Train in Top Operating Condition
- Works better after couple hours of break-in time.
- Train performs best under clean operating conditions.
- Clean wheels and a clean track ensure good electrical contact.
- After about every 8 hours of operation, wipe the track rails and exposed wheels with a soft, lint-free cloth.
- Removal of black residue is normal.
- Do Not Use Steel Wool To Clean Your Track.
- Do not use common solvents, they may damage plastics - use track cleaner.
- After 24 hours of use, light lubrication is required to keep train in top operating condition. Bachmann E-Z Lube or other hobby-grade lubricants are recommended.
Bachmann hopes you enjoy your train for many years to come!

Bachmann Trains - Snap-Fit E-Z Track 9” Straight Track (4/card) - Nickel Silver Rail With Gray Roadbed - HO Scale
Bachmann Trains
Product description
Snap-Fit E-Z Track 9” Straight Track (4/card) - Nickel Silver Rail With Gray Roadbed - HO Scale. Bachmann's exclusive E-Z Track system makes set-up quick, easy and fun. E-Z Track is designed to Snap Together and Stay Together on Floors, Tables and Carpets. This product features Nickel Silver Rail with Gray Roadbed, Designed to Provide Excellent Conductivity and Durability. Four pieces of 9” Straight Track build 36” of railroad.
From the Manufacturer
Bachmann's exclusive E-Z Track system makes set-up quick, easy and fun. Nickel Silver Rail. Gray Roadbed. E-Z Track System --Snaps Together, Stays Together on Floors, Tables and Carpets.
- E-Z Track System - Snaps Together, Stays Together on Floors, Tables & Carpets
- Set Up is Quick, Easy and Fun - No Nails, Screws, or Special Tools Needed
- Nickel Silver Rail with Gray Roadbed, Designed to Provide Excellent Conductivity and Durability
- Easy to Use For Both Temporary and Permanent Train Layouts
- HO Scale 1:87 - Modeled From AAR Track Engineering Dimensions
User questions & answers
| Question: | Where can I get a replacement activator? I have it’s part number but can’t seem to find it anywhere |
| Answer: | i would think that a major or specialty model train shop would have a replacement activator. ..... make your own fastback activation track section ---- you tube. |
| Question: | How many pieces of track are there |
| Answer: | Your qustion does't give me much to go on but track is packaged in 6 pieces per pack most of the time. It comes in 5 inch and 10 inch lengths in straight track. You can buy bulk track in 30 inch lenghts and 50 pieces per box. There are a number of track package deals on the market that contain switchs, curves and straight track to form various sized layouts. This is all I can think to tell you from the question as you asked it for N scale track. |
| Question: | Is this track work to dcc equipped loco and dcc controller |
| Answer: | Yes, this track works just fine with either DC or DCC. May even be better than hand layed track as joint problems and track alinement is easier for snap-fit E-Z Track than with hand layed track. I am and have in the past ran both systems on snap-fit. |
| Question: | ARE ALL THE TRACKS ho GUAGE |
| Answer: | Yes. We received ho gauge tracks. |
| Question: | Dear sir i have a eztec radio control battery operated christmas train i am very keen to buy more track particularly straight pieces are any available |
| Answer: | This would NOT be the type of track you need as this is HO scale. Unfortunately I do not stock the product you need. |
| Question: | Does this same set come with gray road bed |
| Answer: | Yes it does, here's a link: https://www.amazon.com/dp/B01ES6EMVY |
| Question: | Can i use this with the santa fe ho set (without needing a different controller |
| Answer: | Should work with any Bachmann HO scale set |
| Question: | Does it come with a power pack |
| Answer: | no! |
Product features
Discover Everything Bachmann Trains Offers to Get Started in Model Railroading
Since 1833, Bachmann has been known for providing innovative design at a good value. We are now one of the world's largest distributor, by volume, of ready-to-run train sets, locomotives, track, and accessories. Bachmann is also the only train company to offer products in all five of the most popular scales: N, HO, On30, O, and Large Scale.
As a distributor of beloved Thomas & Friends products, Bachmann brings the adventures of Thomas the Tank Engine to life with a growing line of complete train sets, separate sale items, and accessories for children from 8 to 80-just add your imagination. Thomas & Friends is available in both HO and Large Scale.
Bachmann's exclusive snap-together E-Z Track System makes track setup quick, easy, and fun. Plasticville U.S.A. and SceneScapes buildings and accessories let you add the finishing touches for the perfect layout.
If You Are Purchasing a Train Set, It Will Include
- Locomotive
- Cars (Rolling Stock)
- E-Z Track – available in either black roadbed with steel alloy rail or gray roadbed with nickel silver rail
- Terminal/Rerailer
- Terminal Wire
- Speed Controller
- Power Supply
- List of Components
Track Assembly
- Decide where to set up your train – a dry, firm, flat surface works best!
- To make sure you have enough working room, make a test track layout by loosely placing track in desired configuration.
- The terminal/rerailer section will later be connected to a power pack and power supply, so place it near an outlet or power strip.
- Install under-track magnet, if your set comes with one. If your set does not come with one, magnets are available separately (HO Item No. 78999; N Scale Item No. 78998).
- Assemble the track by pushing together. Make sure the rail and joiners are seated properly. Be careful that the rail joiners do not slip under the rail without properly connecting. This can cause train derailments and electrical circuit interruptions.
- After track is assembled, double-check for joint connection and fit by lightly running your fingers over the top of the rails in both directions.
- If you detect bumps or distortion on the track surface, recheck the rail joiner fit.
Power Connections
- Power supply and speed control are plug and play; no tools are needed.
- Power is supplied to the track and the locomotive by the power supply, speed controller, terminal wire, and E-Z Track terminal/rerailer.
- First – turn knob on the speed controller counterclockwise until it stops (all the way to the left).
- Next – attach terminal wire to the speed controller by plugging it in where it says 'To Track'.
- Then – plug terminal wire into the E-Z Track terminal rerailer. Firmly push connector onto the track terminals.
- Finally – plug the connecting wire from the power supply into jack on the speed controller labeled 'In'. Then plug power supply into a live wall outlet.
- Some sets may come with a speed controller with two push button connectors. These are used to supply AC power to accessories.
- To make positive and secure connections to these, push in buttons and insert each of the bare ends of the connection wire from your accessory.
- The speed controller is capable of powering one accessory at a time.
Putting the Train on the Track
- Put the locomotive on the track and run the wheels back and forth over the terminal rerailer track.
- When the wheels glide smoothly over the track, you know the wheels are all on the track. If your set comes with a tender, attach it to the locomotive.
- Add the rest of the cars that come with your set by placing them on the track and running them back and forth over the terminal rerailer until they glide smoothly. Then gently push the cars together – they will engage automatically.
- Do not try to connect cars when positioned over an under-track magnet.
How to Use E-Z Mate Couplers (HO and On30 Scale)
- Your set may be equipped with E-Z Mate magnetically operated knuckle couplers that let you perform real railroad switching and yard operations.
- Coupling two cars with E-Z Mate couplers is as easy as pushing them together when they are not over an under-track magnet.
- Uncoupling occurs only when over an under-track magnet and when there is no tension between the cars.
- To uncouple E-Z Mate couplers, stop two couplers directly over the under-track magnet. With no tension between the cars, the couplers will open automatically.
- If cars will not couple, check to be sure cars are not positioned over the uncoupling magnet or parked on a curve.
- If cars will not uncouple, check to be sure the couplers are positioned directly adjacent to the magnet position indicator and that the indicator is placed in line with the center line of the under-track magnet.
- Check that the magnet is secured to the underside of the track and fitted with the steel plate provided.
How to Run Your Train
- Turn the knob on the speed controller clockwise until it stops (all the way to the left).
- Plug in the power supply.
- Begin feeding power to the track by slowly turning the knob on the speed controller clockwise.
- Observe the direction of your train.
- If it moves backwards when the controls indicate forward, stop the train.
- Then simply disconnect, flip, and reconnect the terminal wire to the terminal rerailer track.
- Remember – never leave your train running unattended!
Action Checklist (Troubleshooting If Your Train Doesn’t Run or Stops Running)
- Is the power supply plugged in to a live receptacle?
- Are the wheels on the track?
- Is the wiring secure?
- Is the track properly assembled?
- Is the track properly seated in the rail joiner?
- If your train stops or fails to start, a short circuit may be indicated. If this is the case, Unplug The Power Supply Immediately.
- Common reasons for a short circuit: derailed wheels may cause a short. Check to make sure all wheels are on the track. Also check all connections and make sure there is no metal of any sort across the rails.
- After checking everything carefully, resume operation.
- Please note, your power supply is protected by a circuit breaker that automatically resets after a short circuit is corrected.
- Allow up to 5 minutes for the circuit breaker to reset before resuming operation.
Keep Your Train in Top Operating Condition
- Works better after couple hours of break-in time.
- Train performs best under clean operating conditions.
- Clean wheels and a clean track ensure good electrical contact.
- After about every 8 hours of operation, wipe the track rails and exposed wheels with a soft, lint-free cloth.
- Removal of black residue is normal.
- Do Not Use Steel Wool To Clean Your Track.
- Do not use common solvents, they may damage plastics - use track cleaner.
- After 24 hours of use, light lubrication is required to keep train in top operating condition. Bachmann E-Z Lube or other hobby-grade lubricants are recommended.
Bachmann hopes you enjoy your train for many years to come!
Latest Reviews
View all
D Link High Speed Modems
- Updated: 19.03.2023
- Read reviews
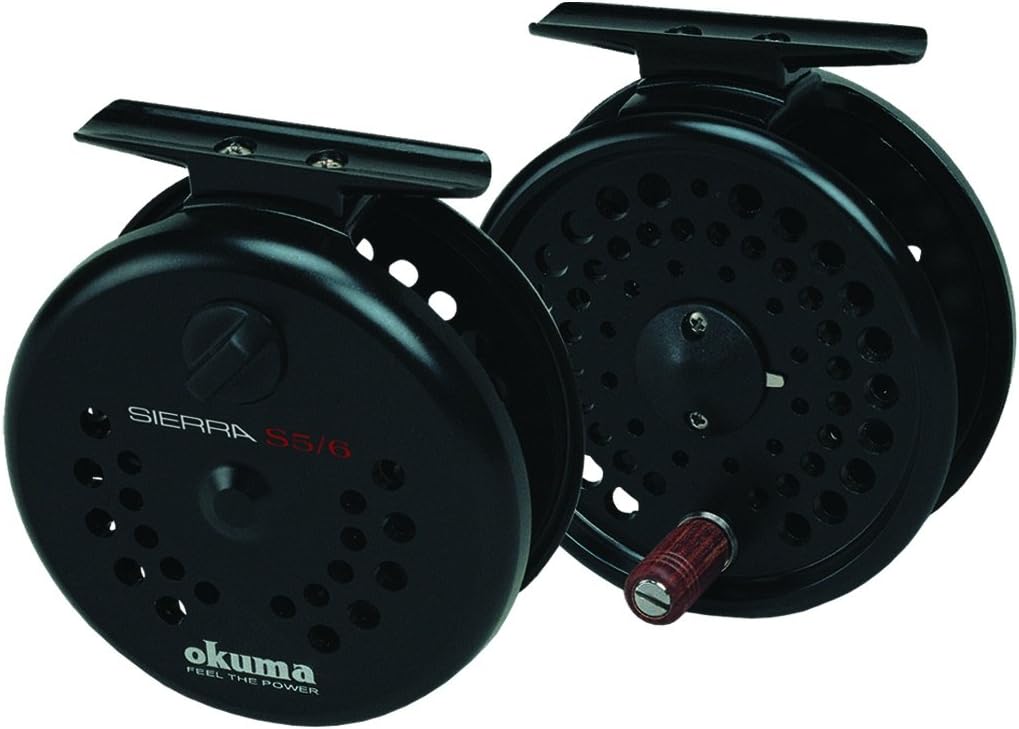
Okuma Fly Reels
- Updated: 05.01.2023
- Read reviews

Sabre Travel Alarms
- Updated: 01.03.2023
- Read reviews

Yamaha Motorcycle Boots
- Updated: 06.07.2023
- Read reviews
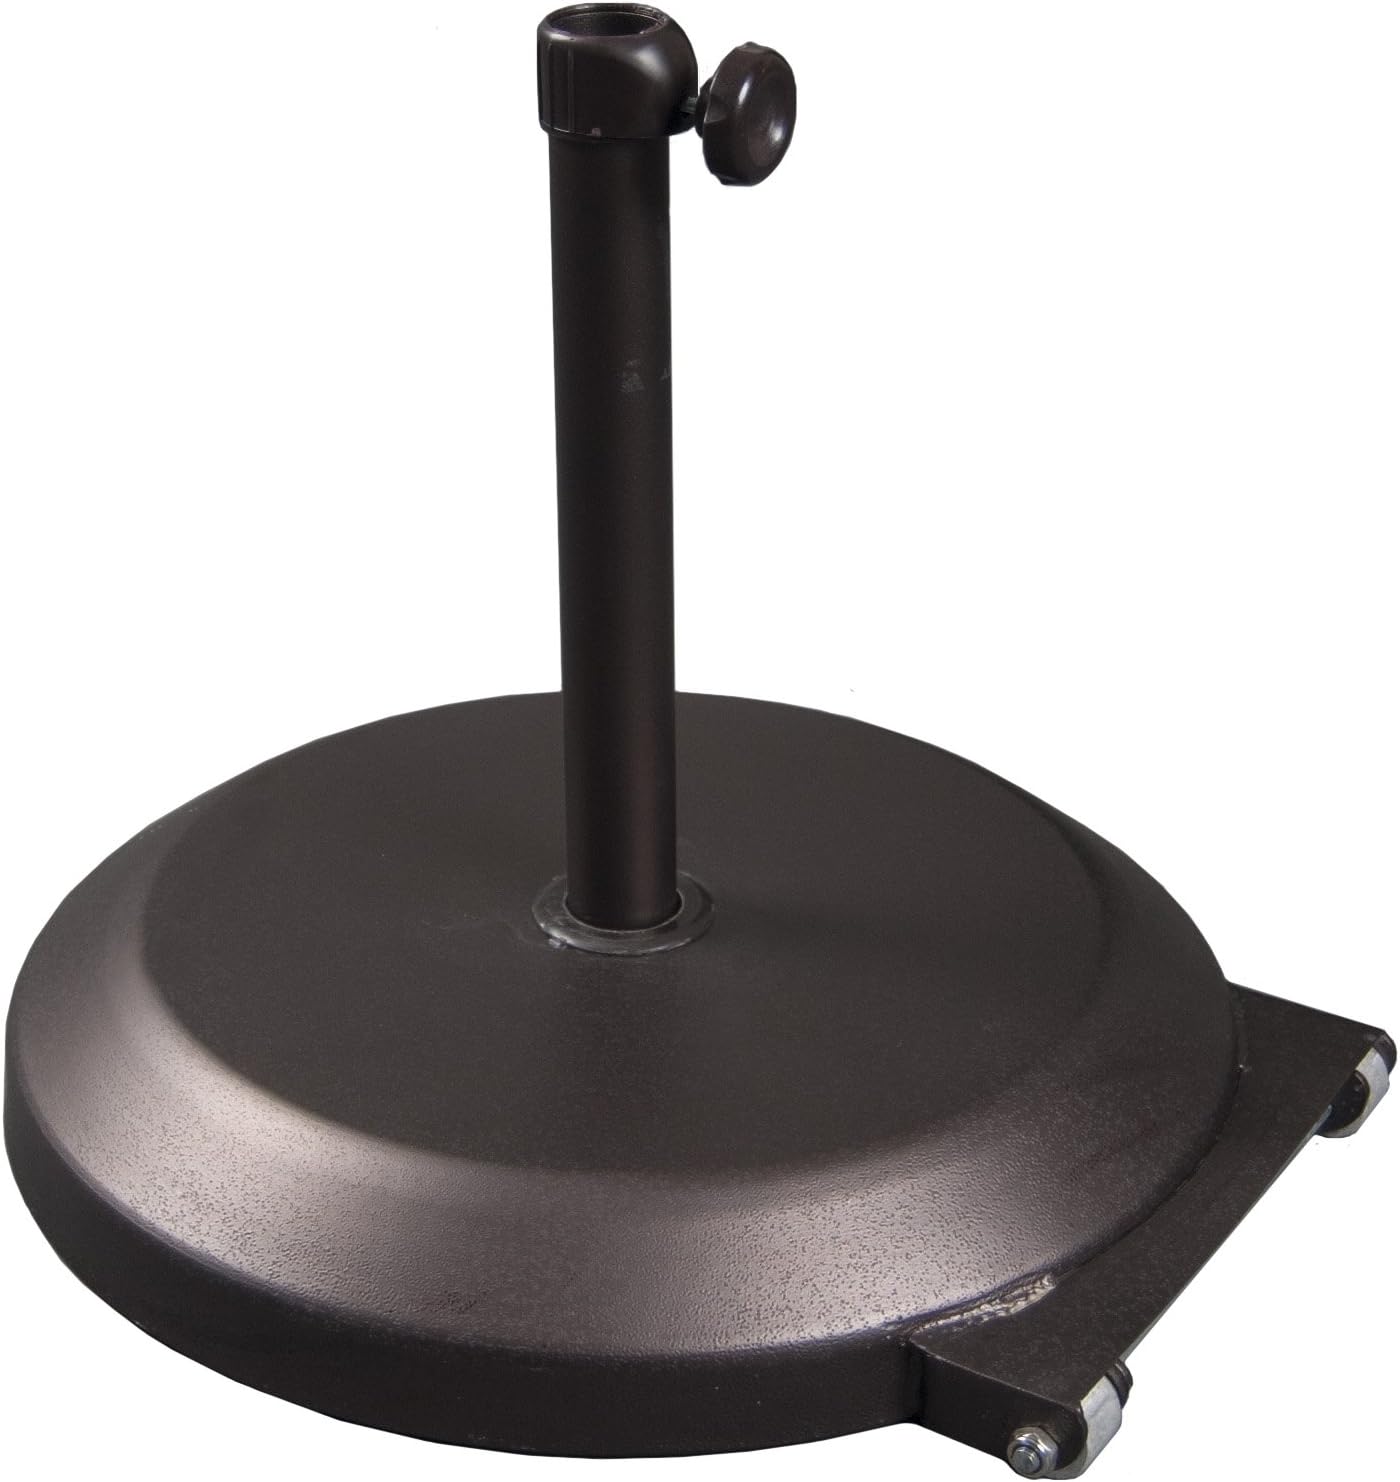
California Umbrella Outdoor Umbrellas
- Updated: 25.07.2023
- Read reviews