12 best wood epoxy
Wood epoxy is a versatile and essential product used in various applications related to woodworking, home improvement, and DIY projects. It is commonly found in the categories of Stains, Finishes & Sealers and Paint & Wall Treatments Supplies. Here's what you should know about wood epoxy:
Epoxy Resin and Hardener: Wood epoxy typically consists of two components: epoxy resin and a hardener. When these two components are mixed together in the correct ratio, a chemical reaction occurs, creating a strong and durable adhesive, filler, or protective coating.
Adhesive: Epoxy can be used as a powerful adhesive for bonding wood pieces together.It forms a strong, waterproof bond that is resistant to temperature fluctuations and moisture, making it suitable for outdoor applications and marine projects.
Filling and Repair: Wood epoxy is often used to fill gaps, cracks, knots, or voids in wood surfaces. It can effectively repair damaged or rotted wood, restoring structural integrity and appearance.
Woodworking: Woodworkers use epoxy to stabilize and strengthen wood with imperfections, such as spalted or punky wood. It can also be used to create decorative inlays and designs in wood projects.
Finishing: Epoxy can be applied as a clear coating to wooden surfaces, providing a glossy, protective finish. This is commonly seen on bar tops, tabletops, and other surfaces where a durable, shiny finish is desired.
Sealing: Epoxy can seal and protect wood from moisture, preventing rot and decay. It's often used on outdoor wooden structures, like decks and fences, to extend their lifespan.
Color and Dye: Some epoxy formulations allow for the addition of pigments or dyes, enabling you to customize the color and appearance of the epoxy finish.
Curing Time: The curing time for epoxy can vary depending on the specific product and environmental conditions. Some epoxy formulations cure quickly, while others may take several hours or even days to fully harden.
Safety Precautions: When working with epoxy, it's essential to follow safety guidelines, including wearing protective gear such as gloves and safety glasses, working in a well-ventilated area, and avoiding skin contact with uncured epoxy.
Versatility: Epoxy is not limited to wood; it can be used on a wide range of materials, including metal, concrete, and plastic, making it a versatile choice for various projects.
In summary, wood epoxy is a valuable tool for woodworkers, DIY enthusiasts, and home improvement projects. Whether you need to bond, repair, fill, finish, or protect wood surfaces, epoxy offers a durable and reliable solution that can enhance the strength and appearance of your woodworking creations.
Below you can find our editor's choice of the best wood epoxy on the market
PC Products - 163337 PC-Woody Wood Repair Epoxy Paste, Two-Part 12 oz in Two Cans, Tan 16333
PC Products
Product description
PC-Woody is an epoxy paste formulated to replace missing and rotted wood. It has structural strength greater than most wood. PC- Woody is a permanent wood repair for interior and exterior applications. This epoxy is made from real wood and has many characteristics of wood. PC-Woody formulation provides extended working time, for large and critical jobs, which allows the user time to reposition work or make changes. High "wet grab" or tack of PC-Woody makes overhead and sidewall work easy without drip or sag. PC- Woody demonstrates excellent resistance to all weather elements, mildew dry rot, UV light, fresh and salt water, and also chemicals present in pressure-treated wood. After cure paint, stain, drill, machine, sand, file, tap, or saw. Repair log homes, furniture, window and door sills and much more. Color (component a): Off white. Color (component b): Light brown. Color (mixed): Pine or tan. Work time (70 degree F): 30-40 Minutes. Tack free cure time: 90 Minutes. Cure for service: 24 Hours. Maximum cure: 7 Day. Gardner impact resistance: 100 In/lb. Elongation: 5-7 percent. Conduction (electric): Non conductive. Thermal shock: Excellent. Toxicity: Non toxic once cured. Heat range: -20 To 200 degree F. Tensile shear strength: 850 psi. Compressive yield: 2340 psi. Flexural strength: 1280 psi. Water absorption: 0.44 percent. Weight (specific gravity): 0.72 g/cm cube, 0.42 oz/in cube. Hardness shored: 50-55 (1wk). Heat deflection: 120 degree F.
From the Manufacturer
PC-Products, celebrating 60 years of “Fixing Your Things”, with quality, reliable repair products. Repair solutions for just about anything that needs repair or what you can manage to break. From Concrete to Wood restoration and heavy duty permanent repairs, we have you covered.Yeah; We can fix that!
- Two-part epoxy paste to replace missing or rotted wood is resistant to mildew, dry rot, UV light, and fresh and salt water
- Can be used in indoor and outdoor applications, with an application temperature range of 35 to 115 degrees F and a service temperature range of -20 to +200 degrees F
- High tack helps reduce drips and sags while hardening. PC-Woody part B must be mixed with PC-Woody part A in equal volumes. The PC-Woody part B will not cure by itself and must be removed and mixed properly. It is not recommended to mix PC-Woody in teaspoon size increments or smaller, simply because of the likelihood of an ‘off-ratio’ mix
- Provides work time of 30 to 40 minutes (at 70 degrees F) to allow for adjustments
- Can be painted, stained, and machined after fully cured
- High "wet grab" or tack of PC-Woody makes overhead and sidewall work easy without drip or sag
- Excellent resistance to all weather elements, mildew dry rot, UV light, fresh and salt water, and chemicals present in pressure-treated wood
- Note: PC-Woody will not bond to wax paper, Teflon, Polyethylene and some other plastics. Test a small area when in doubt
User questions & answers
| Question: | Is this product ok to use on my porch floor where it gets lots of traffic |
| Answer: | If the rotted-out section is properly prepared (say, by removing all damaged wood and applying a couple of coats of wood petrifier to soak the adjacent area), then yes, the epoxy paste will be equally as strong as wood and should withstand traffic. Just filling in the rot hole without treating the edges where it binds will eventually result in the "plug" separating. Be sure to paint or eurathane, etc. the finished, sanded repair. |
| Question: | Is it possible to buy this product in white as the wood items I need to repair will be painted white afterwards |
| Answer: | It cures to a very light tan. When painting give the product a very light first coat of paint and then a 2nd after that dries. |
| Question: | the bottom of my sash is rotted, so how do I keep the epoxy in the hole |
| Answer: | Tape over the bottom if you have access to the bottom, but if not try plugging the bottom of the hole with putty or glazing compound |
| Question: | If I am using this to fill wood gaps in wood that is not rotted should I still use wood hardener first? How likely is this epoxy to come loose |
| Answer: | The petrifier can be used to harden rotted wood. You can also remove a lot of the rotted wood if that is possible given the project parameters. If you are filling a large void it is good idea to use some screws to act as rebar for the putty. You install the screws below the surface of the repair and make sure to drive them into good material. Then spread the putty into the hold around the screws when dry the putty will have wrapped around the screws almost like you "screwed" the putty to the surface. Make sure the screws are below the finished surface will allow the putty to hide the screws. |

J-B Weld 8257 KwikWood Wood Repair Epoxy Putty Stick- 3.5 inch, Tan
J-B Weld
Product description
KwikWood is a hand-mixable epoxy putty, formulated to repair and rebuild wood. After mixing, it cures to the same density as wood and becomes an integral part of the repair. For use on exterior or interior applications, it contains no solvents, will not rot, shrink, crack or pull away. KwikWood has a 15-25 minute work life. After 60 minutes, it can be machined, drilled, tapped, sanded, filed and painted. Stronger than wood, KwikWood dries to a light tan color.
- J-B WELD KWIKWOOD: A hand mixable two part epoxy putty stick that is formulated to repair and rebuild wood. J-B Weld KwikWood is designed for all wood household DIY repairs!
- CURE AND SET TIME: After kneading the two part formula together by hand, KwikWood takes 15-25 minutes to set and cures in 1 hour. J-B Weld KwikWood set and cure color is a light tan.
- PRODUCT FEATURES AND STRENGTH: J-B Weld KwikWood has lap shear strength of 900 PSI. KwikWood will not shrink or rot and can be stained, molded, tapped, drilled, sanded and shaped.
- APPLICATIONS: Window/Door Hinge Repairs, Dry Rot Repairs, Gouges and cracks in furniture, knot hole repairs, gap fillers and more!
- DO IT YOURSELF: Big or small, you can DIY it with J-B Weld. Our heavy duty epoxy and adhesives repair & restore it right the first time. J-B Weld delivers superior performance, quality, and results for the World’s Strongest Bond.
User questions & answers
| Question: | Will this product accept wood stain at all |
| Answer: | Yes, but to control the amount of pigment, I have always sealed the filler 1st, and matched the background color of the wood grain, sealed again, then added the actual wood color on top of the 2nd coat of sealer, then sealed again, painted in grain lines and sealed again. Sealer = lacquer, polyurethane, etc. Usually using a spray finish.. |
| Question: | Can kwikwood be used for rotted wood repair? the window sill has rotted area with high moisture content.the product label mentions dry rot |
| Answer: | Yes, but dry rot has to be removed and wood needs to be dried out, for a good base for a stable application...also how large of an area is involved needs to be considered. If larger than 3"x3"×2" deep..I would considered a different filler, a bondo type for wood repair, available at most hardware stores, that's more spreadable...for larger holes. |
| Question: | can this be used to replace the corner of a wooden drawer that is broken off |
| Answer: | Absolutely. I used it to replace a few corners and patch nail holes |
| Question: | Once you open the package do you have to use it all at once or can you reseal it and save it for another day |
| Answer: | I used about 2/3's of a package. Resealed. Used about half of remaining a week later. Resealed. Still seems usable except portion I accidently put in contact. Is binary thick paste, like modeling clay. To activate, must kneed together with fingers quite a bit. Hardens in about 15 minutes. RH |
Product features
Epoxy Putty
KwikWood is a hand-mixable epoxy putty, formulated to repair and rebuild wood. After mixing, it cures to the same density as wood and becomes an integral part of the repair. For use on exterior or interior applications, it contains no solvents, will not rot, shrink, crack or pull away. KwikWood has a 15-25 minute work life. After 60 minutes, it can be machined, drilled, tapped, sanded, filed and painted. Stronger than wood, KwikWood dries to a light tan color.
Additional Attributes
- KwikWood will not shrink or rot.
- KwikWood can absorb stain coloring (color should be tested and matched first).

Clear Table Top Epoxy Resin Coating for Wood Tabletop - 1 Gallon Kit
Pro Marine Supplies
- Designed for Table Tops, Bars, Wood finishes, See-Through Encapsulations, Art work, and other applications
- Self Leveling and High Gloss U.V. Resistant Formula
- Produces a Tough, High Gloss, Water Resistant Coating
- Eliminates Craters, Crawling and Fish Eyes
- Blush Resistant
User questions & answers
| Question: | I ran out in the middle of a project. Next batch wont arrive until after the 12 hour window for multiple coats. Should I just sand before next coat |
| Answer: | Yes, lightly sand to help your next coat adhere better to the last one. |
| Question: | I have wood table that I want to make shine, would this product will give me what I'm looking for |
| Answer: | Yes it will make the table very glossy but it is not an easy process . If you have not worked with epoxy much you will want to practice before you use it on your table. |
| Question: | What are the instructions for installation? Other answer says practice first, but I'm wondering what possible complications might be |
| Answer: | Possible complications we found is not mixing this properly therefore it will not harden. |
| Question: | Is there a recommended maximum depth for this |
| Answer: | 1/8 normal. I have done 2 inch at time but you really need deep pour product for river table. |
Product features
High Gloss & Durable
High performance and Crystal clear! Produces a tough, high gloss, water and scratch resistant coating.
Versatile
Can be used for a wide variety of applications, art, and home projects.
FDA Compliant
FDA Compliant formula for artistic items used around food, such as trays, tumblers, and glassware.
Easy 1:1 Self-Leveling Formula
Use our product with ease, featuring an easy 1:1 self-leveling formula!
Beautiful and Versatile, Crystal Clear Finish...Every Single Time!
Step 1: Measure
Pour equal parts of resin and hardener into a clean mixing container or graduated mixing tubs, using a 1:1 ratio (by volume) It is crucial that the product is measured accurately and mixed thoroughly. Measure 1 part RESIN to 1 part HARDENER by volume. Do NOT vary this ratio. Our Epoxy is formulated to cure at a specific mixing proportion, and any variances can cause the product never fully to cure. We recommend always pouring the HARDENER into your mixing container first, followed by the RESIN. This will help the two components mix thoroughly.
Step 2: Mix
First Mix: Mix with a flat bottom stir stick or spatula being sure to scrape the sides and bottom of the container as you go. Your mixture will appear hazy at first, and then become more transparent as the resin and hardener molecules begin to blend within three to five minutes.
Second Mix: Pour the Resin and Hardener from your first container into a second container scraping all the mixture out from the sides and bottom of the cup. Thoroughly mix for an additional three minutes.
Step 3: Seal Coat Stage
The best way to apply a seal coat is to start on one end of the table and pour the resin all the length of the surface, zigzagging as you go. Then use a foam brush to drag the resin across the entire surface to achieve an even coat. The epoxy cures rather quickly in the container, so it is necessary to paint the seal coat on quickly or mix up a smaller amount so that it does not cure in the container while you are still working on it. The seal coat does not need to be smooth as the flood coat will fill in the brush strokes and irregularities making it crystal clear. Once the entire surface is sealed, wait 4-6 hours to pour the flood coat. Do not exceed 10 hours or you run the risk of the flood coat not blending into the seal coat flawlessly.
Step 4: Flood Coat Stage
Each flood coat self-levels at approximately 1/8” thick. If depths thicker than 1/8” are desired multiple coats are necessary. You must wait at least 4 to 10 hours between flood coats. The epoxy will still be tacky so the next pour will stick to it.
The best way to apply the flood coat is to start on one end and pour the resin the entire length of the surface, zigzagging as you go. After you are finished pouring, set the container down. Do NOT try to scrape anything else out of the bucket. Because you are pouring about three times the amount of product you did with the seal coat, the material will immediately start to flow out.
Step 5: Remove Air Bubbles
Once you have sufficiently covered the entire surface with your flood coat, you will begin the process of popping air bubbles. The best tool for removing bubbles is a small propane torch. Hold the flame approximately 6 to 10 inches away from the table top and quickly sweep across the entire surface using an ironing motion. You will immediately see the bubbles start to pop. Do this until all the bubbles are gone from the surface of your table.
* After pouring your epoxy, it is common for air bubbles to form. Bubbles can continue to develop for up to 60 minutes after the curing process has begun. The most efficient way to get rid of them is to run a blowtorch over the surface sporadically 10 - 15 min at a time.
Step 6: Curing Process
After applying your final coat, the product should be kept in a clean, dust-free environment at a minimum of 75-80° F degrees. The product takes approximately 12-14 hours to dry to the touch. However, the product should not be put into any use for at least three days which will allow it to achieve sufficient hardness to resist scratching. At temperatures below 75 F, the product will take longer to cure and might not cure to complete hardness.

J-B Weld 8251 WoodWeld Quick Setting Wood Epoxy Adhesive - 1.52 oz.
J-B Weld
Product description
J-B Wood Weld is a fast setting two-part epoxy system formulated for wood bonding and repairs. When fully cured it can be shaped, tapped, filed, sanded and drilled. It provides a lasting permanent bond that is stronger than the wood! J-B Wood Weld has a 1: 1 mixing ratio, sets in 6 minutes and cures in 1-3 hours. Rated at a tensile strength of 1800 PSI, J-B Wood Weld cures to a light tan colour.
- J-B Weld Woodweld: a fast setting two-part epoxy system formulated for wood bonding and repairs. WoodWeld provides permanent and lasting bonds that are stronger than wood! Perfect for all indoor/outdoor wood DIY repair projects
- Cure and set time: after mixing the tubes at a 1:1 ratio, it takes 6 minutes to set and 1-3 hours to cure. Once cured, WoodWeld can be painted, tapped, filled, sanded, molded and drilled. WoodWeld’s set and cure color is light tan
- Versatile and depedable: J-B Weld WoodWeld has a tensile strength of 1800 PSI. The product will not shrink or foam allowing it to be used as a structural adhesive or filler. No clamping necessary due to the short set time
- Applications: indoor or outdoor projects, furniture, doors, windows, trim, molding, decks, wood restoration projects, rotting wood repair, and more
- Do it yourself: big or small, you can DIY it with J-B Weld. Our heavy duty epoxy and adhesives repair & restore it right the first time. J-B Weld delivers superior performance, quality, and results for the World’s Strongest Bond
User questions & answers
| Question: | Can the mixed epoxy be injected with a syringe to ensure it fills a deep screw hole? Need to make sure the hole is filled in order to drill a new hole |
| Answer: | You can certainly try. I am not sure it will be thin enough to fit in a syringe. I would use the original JB Weld (8265S) rather than the Wood Weld. It can be drilled and tapped and is the strongest product we have. Thanks JB Weld support |
| Question: | Can I use this to repair chair legs that my dog chewed ver badly or should I use regular wood filler |
| Answer: | This is much stronger than wood filler, you can only work with a little at a time though, it dries very quickly so I suppose it depends how many repairs you need to make. I would probably still use J-B Weld, the finished repairs will be much stronger. Don't know what sort of finish you want to use afterwards that would be a factor too. If you are painting over the repairs it will be great for that. |
| Question: | can one drill and srew into it |
| Answer: | Yes, but I would always drill a pilot hole before screwing in a wood or sheet metal screw, |
| Question: | What is highest temperature a cured joint can withstand |
| Answer: | It's made for wood, so if wood burns then that is the highest temperature it can withstand. |
Product features
Quick Setting Epoxy
WoodWeld is a fast setting two-part epoxy system formulated for wood bonding and repairs. When fully cured it can be shaped, tapped, filed, sanded and drilled. It provides a lasting permanent bond that is stronger than wood! WoodWeld has a 1:1 mixing ratio, sets in 6 minutes and cures in 1-3 hours. Rated at a tensile strength of 1800 PSI, WoodWeld will cure to a light tan color.
Additional Attributes
- WoodWeld will not shrink or foam allowing it to be used as a structural adhesive or as a filler.
- 6 minute set time eliminates the need for clamping.
- WoodWeld can be used on wood repairs inside or outside!
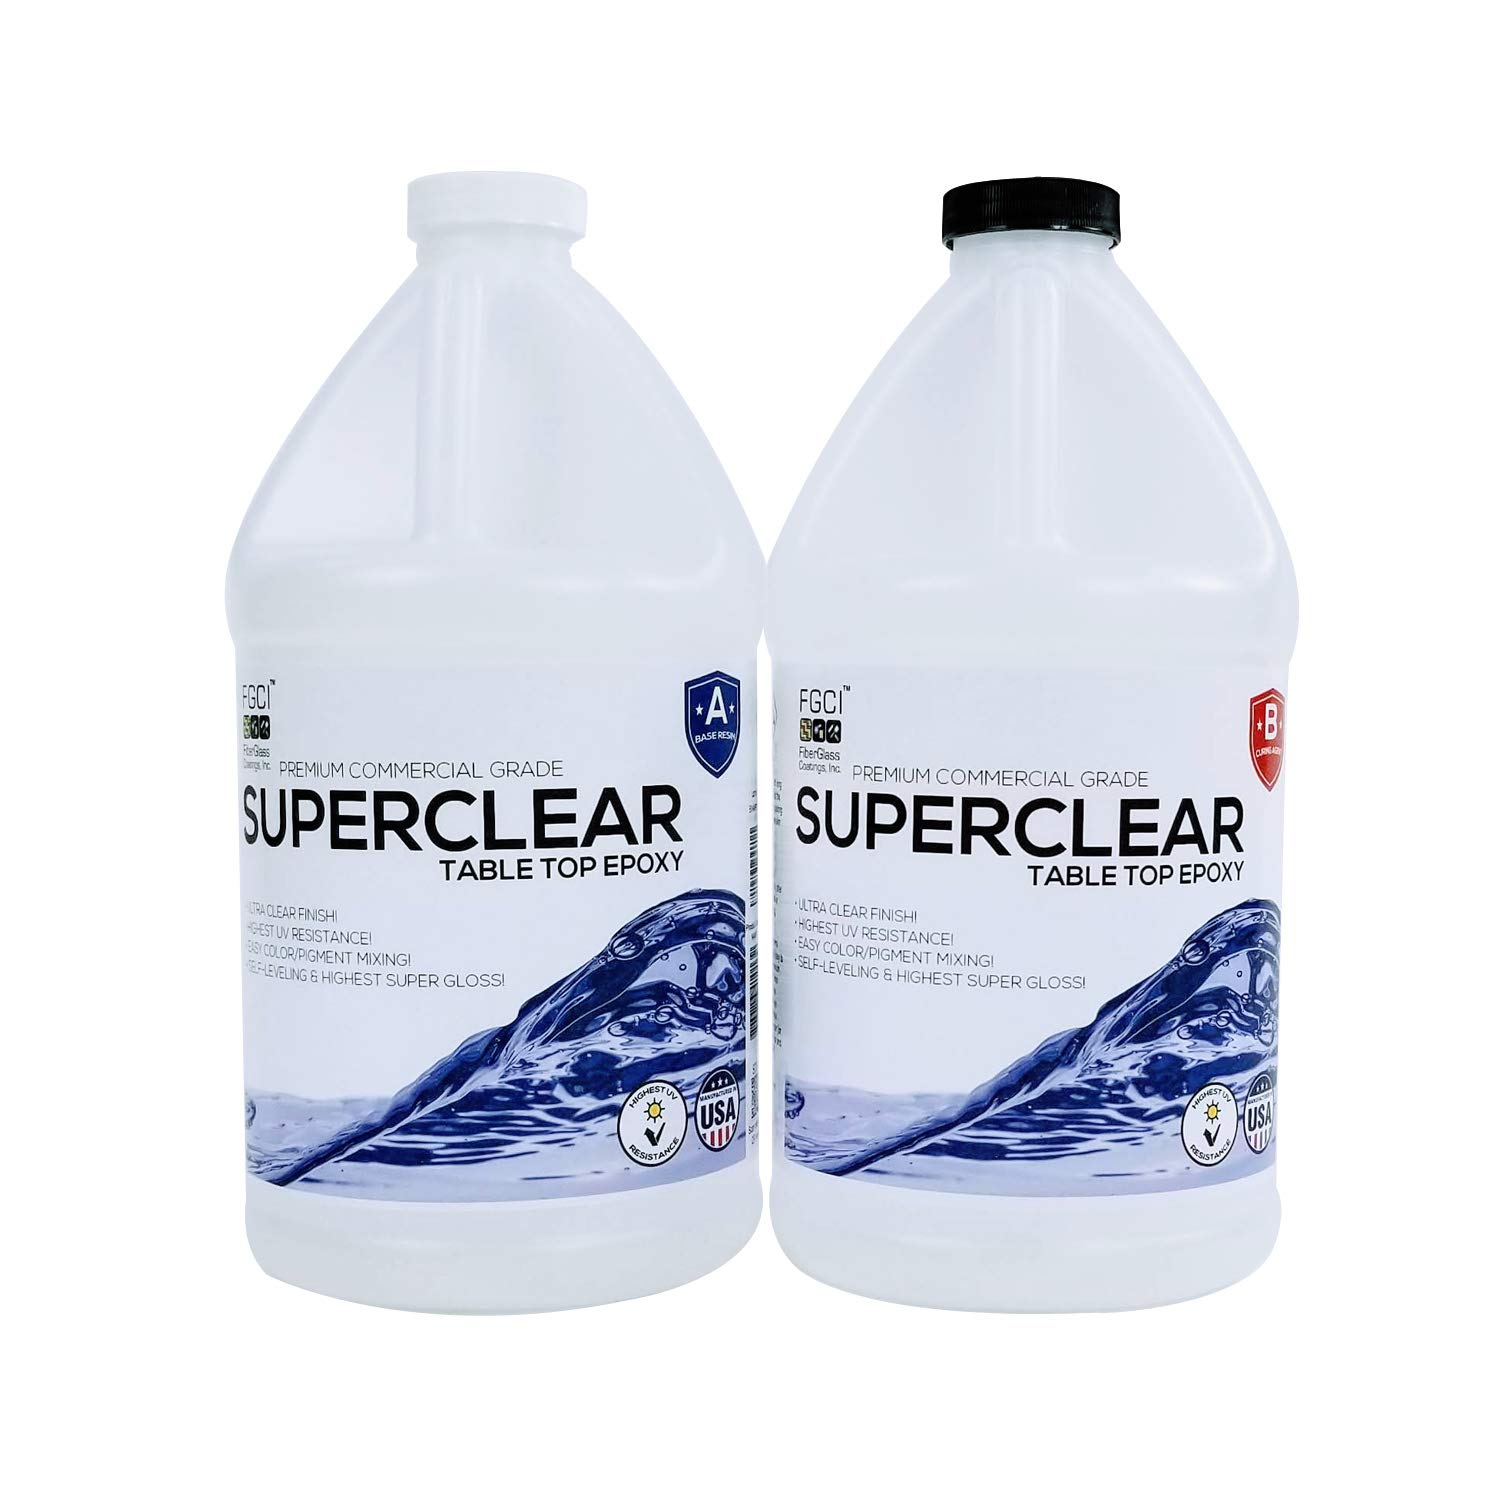
Superclear Premium Amazing Clear Cast Epoxy Pourable Resin, Food Safe Epoxy for Wood Tables, Concrete Countertop Sealers, Orgone Supplies, Epoxy Resin Molds - 1 Gallon, 2 Part Epoxy Resin Kit
FGCI
- 👍 FORMULATED for River Tables, Live Edge Table,s Countertops and Bar tops! The PERFECT Art Resin for using with Pigment Powder, Mica Powder, Alcohol Ink, Resin Dyes and Resin Tints!
- 👍 SELF-LEVELING & HIGHEST SUPER GLOSS! CLEAR, EASY TO CLEAN, SCRATCH & WATER RESISTANT!
- 👍 HIGHEST UV RESISTANCE! PERFECT Epoxy Resin Color Pigment Mixing Every time!
- 👍 DIY EPOXY KIT MIXER INCLUDES: Clear Epoxy Resin And Hardener!
- 👍 We Are the Original Manufacturer, and We've Been in this Business for over 60 years! 100%MADE IN THE USA!
User questions & answers
| Question: | Hows this for knife scales and pen blocks |
| Answer: | Awesome |
| Question: | What is the work time allowance before it becomes gelled |
| Answer: | It will greatly depend on the ambient temperature, but at 77 degrees, you will get about 25 minutes of working time before it starts to gel. |
| Question: | How do i add colour to this? And what primer do you recommend |
| Answer: | We sell pigment you can add to this product. This product also works great with Mica Powder and Alcohol-based Dye. As far as primer goes, you shouldn't really need a primer before applying this product. |
| Question: | Can this be poured on acrylic paint? If yes how long should the paint cure before application |
| Answer: | You can pour it over Acrylic Paint, but you want to wait a minimum of 48 hours for the paint to dry, before doing so. |
Product features
About Super Epoxy Systems (Superclear, Liquid Glass)
We are the Original Premier Manufacturer of Epoxy Resins manufactured in the USA, right here in Saint Petersburg, Florida, and have been manufacturing resins, putties and adhesives for over 50 years! We only use high grade premium ingredients and UV additives within our epoxies to give you an unparalleled final result! You’re in good hands with us!
We are completely dedicated to providing you with the highest grade products, service and we are always available for technical support, or touch base with us on Instagram!
Mirror-Like Crystal Clear Finish
Our Superclear Epoxy resin kit is a two part epoxy, pourable, self-leveling and is scratch and water resistant, leaving you with THE HIGHEST SUPER WET GLOSS finish with unparalleled depth and clarity. Superclear is formulated to use within all coating and step casting applications such as: Coffee Tables, Step Pour River Tables, Side Tables, Bar Tops, Countertops, Small Void Filling Live-Edge Tables, Step Casting Art, and Even Small Jewelry Castings! If you have a large project, make sure to mix up no more than a Half Gallon at a time. This product is mass dependent, meaning the more you mix, the hotter it gets, the quicker it cures, and the less working time you will have.
High-Grade UV Resistance
All epoxies will turn yellow overtime. What makes our Superclear Epoxy resin crystal clear kit different is our specific high-grade additive formulation. Ours will yellow less and remain ultra-crystal-clear over a longer period of time than any of our competitors. Our products are made for you, and made to last, bar none.
Integrate Color With Ease
Perfectly suited for accepting and dispersing mica powder pigments, liquid pigments and alcohol inks and dyes! Liquid Glass is the ideal epoxy for evenly distributing color and suspending inks and powders. *Paint, acrylic paint and oil based paint are not recommended to use with epoxy, and can have negative results.
Is It Food Safe?
To consider a product food safe, the end product must be tested. Since every project is made by a different artisan and not in the same exact way, and our product comes in two parts that must be mixed, every finished piece must be tested. Once Super Clear Table Top Epoxy has cured, it becomes safe, per FDA code, 21CFR175.300 which states "Resinous and polymeric coatings may be safely used as the food-contact surface of articles intended for use in producing, manufacturing, packing, processing, preparing, treating, packaging, transporting, or holding food" and can be used as a "functional barrier between the food and the substrate" and "intended for repeated food-contact and use.”
100% MADE IN THE GOOD OLD U.S.A.
It is amazing to be able to provide a high quality product to professional and DIY makers, but more importantly, make it in America. We are honored everyday, not only be a part of the maker community, but also have the opportunity to form friendships with those makers and be fortunate enough to help them with their business.
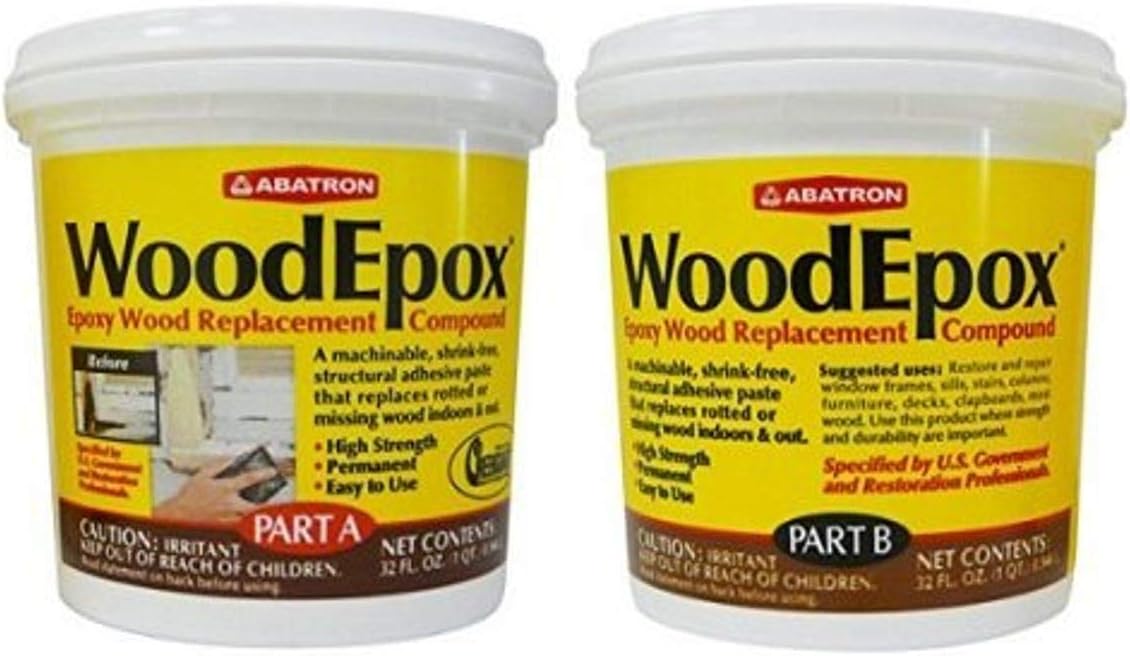
Abatron WoodEpox Epoxy Wood Replacement Compound, 2 Quart Kit, Part A & B
Abatron
Product description
Abatron wooden epoxy wood replacement compound, 2 quart kit, part a & B
- Rotted Wood Restoration
- Fills and Rebuilds Missing Sections of Wood
- 100% Solids and Shrink-Free
- Easy to Sand and Paint
User questions & answers
| Question: | Will it stick to anything |
| Answer: | It appears to stick to any clean surface. Have not found a surface that presented a problem. |
| Question: | Will this destroy styrofoam insulation |
| Answer: | You should call the manufacturer to be sure. I doubt the wood epox would harm Styrofoam. Not sure about the liquid. |
| Question: | I’m repairing a bench that’s carved bears. we unfortunately left it outside in a building. the feet on one was rotted. can that be fixed with this pro |
| Answer: | Absolutely. Knowing to remove all spongy or rotted wood. If not possible use the consolidator which essentially solidifies the remnants. Then apply the two part product. I have had good success with their products. Good luck - the bears need some new feet. |
| Question: | What is the typical shelf life of this product?Can it be stored in a shop where it will freeze now & then and remain useful |
| Answer: | I've used this stuff for a lot of years. And I have had stuff on the shelf after opening it for many years and it's still good. Absolutely amazing! I say if it's kept cool and dry it could easily last 4 to 5 years After opening. |
| Question: | Would this product be a suitable substitute for Mr. Mac's Wood Repair? Can it be mixed to any consistency |
| Answer: | WoodEpox is an epoxy based solids system. The mix ratio is fixed at 1:1 (approximately) by volume. When the two components are properly blended together the putty appears light brown -- the hardener is white and the other component is brown. Not familiar with Macs Wood Repair. |
| Question: | I read that you can add stain to the mixture to change the color. Is this true? If so, will it change the consistency so it won’t harden properly |
| Answer: | I use this all the time. To my knowledge I've never hear or read that you could add stain to the mix. I do know you can paint or stain it when it is dried and the repair is completed. It can also be sanded, planed, sawed, nailed and stained or painted. |
| Question: | Can this material be drilled and have a screw placed |
| Answer: | Yes it can, but drill a pilot hole for the screw. Another option if filling a screw hole (because the hole became too large) is to almost fill the hole with the compound, coat the screw with a light coat of petroleum jelly and insert it through a hole in a thin piece of wood or metal that also has a light coat of petroleum jelly on the bottom, and then press the screw into the compound. The wood/metal keeps the compound in the hole and compressed against the screw threads. The petroleum jelly keeps the compound from adhering to the screw and wood/metal strip. After the compound has setup, remove the screw and you have perfect screw threads for the replacement screw. |
| Question: | can this be used to fill knot holes in syp pressure treated decks and docks |
| Answer: | Basic: Yes. I would clean the hole with lacquer thinner first. Let it dry then fill. I've used it for repairing an area on a dock that held a fitting. Once filled and cured, I was able to drill and tap it to hold screws. Stuff's incred! |
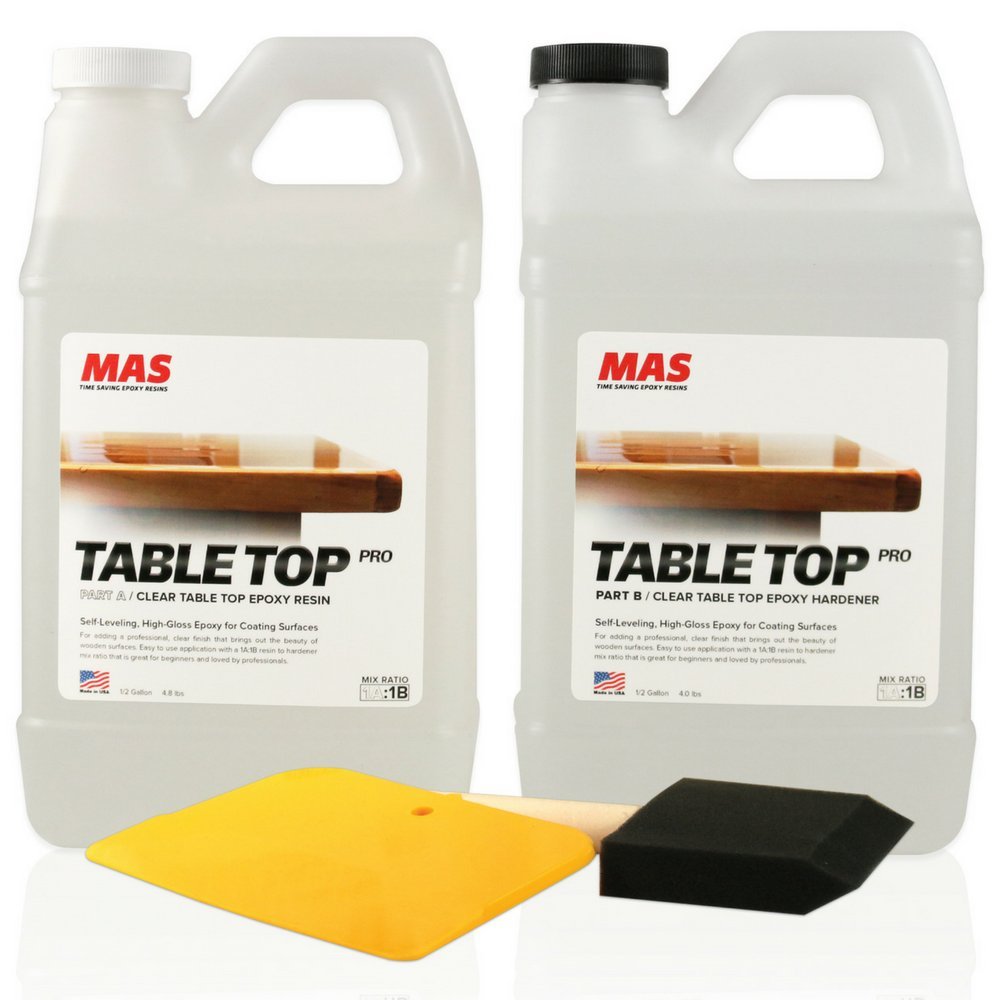
Crystal Clear Epoxy Resin One Gallon Kit | MAS Table Top Pro Epoxy Resin & Hardener | Two Part Kit for Wood Tabletop, Bar Top, & Resin Art | Set Includes Spreader & Brush | Professional Grade Coating
MAS
- PROFESSIONAL GRADE EPOXY RESIN: Our epoxies are trusted by professionals and hobbyists alike. We pride ourselves on creating epoxy resins that are strong, dependable, and easy to use. TableTop Pro is ultra-clear, self-leveling, and a beautiful high-gloss epoxy resin coating. You'll appreciate the quality and consistency of our product.
- QUALITY YOU CAN TRUST: For over 25 years, MAS Epoxies has taken pride in manufacturing the highest-quality epoxy products available. We proudly manufacture our epoxy resin from start-to-finish in the USA.
- EPOXY RESIN KIT INCLUDES SPREADER & BRUSH: Our 1:1 kit includes 1/2 gallon of Part A (resin), half gallon of Part B (hardener), a 4" spreader, and a 4" brush. Kit makes a great gift for the DIY person in your life!
- NUMEROUS POTENTIAL APPLICATIONS: Our epoxy resin kit works great for a variety of projects. Tabletop, bartop, resin art, and much more! Enjoy a stunning, glass-like clear finish on almost any surface.
- EASY TO APPLY: Application instructions will accompany your purchase to help make your project a success. You can also watch our instructional video which will walk you through how to apply to a table top.
User questions & answers
| Question: | can you use this on a vertical suface |
| Answer: | I had luck doing a vertical pour on a penny backsplash in my kitchen. I would recommend many small pours and focus on about a 3x3 area at a time. It was a gamble but it turned out great and wipes down fabulously |
| Question: | What is the cure time |
| Answer: | For a seal coat, I waited about 3 days before I added additional layers. The last pour was about 1/4 - 3/8 inch and I let it set a week before doing anything with it. The epoxy was hard within a day or so, but I don't know if it would be cured all the way through. |
| Question: | After the resin is mixed, how much working time does it have |
| Answer: | Thanks for the question. There is approximately a 30 minute gel time at 77F. To be safe I'd assume about 20-25 minute pot life depending how much you mixed up. If you mixed a lot of epoxy together it would be a bit quicker; it would also be quicker if the working temperature was over 80F. I hope that helps. Let us know any other questions! |
| Question: | Will this work for a 2” cork table |
| Answer: | Yes, it will work for a cork table. Make sure the corks are secured to the bottom surface otherwise the corks will float. You may need to tend to it with a heat gun as air bubbles will continue to rise up to the surface due to the gaps in the corks and epoxy filling in underneath. We recommend checking on it every 15 minutes at 70 F within the first hour of pouring to release air bubbles. Hope that helps! |
Product features
America's Trusted Epoxy Resin Brand For Over 25 Years | Thank You For Supporting Our Small Business & American Manufacturing!
Thank you for your interest in MAS epoxy resin! We are a family owned small business with a passion for manufacturing high-quality epoxy resin.
For nearly three decades we've worked hard to give our resin users the best product and service available anywhere. Our epoxies are known to be beginner friendly but also trusted by professionals. With Table Top Pro from MAS you'll get great results every time for your tabletop, bartop, or resin art project.
We sincerely appreciate your support of our small business and are excited to see what you create!
Why MAS Epoxy Resin?
- AMERICA'S TRUSTED EPOXY RESIN BRAND FOR OVER 25 YEARS: Our nearly three decades of epoxy experience helps us manufacture awesome resin so you can have a great project.
- INCREDIBLE RESULTS: You'll love the results you get from Table Top Pro. We've served thousands of happy buyers over the years. Check out #masepoxies on IG for some phenomenal photos from MAS users!
- AMAZING VERSATILITY: You can use Table Top Pro for bartops, tabletops, resin art, and much more. Table Top Pro is extraordinarily versatile and suitable for a variety of applications.
- BEGINNER FRIENDLY | TRUSTED BY PROS: We are privileged to have numerous incredibly talented professionals and artists that trust MAS epoxy resin for their projects. We also have many new users that join the MAS family as they get started with epoxy resin. No matter your epoxy experience you'll get great results with MAS.
- THANK YOU FOR SUPPORTING SMALL BUSINESSES & AMERICAN MANUFACTURING: Made in the USA! Your purchase supports American manufacturing and our hard working workforce. We sincerely thank you for the support.
- WE'RE HERE FOR YOU! We want you to have an awesome project! Our user guide answers most questions but if you need anything we're here to help you have an amazing project.
Wipe Surface Clean
- Detailed instructions accompany your purchase to help you get great results: After you place your order you'll receive a detailed user guide (if you've opted out of seller communications just shoot us a note and we'll send to you). This helpful guide will walk you through how to use our epoxy.
- Preparation: Step one is preparing the surface for a seal coat. You want to remove any dirt, dust, or contaminants.
Mix & Pour Your Epoxy
- Flood Coat: After cleaning the surface and applying a thin seal coat, it's time for your flood coat.
- Max thickness: Each flood coat pour should be no more than 1/8” thick. You can achieve thicker results with 'step pouring'.
Use Included Accessories To Spread
- Self-leveling: Our epoxy is self-leveling but many users like using the included accessories to help evenly spread the epoxy across the surface.
- Accessories included: For your convenience we include a 4" spreader and a 4" brush in each kit.
Apply Heat To Remove Bubbles
- Zap those bubbles!: Heat is very effective at eliminating bubbles. You can use use a heat gun or butane torch to help eliminate bubbles.
- User Guide: Again, all application steps will be explained in more detail in our user guide to help you have a great project!

Crystal Clear Bar Table Top Epoxy Resin Coating for Wood Tabletop - 1 Gallon Kit
Pro Marine Supplies Inc.
User questions & answers
| Question: | will sealing bare wood surface prevent bubbles forming |
| Answer: | The product should be applied in two stages. The first stage is referred to as the seal coat. The seal coat is a small batch of epoxy that is brushed on in a thin layer to seal any pores in the surface and prevent air bubbles from forming in the following flood coat. Our epoxy is used for both your seal coat and your flood coat. |
| Question: | Is this FDA compliant |
| Answer: | Yes, here is the response from promarine supplies "Although we do not have FDA approval certificate, our epoxy does comply with FDA Compliant Coating for Direct and Indirect Food Contact. Our Epoxy is VOC-Free and user-friendly. Once the epoxy is cured, it is an inert plastic that is non-harmful or hazardous." I have also shared some information from our websites in the link below. https://promarinesupplies.zendesk.com/hc/en-us/articles/115001444873-Is-Pro-Marine-Clear-Table-Top-Epoxy-FDA-Compliant-or-Food-Safe- https://www.promarinesupplies.com/www.promarinesupplies.com/blogis-pro-marine-supplies-epoxy-food-safe/ |
| Question: | Will this work over Minwax polyurethane (oil based). i see it wont react well with oil based stain so i applied poly over the stain. thoughts |
| Answer: | epoxy can go over them in about 24 hours. OIL BASED paints take a LONG time to fully dry. If an oil-based paint is used, you must apply 3 coats of oil-based polyurethane to seal the surface before applying a seal coat of our UltraClear epoxy. If you go directly over the oil-based paint and it is not completely dry, you run the risk of the epoxy not sticking to the surface and peeling off months later. |
| Question: | how many square feet does it cover |
| Answer: | it depends on how thick you put it. First time I used it, 1 gallon for 80 square feet. second time I used 5 oz thinner to 1/2 gallon and covered 80 square feet.it all depends how thick you spread it. |
Product features
High Gloss & Durable
High performance and Crystal clear! Produces a tough, high gloss, water and scratch resistant coating.
Versatile
Can be used for a wide variety of applications, art, and home projects.
Food Safe
Food Safe formula for artistic items used around food, such as trays, tumblers, and glassware.
Easy 1:1 Self Leveling Formula
Use our product with ease, featuring an easy 1:1 self-leveling formula!
Beautiful and Versatile, Crystal Clear Finish...Every Single Time!
Step 1: Measure
Pour equal parts of resin and hardener into a clean mixing container or graduated mixing tubs, using a 1:1 ratio (by volume) It is crucial that the product is measured accurately and mixed thoroughly. Measure 1 part RESIN to 1 part HARDENER by volume. Do NOT vary this ratio. Our Epoxy is formulated to cure at a specific mixing proportion, and any variances can cause the product never fully to cure. We recommend always pouring the HARDENER into your mixing container first, followed by the RESIN. This will help the two components mix thoroughly.
Step 2: Mix
First Mix: Mix with a flat bottom stir stick or spatula being sure to scrape the sides and bottom of the container as you go. Your mixture will appear hazy at first, and then become more transparent as the resin and hardener molecules begin to blend within three to five minutes.
Second Mix: Pour the Resin and Hardener from your first container into a second container scraping all the mixture out from the sides and bottom of the cup. Thoroughly mix for an additional three minutes.
Step 3: Seal Coat Stage
The best way to apply a seal coat is to start on one end of the table and pour the resin all the length of the surface, zigzagging as you go. Then use a foam brush to drag the resin across the entire surface to achieve an even coat. The epoxy cures rather quickly in the container, so it is necessary to paint the seal coat on quickly or mix up a smaller amount so that it does not cure in the container while you are still working on it. The seal coat does not need to be smooth as the flood coat will fill in the brush strokes and irregularities making it crystal clear. Once the entire surface is sealed, wait 4-6 hours to pour the flood coat. Do not exceed 10 hours or you run the risk of the flood coat not blending into the seal coat flawlessly.
Step 4: Flood Coat Stage
Each flood coat self-levels at approximately 1/8” thick. If depths thicker than 1/8” are desired multiple coats are necessary. You must wait at least 4 to 10 hours between flood coats. The epoxy will still be tacky so the next pour will stick to it.
The best way to apply the flood coat is to start on one end and pour the resin the entire length of the surface, zigzagging as you go. After you are finished pouring, set the container down. Do NOT try to scrape anything else out of the bucket. Because you are pouring about three times the amount of product you did with the seal coat, the material will immediately start to flow out.
Step 5: Remove Air Bubbles
Once you have sufficiently covered the entire surface with your flood coat, you will begin the process of popping air bubbles. The best tool for removing bubbles is a small propane torch. Hold the flame approximately 6 to 10 inches away from the table top and quickly sweep across the entire surface using an ironing motion. You will immediately see the bubbles start to pop. Do this until all the bubbles are gone from the surface of your table.
* After pouring your epoxy, it is common for air bubbles to form. Bubbles can continue to develop for up to 60 minutes after the curing process has begun. The most efficient way to get rid of them is to run a blowtorch over the surface sporadically 10 - 15 min at a time.
Step 6: Curing Process
After applying your final coat, the product should be kept in a clean, dust-free environment at a minimum of 75-80° F degrees. The product takes approximately 12-14 hours to dry to the touch. However, the product should not be put into any use for at least three days which will allow it to achieve sufficient hardness to resist scratching. At temperatures below 75 F, the product will take longer to cure and might not cure to complete hardness.

Clear Table Top Epoxy Resin Coating for Wood Tabletop - 1 Gallon Kit
Product description
Premium epoxy resin sold by The Epoxy Resin Store, USA. We have been in business for 20 years. We are the manufacturer of this product and not a reseller. We manufacture, label, package and ship all in house. Your resin will ship from lake Elsinore, CA. This resin is a 1 gallon kit. These are each half gallons with a combined weight of 8 pounds. You will receive 1 half gallon of resin and 1 half gallon of hardener. The resin is a premium quality 100% solid with no cheap additives. This resin can be used for coatings and small castings. Ideal applications are jewelry making, wood working, crafts, arts, coatings of concrete, wood, and stone. The mix ratio on our resin is 1:1 by volume (1 cup to 1 cup). Fully cures in 24 hours and cures to a shiny rock hard finish. Please note: This resin's worktime is 30-45 minutes and full cure is 24 hours. Mass, and room temperature will affect curing. We ship item within 1 business day. We ship UPS ground and the item will arrive within 5 business days. Your item will arrive in a secured box. You should receive 1 bottle resin, 1 bottle hardener. Bottles are sealed with a foil insert to prevent leaks. bottles are sealed with a safety tape and bagged in zip lock bags. We do our best to avoid spills and damages. In the event that you receive a damaged item, Please reach out to our customer support and we will take care of your concern within 24 hours. we appreciate the opportunity to serve you
- CURES CLEAR
- FAST CURE 24 HOURS
- HIGH GLOSSY FINISH
- NON TOXIC
- EXCELLENT QUALITY
User questions & answers
| Question: | I do a lot of resin casting in molds for my online business. Will this work for decorative mold crafts? The price is amazing if it does |
| Answer: | Yes, it will work on decorative mold crafts. |
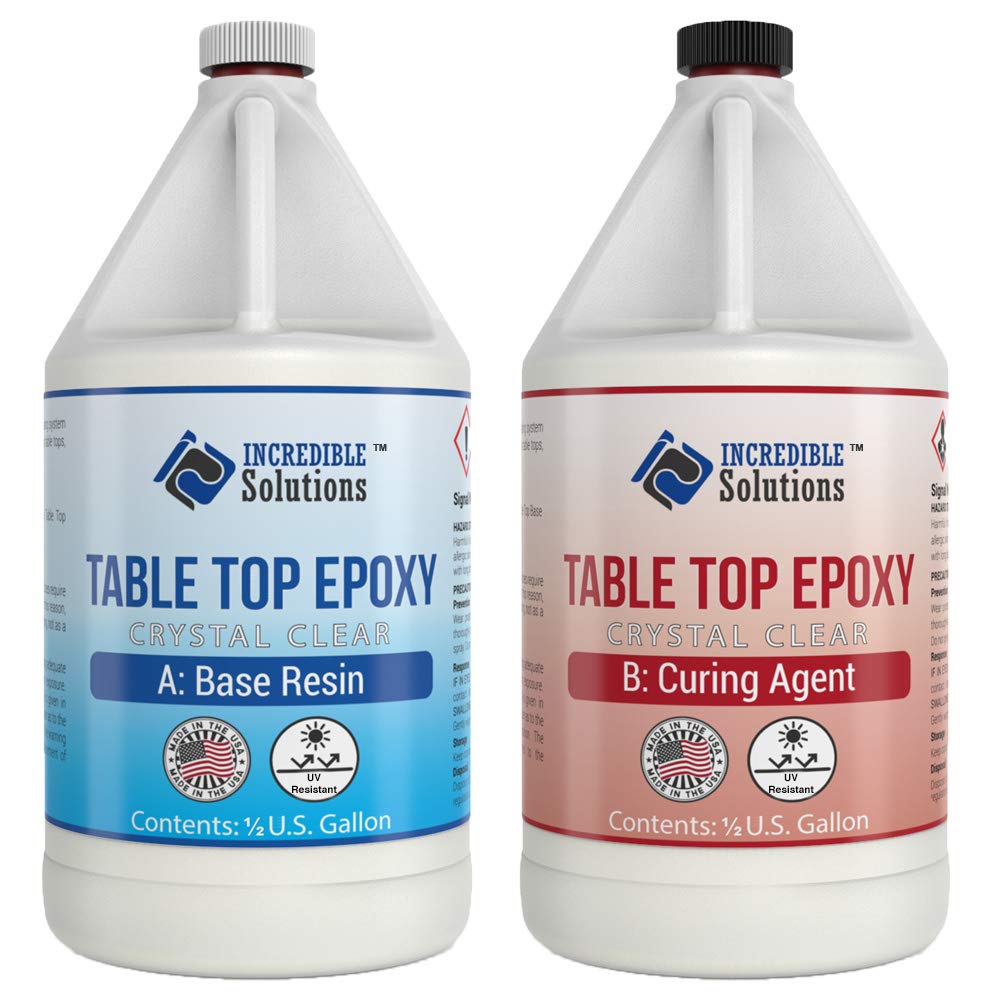
Table Top & Bar Top Epoxy Resin, Ultra Clear UV Resistant Finish, 1-Gallon Kit, Self Leveling, Perfect for DIY Epoxy Counter Tops, Tabletops & Bars (Table Top)
Incredible Solutions
- ✔ CRYSTAL CLEAR - Our Table Top Epoxy cures ultra clear making it perfect for table tops, bar tops, and countertops
- ✔ UV RESISTANT - Unlike many other epoxies, our epoxy resist yellowing caused from exposure to Ultra Violet Light Sources
- ✔ SELF LEVELING - Bar Top Epoxy self levels on application including corners, over bar rails and edges.
- ✔ HIGH GLOSS DURABLE FINISH - Epoxy resin leaves durable, blemish resistant, water resistant and impact resistant coating
- ✔ 100% SOLIDS - Low Odor, ZERO VOC, consistent thickness, quick curing 1 to 1 mixture, 1 Gallon Kit
User questions & answers
| Question: | Is it required to use a ventilator mask when using? and is this Resin food safe |
| Answer: | It is not required. However, you should use the epoxy in a well-ventilated area. It is possible to be food safe. However, because the customer is mixing/pouring we cannot say this is food safe. Each mixture/application would have to be assessed individually. |
| Question: | Id like to dye the epoxy different shades of green but I need it to stay transparent. Any suggestions |
| Answer: | There are various dyes and pigments to choose from. It really depends on how deep of a green you'd like while maintaining transparency. I would suggest trying multiple on a sample area so that you can gauge the color/transparency of the pigment/dye. |
| Question: | I have stained my bar top with an oil based stain. Can I use the epoxy over it or do I need to do some other prep |
| Answer: | You can use a water-based clear coat on top of the stain. After the clear coat has cured, use a 320grit sand paper to take the shine off. You can then apply the table top epoxy. |
| Question: | What’s the diameter of the cap? I want to buy pumps to fit, thanks |
| Answer: | The cap is 1.5 inches in diameter. Let us know if you have any other questions. Thanks! |
| Question: | How much does it discover ( sq feet |
| Answer: | Covers apx 750 sq inches. |
| Question: | I have a heavy marble table, the bottom mount under the top broke off, would it be strong enough for this application |
| Answer: | I got a job to put together a 13 foot marble altar, weighing several tons. I used this stuff to glue the hundreds of marble pieces together, after testing the bond strength, and it's still standing today. Granted there isn't any real strain on the joints in most places, but the bond is stronger than the marble itself. This is good stuff. |
| Question: | Can it fix on the cracks of corina counter top |
| Answer: | Hi Chris,It is great for crack repair as long as the crack is wide enough to be able to get the material down in it. A good rule of thumb is that crack needs to be wide enough to get a credit card wedged between. Good luck! |
| Question: | What type of colorant can be used with the product - is the resin considered a polyester resin. The product details are not very precise |
| Answer: | For coloring the resin I have used Custom 4 Coloring Kit for Epoxy Gluing or Repairing of Granite,...Sold by: GRANITE POLISHING PADSYou can order this item from amazon. The dye is very efficient and seems to work very well with the resin. Yes this epoxy appears to be some sort of polyester. As soon as u add the hardener the epoxy hardens fast but it gives you enough time work with. My results were very good although didn't polished it yet. Good luck |
Product features
Crystal Clear Finish
High gloss, ultra clear finish makes our epoxy perfect for Table Tops, Bars Tops, Coffee Tables, Live Edge Tables and other coating applications. However, epoxy is not flexible. River tables must be supported to prevent flexing which could cause cracking.
*Do not pour over oil-based paint or stain.
Common Question: My project is painted or stained with an oil based product, what can I do?
A: You can apply a water based clear coat (must be water based). Once the water based clear coat has fully cured, you can apply the epoxy. If the clear coat leaves a shine/gloss you may want to scuff the surface to ensure the epoxy properly sticks. We recommend using 320 grit sandpaper. If you do sand, be sure to thoroughly clean the surface prior to applying the epoxy. We recommend using Isopropyl Alcohol 99% (be sure it is 99%) to clean.
UV Resistant
Although most epoxies will yellow over time, some resist yellowing caused by exposure to ultraviolet light better than others. Our epoxy contains UV Inhibitors which helps to resist yellowing. *Although our epoxy is UV resistant, which resists yellowing, we do not recommend leaving finished projects in direct sunlight or for permanent outdoor applications.
Common Question: Can I use this on a table that will be outside on a covered patio?
A: It is possible to leave the epoxy outdoors if not exposed to direct UV exposure. If the epoxy is exposed to direct UV, the epoxy can yellow. This will be more noticeable on white or lightly colored substrates/surface. We recommend exercising caution when considering use over white or light-colored surfaces.
It is also important to consider temperature fluctuations. Materials such as metal and glass can expand and contract at a different rate from the epoxy. This could cause glass to crack or the epoxy to peel away from a metal surface.
Food Safe Epoxy
Properly cured epoxy is possible to be food safe. However, because the customer is mixing/pouring we cannot say this is food safe approved. Each mixture/application would have to be assessed individually. This is not a high heat epoxy. We recommend using hot pads/coasters for coffee mugs, hot pans, pots, etc.
Common Question: Can I use this epoxy to make tumblers?
A: We have many customers using our epoxy for custom tumbler designs. However, this epoxy self levels. Therefore, many customers utilize a "cuptisserie" which is a rotating device that keeps the tumbler rotating while the epoxy is curing so that the finish is even.
Again, keep in mind: Properly cured epoxy is possible to be food safe. However, because the customer is mixing/pouring we cannot say this is food safe approved. Each mixture/application would have to be assessed individually.
Colored Epoxy Compatible
How To Color Epoxy: Our epoxy mixes well with mica pigment powders for colored epoxy applications. River tables, resin art canvas and more may require tinted epoxy. Epoxy is not meant to be mixed with or poured over oil-based products. Do not pour over oil-based paint or stain.
Common Question: What type of pigment or dye should I use with this epoxy.
A: We do not recommend mixing epoxy with paint or anything oil based. Many of our customers use mica pigment powders. Mica pigment powders come in many different colors, glitters, metallics, and even glow in the dark.
Q: How Much Pigment Powder Should I Use?
A: This is a subjective answer as it depends on the certain hue and level of opacity desired. We suggest starting with a very small amount and adding more until the desired color is achieved. We also always suggest testing a small scrap piece of material to understand how the epoxy will flow and how the color will cure in the epoxy.
Easy To Use 1:1 By Volume Mixture
Self Leveling, Impact Resistant, Superior Air Release
Popular uses include wooden bar tops, river tables, embedding pictures or embedding solid objects into a desired surface. Because our epoxy cures crystal clear, multiple layers will not compromise color/transparency. Each poured layer should not exceed 1/4" at a time. Working Time: 25 (+/-5 Minutes)
How Much Epoxy Do I Need?
Our rule of thumb regarding coverage is 12 sqft per mixed gallon at 1/8 inch.
Family Owned Business, Made In USA
VARIETY OF APPLICATIONS
For Uses On
- Wood
- Concrete
- Bottle Caps
- Artwork
- Canvas
Common Question: Can I apply epoxy over paper products like photographs, cigar wrappers, playing cards, and more?
A: If you wish to apply paper decals, bottle caps, or other objects under the Table Top surface, those objects need to be bonded to the surface with craft glue or a thin layer of Table Top Epoxy. Paper products must be sealed prior to applying any epoxy as the epoxy could soak in and ruin the paper product.
You can use something like mod podge or a similar water based clear coat/glue. Allow this seal coat to dry thoroughly before applying epoxy. For figurines, shells, and other large more three-dimensional items, using a thin epoxy seal coat is best, prior to encapsulating.
HIGH GLOSS FINISH
Epoxy resin leaves durable, blemish resistant, water resistant and impact resistant coating.
The beauty of epoxy is the ability to recoat a surface after years of use to regain a smooth, high gloss finish.
Common Question: I see that your epoxy requires thin pours of no more than 1/4" per application. How long do I need to wait between pouring a new layer?
You can apply the second coat when the prior coat is tacky to the touch (usually 4-6 hours depending on temperature). If you wait longer than 12 hours between coats, we recommend a light sanding. You can use 320 grit to scuff the surface. This will help the next coat to properly stick. If you do sand, be sure to thoroughly clean the surface prior to pouring the flood coat. We recommend using Isopropyl Alcohol 99% (make sure it is 99%) to clean.
TOP QUALITY
Incredible Solutions Table Top Epoxy is proudly MADE IN THE USA.
Competent Knowledge Base helps plan and troubleshoot even the most complicated projects.
Common Question: Does your epoxy require specific temperature environment to mix/pour epoxy?
A: The ideal working temperature is around 77°F. Best results can be obtained at temperatures between 75°F and 85°F, in a clean, dry, dust-free environment. Avoid working in high humidity. It is important you keep your project in this environment throughout the entire curing process. We recommend using this product on a leveled and flat work surface so that it can flow and self-level properly.

DR CRAFTY Clear Epoxy Resin Crystal Clear Art Resin Epoxy Clear 2 Part Epoxy Casting Resin Kit 1 Gallon Countertop Epoxy Wood Epoxy Resin Kit with Bonus Measuring Cups, Plastic Spreader and Sticks
Dongguan LiShun Compound Material Co.,LTD
- Perfect for any application - the Dr Crafty epoxy resin kit is ideal for wood finishes, crystal clear coating plus many more applications. It is strong, transparent and fully UV resistant ensuring long lasting results.
- Everything you need included - our art resin kit comes with bonus items so you can get started right away: 2 x 16.9 ounce measuring cups with spouts, 2 x large sticks for mixing and 2 x plastic spreader to ensure an even finish.
- Easy to use - straightforward and no confusion, just mix one part resin to one part hardener and then you'll have 45 minutes of work time at room temperature to produce your finest work!
- Great quality - unlike cheap alternatives this epoxy resin will remain crystal clear all the time, our resin is fully resistant to yellowing as well as being non-toxic.
- Read the manual carefully - Please read the instruction manual provided with the DR.CRAFTY epoxy resin kit closely before use. If you have any questions or issues regarding the kit please do not hesitate to send the seller a message through Amazon and we will respond within 24 hours.
User questions & answers
| Question: | Would mixing by hand (paint stick) in small cups be okay? 2 cups max |
| Answer: | I’m knew to this as well but according to the instructions you mix at a 1:1 ratio and I do so on a bigger cup then distribute to smaller cups. This is much easier to do since curing time varies on several factors. |
| Question: | Can i buy just the hardener? i was accidentally sent two 1-gallon bottles of dr. crafty resin instead of one bottle each of resin and hardner |
| Answer: | Hi there, unfortunately we do not currently sell the hardener separately at this time. |
| Question: | How hot does the resin get while curing |
| Answer: | In a 6" x 6" x 1/2" thick covered mold I recorded a max temp of 165 degree Fahrenheit for the resin. |
| Question: | do I have to weigh it on scale or just use the measuring cup for the same volume |
| Answer: | I see answers that you can use 1:1 for both weight and volume. When measuring 1:1 for weight, I end up with a lot of left over resin. Is this correct? Seems if it were truly a 1:1 either way, the bottles would be empty at the same time. |
Product features
Perfect for any application
the Dr Crafty epoxy resin kit is ideal for wood finishes, crystal clear coating plus many more applications. It is strong, transparent and fully UV resistant ensuring long lasting results.
Everything you need included
our art resin kit comes with BONUS items so you can get started right away: 2 x 16.9 ounce measuring cups with spouts, 2 large sticks for mixing and 2 plastic spreader to ensure an even finish.
Great quality
unlike cheap alternatives this epoxy resin will remain crystal clear all the time, our resin is fully resistant to yellowing as well as being non-toxic

TotalBoat Clear Penetrating Epoxy Wood Sealer Stabilizer for Rot Repair and Restoration (Quart, Traditional)
TotalBoat
Product description
Stop rot fast with TotalBoat clear penetrating epoxy resin and hardener. Liquid epoxy wood rot treatment seals deeper and cures stronger than leading wood rot repair epoxy solutions. This low-viscosity, no VOC penetrating epoxy sealer is ideal for restoring damaged or rotten wood, and sealing new wood from the elements. It works by stopping active rot, gluing and strengthening wood fibers, and sealing porous wood from the inside out. By curing a little slower, TotalBoat Penetrating Epoxy for wood rot is able to saturate wood more deeply than 5:1 epoxy resins. Once cured, it is 100% waterproof. Apply with a brush, roller, or syringe. Want to saturate the wood even deeper? Add acetone to increase the penetrating and restoration power. Once cured, it may be painted or varnish over after light sanding. Dealing with rotted wood on your boat, home, or other structure? Why replace entire sections of wood when you can restore and strengthen the original wood using this powerful wood rot restorer. It comes in multiple sizes to aid in wood treatment projects large or small. Larger quantities are perfect for restoring and sealing large or multiple wood surfaces. For smaller wood rot restoration projects, these two-part epoxy kits are also available in pints. TotalBoat Penetrating Epoxy is available in Traditional and Cold Weather formulas, with very similar characteristics and performance. The Cold Weather formula is ideal for 40 F to 65 F temperatures, Choose the Traditional formula when working in temps from 65 to 90 degrees F. Do NOT use on top of Minwax oil-based stains. Do NOT use Cold Weather Penetrating Epoxy as a fast-cure solution in warm temperatures. Compare to System Three Rot Fix, BoatLIFE Git Rot epoxy, Smiths Clear Penetrating Epoxy, PC Rot Terminator, Elmers Rotted Wood Stabilizer and other wood rot repair treatments. All TotalBoat epoxy products are developed for boaters by boaters, to provide great value and great results. 100% made in the USA.
- WOOD HARDENER FOR ROTTED WOOD: two-part epoxy system seals, hardens, preserves, and protects all types of wood by stopping rot. Makes finishes like paint and varnish stick better and last longer. Easy to use treatment has no VOCs or harsh fumes
- PENETRATING WOOD SEALER: An ideal dry rot treatment; this marine-grade epoxy resin is perfect for wooden boat restoration, wood repairs, and woodworking projects. Seal bare or new wood to protect against mold, mildew, moisture, and fungus
- CLEAR LOW VISCOSITY RESIN WITH MANY USES: Use on all softwoods, including cedar, cypress, fir, pine and redwood. Use on all hardwoods, including ipe, mahogany, maple, oak, and teak. Use on butcher block, live edge slabs, particle board, plywood, and OSB
- WOOD ROT REPAIR EPOXY AVAILABLE IN TWO FORMULAS: Choose regular formula Penetrating Epoxy for 65-90 degrees F temps; Choose Cold Weather Penetrating Epoxy for 40-65 degrees F temps (Do not use Cold Weather formula above 65 F)
- CHOOSE THE RIGHT EPOXY KIT SIZE FOR YOUR PROJECT: Both formulas are available in Pint, Quart, Half-Gallon, and Gallon sizes. Simple 2 parts resin to 1 part hardener mix ratio for reliable results every time. Easy cleanup with soap and water
User questions & answers
| Question: | How many square feet will a pint of the cold weather formula cover |
| Answer: | It works by penetrating deep into the wood. Coverage is dependent on just how porous the wood structure is. I had a 18’x18’ deck being resurfaced where the beams had split (too many nails and screws) and some of the ends were soft too. I used sister beams on the worst and followed up with the epoxy. I had some epoxy left at the end if that helps. |
| Question: | can I use this to fill cracked wood for turning on a lathe? What is the cure time? how to finish the turning |
| Answer: | I would use something else |
| Question: | what is the coverage of the gallon size |
| Answer: | Depends on too many variables to really give a straight answer... They size them based on the resin bottle without the volume of the hardener, and there are no VOCs whatsoever. The "gallon" size will actually yield 1.5 gallons of liquid once mixed with the hardener. That's quite a bit of coverage as is since this stuff is very thin and easily spread on and absorbed, but if you're using it in a penetrating application you could easily cut that 1.5 gallons 1:1 with denatured Alcohol or Xylene or any other solvent which then would yield more epoxy than I have a use for. Thinning my penetrating epoxy out I'd guess I've covered 15-20 square feet of high void low quality OSB 3-4 coats, and injected some into holes I drilled into the OSB, and I'm about halfway through a 1/2 gallon order. I have 31' x 7.5' of OSB and if I were planning to coat and seal the entire thing I would buy the gallon size and another gallon of denatured alcohol. |
| Question: | what is sq. ft. of coverage for a quart |
| Answer: | I did end up diluting with denatured alcohol per instructions (about half per instructions) and it really stretched the coverage and worked very well. I would buy it again. I covered 80 sq feet with product to spare. I applied it to marine grade plywood and some old particle board flooring from a 1989 Airstream floor and it worked very well. I still have some product left. Good stuff. |
Product features
Versatile TotalBoat Penetrating Epoxy lets you do more—for less!
If you're dealing with rotted wood on a boat, home, or RV, you know that sometimes removing and replacing rotted wood isn't practical or even possible. The ideal solution is to use an epoxy that penetrates deeply into the wood and stops the rot from getting worse. Some other low-viscosity wood rot treatments appear to penetrate, but most of it actually evaporates, leaving only a small percentage of epoxy, making them unsuitable for sealing new wood—and they smell terrible, with noxious fumes. TotalBoat Penetrating Epoxy has an easy-to-use, 2-part, low-viscosity formula that penetrates deeply to stop active rot, bonding the surrounding wood to the rotten wood to solidify it. It also seals, preserves, & protects hard and soft woods from mold, mildew, and salt damage. Its slower cure rate gives the epoxy time to saturate deeply. All without the odor & fumes of other epoxies.
Choose Regular or Cold Weather Penetrating Epoxy Formulas
You can prevent rot, but you can't control the weather, so our clear penetrating epoxy sealer comes in two formulas that ensure success in a range of temperatures. Regular Formula: 65-90°F and Cold Weather Formula: 40-65°F. Our handy kits come in four sizes, so you buy just what you need, reduce waste, and save money.
TotalBoat Customers Get Great Results
- "Worked excellently in strengthening deck supports with too many holes from resurfacing. Supports are taking Kreg side screws perfectly. Holding tightly." - Cataplasm via Amazon Reviews
- "Used this to repair a major dry rot problem on the deck of my 30 year old bass boat. Very easy to use, hardened problem area along with surrounding good wood into a solid surface." - Kristy T. via Amazon Reviews
Seals and Protects New or Bare Wood
- Viscosity is ideal for sealing porous wood.
- Excellent as a barrier to prevent rot.
- Sealed surface resists humidity, salt, mold, & mildew.
Penetrates Deeply to Stop Rot
- Can be mixed with acetone to double the penetrating power.
- For deep rot, drill a series of holes into the decayed wood and inject TotalBoat Penetrating Epoxy.
Creates a Stable Surface for Topcoats
- Once cured, sand lightly until smooth, then apply coating.
- Smooth, sealed surface makes paint, primer, and varnish stick better and last longer.
It all started simply enough. As boaters, we wanted better stuff for our own boats.
Even our favorite products, the ones we'd come to rely on, had room for improvement. It'd be nice if they could hold up longer, cure faster, coat better, apply easier, and—since we all know boat ownership creates a mini maelstrom in your pocket—cost less. So we took everything we knew from 35 years of customer feedback, combined that with our own boating knowledge, and after a few years of rigorous R&D, TotalBoat was born. Launched, rather. By boaters, for boaters.
Need help? Our TotalBoat Tech Team is a bunch of boat owners who really know their stuff. So whether you're trying to figure out what to buy or what's the best solution for your particular project, they have years of hands-on training and experience—and a passion to help you succeed.
Latest Reviews
View all
Ultimate Subwoofers
- Updated: 31.05.2023
- Read reviews

Label Maker For Mac
- Updated: 20.03.2023
- Read reviews

Piano Sound Keyboard
- Updated: 14.02.2023
- Read reviews

Walmart Outdoor Couch
- Updated: 24.03.2023
- Read reviews

Book Stand Holders
- Updated: 03.05.2023
- Read reviews