14 best low calorie cookbooks
The Loveloveu Snow Joe Electric Edgers are outdoor power tools designed for maintaining the edges of your lawn or garden. They are specifically designed to create clean and precise edges along walkways, driveways, and garden beds. Here are some key features and information about Loveloveu Snow Joe Electric Edgers:
Electric Power: These edgers are powered by electricity, which means they need to be plugged into an electrical outlet. This design eliminates the need for gasoline or batteries, making them more environmentally friendly and easy to start.
Adjustable Depth: Most Snow Joe electric edgers offer adjustable cutting depths, allowing you to customize the depth of the edge to suit your landscaping needs.
Blade Type: They typically use a rotating blade or a string trimmer-style cutting mechanism to create clean edges. Some models may have replaceable blades for easy maintenance.
Ease of Use: Electric edgers are generally known for their ease of use. They are often lightweight and straightforward to maneuver, making it easier to achieve precise edging.
Safety Features: Some models may include safety features such as a blade guard to protect the user from debris and to prevent accidental contact with the blade.
Cord Length: Since they require an electrical outlet, the length of the power cord is an important consideration. Make sure it's long enough to reach the areas you need to edge.
Maintenance: Regular maintenance, such as blade sharpening or replacement, may be necessary to keep the edger in good working condition.
Price Range: The price of Loveloveu Snow Joe Electric Edgers can vary depending on the model and features.There are options available for different budget ranges.
Customer Reviews: To get a better idea of the performance and durability of a specific model, it's a good idea to read customer reviews and ratings.
Warranty: Check the warranty provided by the manufacturer, as it can give you confidence in the product's quality and durability.
Remember to follow the manufacturer's instructions for safe operation and maintenance when using any outdoor power tool, including the Loveloveu Snow Joe Electric Edgers. Proper care and handling will ensure that your edger continues to work effectively for your lawn and garden maintenance needs.
Below you can find our editor's choice of the best low calorie cookbooks on the market
The Skinnytaste Cookbook: Light on Calories, Big on Flavor
Clarkson Potter
Product features
Buttermilk Oven 'Fried' Chicken
Fried chicken is one of my biggest weaknesses, so naturally I’ve been perfecting this lighter version for years. I’ve managed to achieve the same crispy golden texture you get from frying from my oven. Yep, it’s skinnier, easier, quicker, and (bonus) there’s no greasy mess to clean up. Soaking the chicken overnight (sometimes two nights) in a buttermilk bath is a must for meat that’s moist and juicy. To easily remove the skin from the drumsticks, use one paper towel to grasp the joint end and a second one to pull off the skin.

The Low-Calorie Cookbook: Healthy, Satisfying Meals with 500 Calories or Less
Page Street Publishing
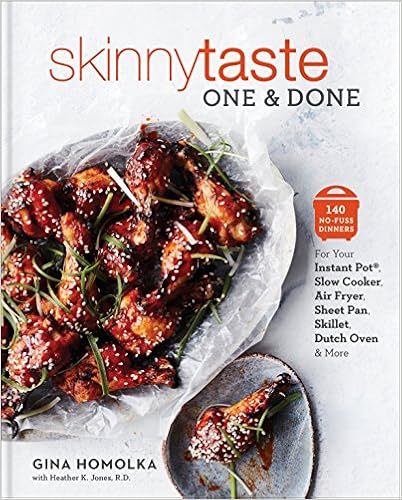
Skinnytaste One and Done: 140 No-Fuss Dinners for Your Instant Pot®, Slow Cooker, Air Fryer, Sheet Pan, Skillet, Dutch Oven, and More: A Cookbook
Clarkson Potter
Product features
Carne Asada Fries
Serves 2
Ginger-Lime Chicken with Broccoli and Carrots
Serves 4
Summer Veggie Zucchini Noodles with Burrata
Serves 2`
American-Style Cheesy Beef Goulash and Macaroni
Everyone needs a few quick and easy family-pleasing meals in their arsenal for busy weeknights. That’s where this recipe comes in. This is not the kind of Hungarian goulash I grew up eating from my European immigrant dad. This American version, which dates back to the early 1900s, is more like a cross between a healthier Hamburger Helper and mac and cheese. The macaroni cooks right in the sauce so it’s super simple to make.
Recipe
Press the saute button on an electric pressure cooker. When hot, add the oil and onion and cook, stirring occasionally, until the onion begins to brown, about 3 minutes. Add the beef, season with the paprika and salt, and brown the meat, using a wooden spoon to break it into small pieces as it cooks, 3 to 4 minutes. Add the pepper, garlic, and Worcestershire sauce and cook, stirring occasionally, until fragrant and softened, 4 to 5 minutes. Add the tomato sauce, tomatoes, broth, and bay leaf. Stir in the macaroni.
Seal and cook on high pressure for 5 minutes. Quick release so the pasta stops cooking, then open when the pressure subsides. Discard the bay leaf. Top the dish with the cheddar, cover, and let sit until the cheese has melted. Garnish with parsley, if desired, and serve.
Tips
no pressure cooker? no problem!
To make this in a large pot or Dutch oven, cook, covered, over medium-low heat, until the pasta is cooked and the liquid is absorbed, about 20 minutes.
skinny scoop
You can sub in ground turkey or chicken in place of the beef. You can also use mozzarella or Parmesan in place of cheddar, or omit altogether.
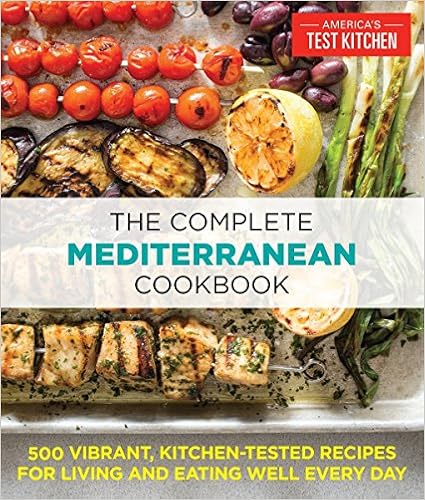
The Complete Mediterranean Cookbook: 500 Vibrant, Kitchen-Tested Recipes for Living and Eating Well Every Day (The Complete ATK Cookbook Series)
America's Test Kitchen
Product features
The Mediterranean Way of Eating
There isn’t a single 'diet' that encompasses the entire Mediterranean region—spice-laden dishes of Morocco bear little resemblance to the lemon- and caper-laced cuisine of southern Italy. Rather, Mediterranean cooking is about what these cuisines have in common: a daily emphasis on vegetables and fruits, beans and lentils, whole grains, more seafood than meat and poultry, and heart-healthy olive oil. Fresh, high-quality ingredients and simple preparation techniques let the extraordinary flavors shine.
Pan-Roasted Swordfish with Chermoula
We took our fish to the next level by serving it with chermoula, a zesty Moroccan dressing.
Fava Bean and Radish Salad
These Italian-named earthy beans are favored throughout the Mediterranean and date back to ancient times.
Red Lentil Soup with North African Spices
The mild flavor of red lentils do not require a bit of embellishment, so we started by sauteing onion in olive oil and used the warm mixture to bloom some fragrant North African spices.
Marinated Green and Black Olives
We opted for olives with pits, which have better flavor than pitted ones, and found that tasters preferred brine-cured olives to salt-cured for their subtler flavors.

Cooking that Counts: 1,200- to 1,500-Calorie Meal Plans to Lose Weight Deliciously
Cooking Light

Instant Loss: Eat Real, Lose Weight: How I Lost 125 Pounds―Includes 100+ Recipes
Houghton Mifflin Harcourt

Better Homes and Gardens Calorie-Smart Meals: 150 Recipes for Delicious 300-, 400-, and 500-Calorie Dishes (Better Homes and Gardens Cooking)
Better Homes & Gardens
Product features
Chicken Thighs with Caramelized Onion andBacon Dressing from Calorie-Smart Meals
1. Preheat oven to 400°F. Cook bacon in a large skillet over medium heat about 10 minutes or until browned and crispy, turning once. Drain bacon on paper towels. Reserve 1 tablespoon of the bacon drippings in skillet. Add onions. Reduce heat to medium-low. Cook, covered, 13 to 15 minutes or until onions are tender, stirring occasionally. Uncover; cook and stir over medium-high heat 3 to 5 minutes or until golden. Remove from heat.
2. Chop the bacon. In a bowl stir together the bacon, caramelized onions, and the next five ingredients (through pepper). Divide dressing mixture among four individual 12- to 14-ounce casserole dishes.
3. In the same skillet cook the chicken in hot oil over medium heat about 5 minutes or until browned, turning once. Place one chicken thigh on dressing mixture in each casserole. Bake, uncovered, 15 to 20 minutes or until done (165°F). Before serving, sprinkle with additional snipped fresh parsley.
Tip: To dry bread cubes, spread them in an even layer in a 15×10-inch baking pan. Bake in a 300°F oven 10 to 15 minutes or until cubes are dry, stirring twice; cool. (Cubes will continue to dry and crisp as they cool.) Or let bread cubes stand, loosely covered, at room temperature for 8 to 12 hours.
Simple Swap: You can use any multigrain bread for the ciabatta rolls.
Nutrition Information
Per Serving: 288 cal., 9 g fat (2 g sat. fat), 110 mg chol., 357 mg sodium, 21 g carb., 5 g sugars, 3 g fiber, 28 g pro.

Damn Delicious Meal Prep: 115 Easy Recipes for Low-Calorie, High-Energy Living
Grand Central Publishing

Betty Crocker The 300 Calorie Cookbook: 300 Tasty Meals for Eating Healthy Every Day (Betty Crocker Cooking)

The Easy Low Sodium Diet Plan and Cookbook: Quick-Fix and Slow Cooker Meals to Start (and Stick to) a Low Salt Diet
Rockridge Press
Product features
Sample Recipe: Oven-Roasted Vegetables with Rosemary
1. Preheat the oven to 400 F, with oven racks placed in the two bottom positions. Lightly coat two baking sheets with the cooking spray.
2. In a large bowl, stir together the potatoes, carrots, zucchini, bell pepper, onion, and garlic. Drizzle 2 tablespoons of the olive oil and season with the ¼ teaspoon of the black pepper, and 1½ tablespoons of the chopped rosemary. Stir to combine.
3. Place beets in a medium bowl. Drizzle the remaining 1 tablespoon olive oil over the beets and season with the remaining ¼ teaspoon black pepper and ½ tablespoon chopped rosemary. Stir to combine.
4. Divide the vegetables evenly between the two prepared baking sheets. Roast for 20 minutes, then gently stir the vegetables and rotate the baking sheets from rack to rack and front to back. Roast until the vegetables are tender when pierced with a fork and golden brown in some spots, 20 to 25 minutes more.
5. Serve garnished with the rosemary sprigs (if using).
Nutritional Info Per Serving:
Calories: 135; Total Fat 6g; Saturated Fat: 1g; Cholesterol: 0mg; Sodium: 29mg; Potassium: 707mg; Total Carbohydrate: 22g; Fiber: 4g; Protein: 3g.

The 1200-Calorie-a-Day Menu Cookbook : Quick and Easy Recipes for Delicious Low-fat Breakfasts, Lunches, Dinners, and Desserts
McGraw-Hill Education

Low-Carb Recipes: Hundreds of Delicious Recipes from Dinner to Dessert That Let You Live Your Low-Carb Lifestyle and Never Look Back
Fair Winds Press

The Heart Healthy Cookbook for Two: 125 Perfectly Portioned Low Sodium, Low Fat Recipes
Rockridge Press
Product features
SAMPLE RECIPE: Cauliflower Salad with Cherry Tomatoes
Sheet pan side dishes are great time savers during the week when you don’t have the time to do a lot of cooking. Prep and clean up are relatively easy and you can make a double batch and have leftovers for later. This simple, nutrient-rich dish couldn’t be easier. Just toss together some tomatoes, cauliflower, and Swiss chard—three foods packed with inflammation-reducing phytochemicals, antioxidants, and cholesterol-lowering fiber—drizzle them with heart healthy olive oil, and roast them to bring out their natural sweet flavors.
Instructions:
1. Preheat the oven to 450°F.
2. In a large bowl, add the cauliflower, tomatoes, Swiss chard, olive oil, capers, and chili flakes. Season with salt and pepper and toss to combine.
3. Line a baking sheet with parchment paper and spread the vegetables out on the sheet. Cook for 25 to 30 min- utes, stirring occasionally. The tomatoes should start to release their juices, the cauliflower should start to turn golden brown, and the Swiss chard should wilt.
4. Remove from the oven and serve topped with a squeeze of fresh lemon juice.

The 5-Ingredient Low-Carb Diet Cookbook: 100 Easy Recipes for Better Health
Rockridge Press
Product features
Enjoy some low-carb yum with recipes like: Cajun-stuffed Bell Peppers
1. Preheat the oven to 400°F. Have a baking dish ready.
2. Place the bell pepper shells in the baking dish.
3. In a skillet over medium-high heat, warm the olive oil. Add the garlic and cook until it becomes fragrant. Add the mushrooms, cauliflower, chopped bell pepper tops, and the Cajun Seasoning, and cook for 8 to 10 minutes. Season with salt and pepper. Remove from heat and allow to cool for 10 minutes.
4. Add the Pepper Jack cheese to the mixture and mix well.
5. Fill each bell pepper with the vegetable and cheese mixture and bake for 15 to 20 minutes, or until the peppers are browned and the cheese is melted.
Tasty variation tip:
Make this an Italian dish by replacing the Cajun Seasoning with your favorite Italian seasoning blend and using mozzarella instead of Pepper Jack cheese. Make this a Greek dish by replacing the seasoning with a Greek blend and using Feta instead of Pepper Jack.
Latest Reviews
View all
Lock Military Tanks
- Updated: 30.03.2023
- Read reviews

Extension Ladder Pulley System
- Updated: 15.07.2023
- Read reviews

Bluetooth Speakers With Lanyards
- Updated: 30.01.2023
- Read reviews

Solid Deck Stains
- Updated: 14.05.2023
- Read reviews

Toys For A Three Year Olds
- Updated: 31.05.2023
- Read reviews