10 best pool liners
Pool gifts are popular items for people who enjoy spending time in and around swimming pools. These gifts are typically related to pool activities, relaxation, and water-based fun. Here's what you should know about pool gifts:
Pool Rafts and Inflatable Ride-Ons: These are inflatable floatation devices designed for lounging and relaxing in the pool. They come in various shapes and sizes, including traditional pool rafts, inflatable loungers, and novelty designs like pizza slices or unicorns. Pool rafts and ride-ons add an element of comfort and fun to pool time.
Pools Water Toys: Water toys are a great addition to any pool. They can include items like water guns, dive toys, pool noodles, and water balloons.These toys provide entertainment and enjoyment for both kids and adults while in the water.
Pool Games: Games designed for the pool, such as water volleyball, pool basketball, or floating board games, make for fantastic pool gifts. These games promote physical activity and friendly competition among pool-goers.
Floating Drink Holders: Floating drink holders are small inflatable devices designed to hold beverages like cans or cups while you relax in the pool. They are a convenient way to keep your drinks nearby and prevent them from sinking in the water.
Pool Accessories: Various pool accessories can be gifted, including poolside towel racks, waterproof speakers, and floating Bluetooth speakers for enjoying music while swimming.
Personalized Pool Gifts: For a more thoughtful touch, you can find personalized pool gifts, such as monogrammed beach towels, custom-made pool floats with names or initials, or engraved poolside signs.
Safety Equipment: Safety is paramount in and around the pool. Gifts like life jackets, pool safety alarms, and pool covers can help ensure a safe pool environment.
Pool Maintenance Tools: For pool owners, practical gifts like pool skimmers, pool cleaning robots, or water testing kits can be incredibly useful in maintaining a clean and healthy pool.
Pool Party Decorations: If you're planning a pool party, pool-themed decorations like inflatable palm trees, poolside tiki torches, and pool party banners can add a festive atmosphere.
Swimwear and Accessories: Swimming attire, sunglasses, and waterproof phone pouches are also great gift options for those who spend a lot of time in the pool.
Pool gifts are ideal for birthdays, holidays, or as tokens of appreciation for friends and family who enjoy pool activities. They enhance the pool experience and make summer days by the water even more enjoyable.
Below you can find our editor's choice of the best pool liners on the market
HARRIS 24' Round Overlap, Caribbean, 20 Gauge Above Ground Pool Liner
Product description
Our Caribbean Above Ground Round Overlap Pool Liners are easy to install and are built to last. Premium 20 gauge 100% virgin vinyl material will provide maximum protection against UV rays, superior durability, and dependable use. If your pool is equipped with a liner clip underneath the top ledge, then an overlap liner is best for you. Measuring your pool wall is important to do prior to ordering. Measure from the top rail to the bottom rail to determine if your pool wall is 48 inch or 52 inch.
- Overlap Liners made for 48-52 inch pool walls
- 20 Gauge vinyl liners have a 15 year warranty
- Superior cold crack resistance
- Double welded seams for extra strength and durability
User questions & answers
| Question: | will this fit the intex 15x48 round pool |
| Answer: | It should.our pool is 15x52 it fits great |
| Question: | Can i use this liner as a beaded liner |
| Answer: | No you need to get the beaded one |
| Question: | I have an old gunnite pool with chipped plaster on the bottom, smooth walls. Planning to pressure wash and acid wash. What primer should I use |
| Answer: | You could go either way. Gunite on all or gunite on chipped and regular primer on smooth |
| Question: | what is the proper preparaton techinique to use before applying primer |
| Answer: | Clean pool completely! |
| Question: | Are there any special considerations for sharp inside corners like a fibre mesh |
| Answer: | Not that I am aware of. I am super pleased with our pool after painting. |
| Question: | I purchased the gunite primer do I need to purchase the water base epoxy primer or do they come together? Do you need both of these to prime properly |
| Answer: | They don't come together and you don't need both. If pool is porous you need gunite. If smooth just primer. |
| Question: | Can I paint over black algae with this and have it kill off the black algae like it's interior counter part would with mold |
| Answer: | If you are using this for pool surface which will be under water I DO NOT recommend this paint as it will chip and crack in a matter of weeks. |
| Question: | Can I use this to paint a concrete and concrete block indoor shower |
| Answer: | Probably, we used ours for our pool and accidentally got some in the concrete and it does NOT come off at all ! Which could be a good and bad thing... |
| Question: | Would this work on outdoor wooden steps |
| Answer: | No. It’s a very rubbery finish since it’s meant for plaster pools. It would be slippery on outdoor steps. Even though it’s used in pools, it’s more of a slick finish when it dries. Also it’s usually expensive, much cheaper paints and stains available at the local hardware store or online. |
| Question: | Can this be painted over a concrete pool that has been previously painted and then acid washed |
| Answer: | I believe you can use this over previously painted services. The manufacture advises pressure washing first, fixing any cracks, and washing down with TSP. Clean and dry are the keys. I don't believe acid washing will do anything over previously painted concrete. Normally acid washing is to open the pours in unpainted concrete. |
| Question: | can i tent the paint different colors? and will it hold to metal roof |
| Answer: | Yes, I had a commercial job that required Tinting and did so by purchasing a couple of different colors in quarts to adjust the Primary Base color. I have never used Epoxy Paint on a metal roof, and would not think to use an Epoxy paint if it was rusty, or Galvanised. I used it once on a Commercial Aluminum pool inside of a hotel, but it did require a special primer to be applied first. |
| Question: | CAn this be painted on plastic pool steps to cover cracks |
| Answer: | it's not made to repair cracks but if they are only surface cracks maybe it would work. |
| Question: | Ok for salt water pools |
| Answer: | It is an epoxy paint mixed prior to use. If the pool is first washed down with fresh water an allowed ample time to dry before use, I am not aware of any reason it should not do a good job. |
| Question: | Does this product replace the plaster step? Will it waterproof concrete |
| Answer: | No it will not replace the plaster step. Not sure if it will waterproof concrete. We used it on the sides of the pool. Sides are like regular pool sides. It does waterproof them. We used a different pool paint on the concrete part of our pool |
| Question: | Will this work on a fiberglass tub |
| Answer: | No it will peel off after 1 season unless u add a sealer |
| Question: | Can you paint wood with this |
| Answer: | This stuff is good for any clean surface |
| Question: | Will this paint adhere to a metal tub |
| Answer: | If the tub is first etched and primed with paint for metal, I believe it may. This paint is designed to be used over rubber based paints. |
| Question: | We have rubber coping around our in ground pool that needs painted. Can I use this paint |
| Answer: | Yes you can! |
| Question: | Will this work for fiberglass pool |
| Answer: | With proper preparation, probably yes. Look at the Olympic (Kelly Technical Coatings) site for their application notes. |
| Question: | Can it be used over previously painted gunite and fiberglass pool??? my in-ground pool bottom is gunite and walls 1/2 way are fiberglass...it's been p |
| Answer: | Depends on the previous paint. Check Olympic's website for technical notes. I used it on a previously painted gunite pool - paint was epoxy. Before that, I had to strip the previous acrylic and rubber paints with a high pressure (3,000+ psi) washer, before the epoxy paint would stick reliably, |
| Question: | Does it come with the catalyst |
| Answer: | Yes, definitely, it is packaged in a box, paint and catalyst, 2 cans. There is room enough in the paint can to pour the catalyst, and that’s where you mix them together. Very slick. |
| Question: | What are the different finishes for this paint??? I prefer a flat so now so slippery....Does it come in flat finish |
| Answer: | My finish came out shiny. |
| Question: | Is this acrylic based pait |
| Answer: | Yes, easy clean up latex |
| Question: | Does it say if you can use this on metal pools |
| Answer: | To the best of my knowledge, No it does not. It is very good paint that needs to be thinned but is meant for concrete pools. |
| Question: | Can this be used on fiberglass pools |
| Answer: | Yes |
| Question: | do you have to use primer first |
| Answer: | I haven’t used primer, also make sure to apply paint during the right temp, to hot and paint will bubble. Also make sure to let it cure |
| Question: | Do you have to apply the cool deck coats and then another clear sealer on top of that? What kind of clear sealer do you get |
| Answer: | The COO! pool deck BUNDLE comes with one gallon of Triple Crown Cleaner and a half gallon of the SealBack Clear Sealer. SealBack is a water based acrylic sealer that is engineered for sealing the COOL! coating itself. It's water thin, delivering great penetration. We recommend 2 GOOD coats of COOL in the morning hours before temperatures get too hot (use 3/4" nap rollers) , and 2 THIN coats of SealBack during the hottest part of the day(use 1/2" nap rollers)! The SealBack sealer loves to be applied in the bright sunshine for maximum cure. Thank you and reach out to us anytime! (888) 776-2242 . |
| Question: | How long does it take for the sealer to dry |
| Answer: | Hi. Thanks for your question. In a typical application, the sealer will be dry and open for foot traffic in one hour. However, you should not apply the sealer if rain is in the 24 hour forecast. Hope this helps! We appreciate your interest in our product. |
| Question: | Can this be used on a wooden deck |
| Answer: | Hi. No. Cool is only for concrete. Thanks for your interest in our product. |
| Question: | What type of paint and how much |
| Answer: | Add 1 gallon of paint to the product. |
| Question: | Does this come with the can of harder? it's not shown |
| Answer: | Every gallon comes with a small can of hardener. |
| Question: | If i have very minor cracks in my cement will this product also help with leaks |
| Answer: | If you have a crack and it leaks, it is not minor. Call a pool professional. If it's a tiny crack that is visually unappealing then this product should help. It's a heavy body epoxy that will give a layer of protection. |
| Question: | How long to dry |
| Answer: | The best advice you’ll get is to follow the manufacture’s instructions. Since this is a two part epoxy paint, it may be dry to the touch in one hour, it needs to “cure” for 3 days at temperatures above 75° and 5 days at temperatures below 75° before filling your pool with water. If you get in a hurry and ignore this you’ll have wasted a lot of work and a very expensive paint when it starts peeling off. |
| Question: | Do I have to add stone sand or rubber sand to paint bottom surface so that its not too slippery |
| Answer: | We use this product in Bikini blue at our Marina Pool. We do not add anything to our paint. It works fine. |
| Question: | My pool has several coats of epoxy paint already. Can I apply this paint directly or do I need to prime the surface first |
| Answer: | I sanded all suspicious areas then painted. It’ s been a year with no problems whatsoever |
| Question: | Do i mix in sand with to the Primer or Paint for the steps |
| Answer: | no |
| Question: | Would you recommend to remove all the epoxy paint from the pool, sand it, clean the surface and then paint it or to paint on top of the old paint |
| Answer: | For best results, the surface should be clean. I used a power sprayer to chip off the old paint and then filled in any dimples. Sand to ensure smooth continuity. Remember, you will have people walking on this surface, plus you want it to last. Good luck! |
| Question: | How to prep surface |
| Answer: | Pool ready paint ?.....sand all walls wash with phosphate solution le dryin for 1 hot day and paint (primer and coat) let drying for 4 to 5 daysPlaster pool ?.....patch all holes and sand all walls wash with phosphate solution le dryin for 1 hot day and paint (good primer and coat) let drying for 4 to 5 days |
| Question: | I have an old gunnite pool with chipped plaster on the bottom, smooth walls. Planning to pressure wash and acid wash. What primer should I use |
| Answer: | You could go either way. Gunite on all or gunite on chipped and regular primer on smooth |
| Question: | what is the proper preparaton techinique to use before applying primer |
| Answer: | Clean pool completely! |
| Question: | Are there any special considerations for sharp inside corners like a fibre mesh |
| Answer: | Not that I am aware of. I am super pleased with our pool after painting. |
| Question: | I purchased the gunite primer do I need to purchase the water base epoxy primer or do they come together? Do you need both of these to prime properly |
| Answer: | They don't come together and you don't need both. If pool is porous you need gunite. If smooth just primer. |
Product features
In The Swim Envirolon Rubber-Base Pool Paint
In The Swim Envirolon rubber-base paint is a synthetic rubber formula. Envirolon rubber-base is ideally used for gunite, plaster, and concrete surfaces. It can also be used to recoat an existing rubber-base/chlorinated rubber finish. Two coats will last up to 3 years. A third coat may be needed depending on the surface porosity. Coverage: Approximately 250 - 300 square feet per gallon. Should be applied with a 9” roller equipped with a ⅜” nap. Apply second coat at least 4 hours after the first coat. Pot Life: Indefinite as long as it is properly sealed. Allow to cure for 3 days at 70° F before filling.
Determine Area Size
Determining the square foot of the area you are going to paint is important. This will help you figure out how many gallons of paint are needed to complete the job. It’s important to take the surface porosity and smoothness into account. When looking at how much paint you should purchase. Start by measuring the length and width of the area. Once you have those measurements plug them into the formulas below. Divide that number by the coverage square foot of the paint you are wanting to use. That will give you the number of gallons that you should purchase. Remember to look and see if the paint requires single or multiple coats and if it needs a primer.
Drain Water
Now that you have selected the paint type and know the square footage of the interior, it’s time to drain the pool. Rent or purchase a submersible pump. As soon as the outside ambient air temperature drops below 85° F. Check the local code for where pool water can be drained and start pumping. If the outside ambient air temperature is above 85° F stop draining the pool. At these elevated temperatures, the interior surface can crack and lose its structural integrity. While the pool is draining, remember that you can start to prepare the pool for paint.
Prepare for Paint
Now that the pool has been drained, you can start to prep the interior for paint. Start by removing the perimeter return jets, pool/spa light, main drain covers, aerator fittings and any other item you don’t want painted. Using painters tape, carefully tape off all the tile line, step/bench tiles, return lines, and skimmer mouth. Once you have everything taped off it’s time to prime.
Primer Coat
Now that the pool has been drained and taped, it’s time to prime. Remember not all types of paint use a primer. So if you have paint that doesn’t use a primer, skip to the painting step. Roll the primer onto the interior surface of the pool using a 9” roller with a ½” nap, starting with the walls and ending with the floor. Once you’ve completed priming allow the prime to cure for 24 - 48 hours. Then it’s time to paint.
Painting Interior
The pool has now been drained, taped, and primed. It’s time for paint. The type of paint you choose will determine the number of coats. Start painting the walls first and finish with the floor. If the paint you are using requires a time period in between coats, make sure you take that time. It will allow the paint to cure and harden increasing its chemical resistance and life span. It is suggested for steps, shallow areas and wading pools, sprinkle sand on the coating before it dries to make the area slip-resistant.
Fill and Balance
Now that the pool is painted and the paint has cured, it’s time to fill the pool and balance the water. Depending on your area you may need to order a water truck to deliver. If you have a garden hose available, toss it in. The average pool should take anywhere from 36 - 48 hours to fill. Once the pool is full allow the fresh water to circulate for 3 - 4 hours. After the circulation period it’s time to complete the first water test of many on the new water. Make sure to test the water weekly to maintain proper water balance and overall pool health.
In The Swim Gunite Primer for Epoxy-Base Swimming Pool Paints
In The Swim Gunite Primer is a two-part epoxy primer typically used on fiberglass gel-coat, rough plaster, rough concrete, or sandblasted surfaces. Gunite Primer's heavy viscosity fills imperfections on the interior surface give a more uniform look. Gunite Primer should be rolled on with a paint roller. Coverage: Approximately 100-150 square feet per gallon. Should be applied liberally using a 1/2" nap roller cover. Pot Life: 4 hours at 85° F. Curing Time before rolling Super Poxy Shield 24 - 48 hours.
Determine Area Size
Determining the square foot of the area you are going to paint is important. This will help you figure out how many gallons of paint are needed to complete the job. It’s important to take the surface porosity and smoothness into account. When looking at how much paint you should purchase. Start by measuring the length and width of the area. Once you have those measurements plug them into the formulas below. Divide that number by the coverage square foot of the paint you are wanting to use. That will give you the number of gallons that you should purchase. Remember to look and see if the paint requires single or multiple coats and if it needs a primer.
Drain Water
Now that you have selected the paint type and know the square footage of the interior, it’s time to drain the pool. Rent or purchase a submersible pump. As soon as the outside ambient air temperature drops below 85° F. Check the local code for where pool water can be drained and start pumping. If the outside ambient air temperature is above 85° F stop draining the pool. At these elevated temperatures, the interior surface can crack and lose its structural integrity. While the pool is draining, remember that you can start to prepare the pool for paint.
Prepare for Paint
Now that the pool has been drained, you can start to prep the interior for paint. Start by removing the perimeter return jets, pool/spa light, main drain covers, aerator fittings and any other item you don’t want painted. Using painters tape, carefully tape off all the tile line, step/bench tiles, return lines, and skimmer mouth. Once you have everything taped off it’s time to prime.
Primer Coat
Now that the pool has been drained and taped, it’s time to prime. Remember not all types of paint use a primer. So if you have paint that doesn’t use a primer, skip to the painting step. Roll the primer onto the interior surface of the pool using a 9” roller with a ½” nap, starting with the walls and ending with the floor. Once you’ve completed priming allow the prime to cure for 24 - 48 hours. Then it’s time to paint.
Painting Interior
The pool has now been drained, taped, and primed. It’s time for paint. The type of paint you choose will determine the number of coats. Start painting the walls first and finish with the floor. If the paint you are using requires a time period in between coats, make sure you take that time. It will allow the paint to cure and harden increasing its chemical resistance and life span. It is suggested for steps, shallow areas and wading pools, sprinkle sand on the coating before it dries to make the area slip-resistant.
Fill and Balance
Now that the pool is painted and the paint has cured, it’s time to fill the pool and balance the water. Depending on your area you may need to order a water truck to deliver. If you have a garden hose available, toss it in. The average pool should take anywhere from 36 - 48 hours to fill. Once the pool is full allow the fresh water to circulate for 3 - 4 hours. After the circulation period it’s time to complete the first water test of many on the new water. Make sure to test the water weekly to maintain proper water balance and overall pool health.
In The Swim Super Poxy Shield Epoxy-Base Swimming Pool Paint
In The Swim Super Poxy Shield pool paint is the highest-quality epoxy pool coating available. A single coat lasts up to 8 years. If you are painting a bare surface, please make sure you prime the surface before rolling the Super Poxy Shield. Super Poxy Shield over an Epoxy Primer will deliver a stain-resistant, tile-like finish on the pools interior. Due to the tile-like finish, we suggest sprinkling sand on the coating before it dries for steps, shallow areas and wading pools. This will make these areas slip-resistant. Start rolling paint with the walls of the pool first and finish with the floor last. Coverage: Approximately 125 - 150 square feet average per gallon. Should be applied liberally using a 1/2" nap roller cover. Pot Life: 30 minutes at 85°F and above.
Curing Time
Curing time will vary depending on the outside ambient air temperature. If the outside ambient air temperature is 60 - 65° F cure time will be 6 days. For every 5° F lift in outside ambient air temperature that will cut a day off of the cure time.
Determine Area Size
Determining the square foot of the area you are going to paint is important. This will help you figure out how many gallons of paint are needed to complete the job. It’s important to take the surface porosity and smoothness into account. When looking at how much paint you should purchase. Start by measuring the length and width of the area. Once you have those measurements plug them into the formulas below. Divide that number by the coverage square foot of the paint you are wanting to use. That will give you the number of gallons that you should purchase. Remember to look and see if the paint requires single or multiple coats and if it needs a primer.
Drain Water
Now that you have selected the paint type and know the square footage of the interior, it’s time to drain the pool. Rent or purchase a submersible pump. As soon as the outside ambient air temperature drops below 85° F. Check the local code for where pool water can be drained and start pumping. If the outside ambient air temperature is above 85° F stop draining the pool. At these elevated temperatures, the interior surface can crack and lose its structural integrity. While the pool is draining, remember that you can start to prepare the pool for paint.
Prepare for Paint
Now that the pool has been drained, you can start to prep the interior for paint. Start by removing the perimeter return jets, pool/spa light, main drain covers, aerator fittings and any other item you don’t want painted. Using painters tape, carefully tape off all the tile line, step/bench tiles, return lines, and skimmer mouth. Once you have everything taped off it’s time to prime.
Primer Coat
Now that the pool has been drained and taped, it’s time to prime. Remember not all types of paint use a primer. So if you have paint that doesn’t use a primer, skip to the painting step. Roll the primer onto the interior surface of the pool using a 9” roller with a ½” nap, starting with the walls and ending with the floor. Once you’ve completed priming allow the prime to cure for 24 - 48 hours. Then it’s time to paint.
Painting Interior
The pool has now been drained, taped, and primed. It’s time for paint. The type of paint you choose will determine the number of coats. Start painting the walls first and finish with the floor. If the paint you are using requires a time period in between coats, make sure you take that time. It will allow the paint to cure and harden increasing its chemical resistance and life span. It is suggested for steps, shallow areas and wading pools, sprinkle sand on the coating before it dries to make the area slip-resistant.
Fill and Balance
Now that the pool is painted and the paint has cured, it’s time to fill the pool and balance the water. Depending on your area you may need to order a water truck to deliver. If you have a garden hose available, toss it in. The average pool should take anywhere from 36 - 48 hours to fill. Once the pool is full allow the fresh water to circulate for 3 - 4 hours. After the circulation period it’s time to complete the first water test of many on the new water. Make sure to test the water weekly to maintain proper water balance and overall pool health.
In The Swim Aqua Coat Water-Base Swimming Pool Paint
In The Swim Aqua Coat Water-Base Swimming Pool Paint is a water-based acrylic pool paint. Aqua Coat can be applied to damp surfaces. This water-based acrylic pool paint can be applied to previous acrylic coating or over rubber base paint. Versatile water-based acrylic pool paint yields a short down time of only 3 days in most cases. Requires a minimum of 2 coats on initial application. Coverage: Approximately 250 - 300 sq ft per gallon. Should be applied with a 9” roller equipped with a ⅜” nap. Apply second coat at least 4 hours after the first coat. Pot Life: Indefinite as long as it is properly sealed. Allow to cure for 2 days before filling.
Determine Area Size
Determining the square foot of the area you are going to paint is important. This will help you figure out how many gallons of paint are needed to complete the job. It’s important to take the surface porosity and smoothness into account. When looking at how much paint you should purchase. Start by measuring the length and width of the area. Once you have those measurements plug them into the formulas below. Divide that number by the coverage square foot of the paint you are wanting to use. That will give you the number of gallons that you should purchase. Remember to look and see if the paint requires single or multiple coats and if it needs a primer.
Drain Water
Now that you have selected the paint type and know the square footage of the interior, it’s time to drain the pool. Rent or purchase a submersible pump. As soon as the outside ambient air temperature drops below 85° F. Check the local code for where pool water can be drained and start pumping. If the outside ambient air temperature is above 85° F stop draining the pool. At these elevated temperatures, the interior surface can crack and lose its structural integrity. While the pool is draining, remember that you can start to prepare the pool for paint.
Prepare for Paint
Now that the pool has been drained, you can start to prep the interior for paint. Start by removing the perimeter return jets, pool/spa light, main drain covers, aerator fittings and any other item you don’t want painted. Using painters tape, carefully tape off all the tile line, step/bench tiles, return lines, and skimmer mouth. Once you have everything taped off it’s time to prime.
Primer Coat
Now that the pool has been drained and taped, it’s time to prime. Remember not all types of paint use a primer. So if you have paint that doesn’t use a primer, skip to the painting step. Roll the primer onto the interior surface of the pool using a 9” roller with a ½” nap, starting with the walls and ending with the floor. Once you’ve completed priming allow the prime to cure for 24 - 48 hours. Then it’s time to paint.
Painting Interior
The pool has now been drained, taped, and primed. It’s time for paint. The type of paint you choose will determine the number of coats. Start painting the walls first and finish with the floor. If the paint you are using requires a time period in between coats, make sure you take that time. It will allow the paint to cure and harden increasing its chemical resistance and life span. It is suggested for steps, shallow areas and wading pools, sprinkle sand on the coating before it dries to make the area slip-resistant.
Fill and Balance
Now that the pool is painted and the paint has cured, it’s time to fill the pool and balance the water. Depending on your area you may need to order a water truck to deliver. If you have a garden hose available, toss it in. The average pool should take anywhere from 36 - 48 hours to fill. Once the pool is full allow the fresh water to circulate for 3 - 4 hours. After the circulation period it’s time to complete the first water test of many on the new water. Make sure to test the water weekly to maintain proper water balance and overall pool health.
In The Swim CRC Pro-Series Chlorinated Rubber-Base Pool Paint
In The Swim CRC Pro-Series Chlorinated Rubber-Base Pool Paint is a self-priming paint designed as a re-coat for existing rubber-base finishes. If re-coating an existing interior, one coat is suggested. A second coat may be required on unpainted or porous surfaces. Chlorinated Rubber-Base Pool Paint has excellent chemical resistance and color retention, allowing the paint to last 3 years on average. Coverage: 250 square feet per gallon on average. This product should be applied with a 9" roller equipped with a 3/8" nap. Pot Life: Indefinite as long as it is properly sealed. Allow to cure 4 - 6 hours in between coats. Cure 10 days minimum before filling.
Determine Area Size
Determining the square foot of the area you are going to paint is important. This will help you figure out how many gallons of paint are needed to complete the job. It’s important to take the surface porosity and smoothness into account. When looking at how much paint you should purchase. Start by measuring the length and width of the area. Once you have those measurements plug them into the formulas below. Divide that number by the coverage square foot of the paint you are wanting to use. That will give you the number of gallons that you should purchase. Remember to look and see if the paint requires single or multiple coats and if it needs a primer.
Drain Water
Now that you have selected the paint type and know the square footage of the interior, it’s time to drain the pool. Rent or purchase a submersible pump. As soon as the outside ambient air temperature drops below 85° F. Check the local code for where pool water can be drained and start pumping. If the outside ambient air temperature is above 85° F stop draining the pool. At these elevated temperatures, the interior surface can crack and lose its structural integrity. While the pool is draining, remember that you can start to prepare the pool for paint.
Prepare for Paint
Now that the pool has been drained, you can start to prep the interior for paint. Start by removing the perimeter return jets, pool/spa light, main drain covers, aerator fittings and any other item you don’t want painted. Using painters tape, carefully tape off all the tile line, step/bench tiles, return lines, and skimmer mouth. Once you have everything taped off it’s time to prime.
Primer Coat
Now that the pool has been drained and taped, it’s time to prime. Remember not all types of paint use a primer. So if you have paint that doesn’t use a primer, skip to the painting step. Roll the primer onto the interior surface of the pool using a 9” roller with a ½” nap, starting with the walls and ending with the floor. Once you’ve completed priming allow the prime to cure for 24 - 48 hours. Then it’s time to paint.
Painting Interior
The pool has now been drained, taped, and primed. It’s time for paint. The type of paint you choose will determine the number of coats. Start painting the walls first and finish with the floor. If the paint you are using requires a time period in between coats, make sure you take that time. It will allow the paint to cure and harden increasing its chemical resistance and life span. It is suggested for steps, shallow areas and wading pools, sprinkle sand on the coating before it dries to make the area slip-resistant.
Fill and Balance
Now that the pool is painted and the paint has cured, it’s time to fill the pool and balance the water. Depending on your area you may need to order a water truck to deliver. If you have a garden hose available, toss it in. The average pool should take anywhere from 36 - 48 hours to fill. Once the pool is full allow the fresh water to circulate for 3 - 4 hours. After the circulation period it’s time to complete the first water test of many on the new water. Make sure to test the water weekly to maintain proper water balance and overall pool health.
In The Swim Envirolon Rubber-Base Pool Paint
In The Swim Envirolon rubber-base paint is a synthetic rubber formula. Envirolon rubber-base is ideally used for gunite, plaster, and concrete surfaces. It can also be used to recoat an existing rubber-base/chlorinated rubber finish. Two coats will last up to 3 years. A third coat may be needed depending on the surface porosity. Coverage: Approximately 250 - 300 square feet per gallon. Should be applied with a 9” roller equipped with a ⅜” nap. Apply second coat at least 4 hours after the first coat. Pot Life: Indefinite as long as it is properly sealed. Allow to cure for 3 days at 70° F before filling.
Determine Area Size
Determining the square foot of the area you are going to paint is important. This will help you figure out how many gallons of paint are needed to complete the job. It’s important to take the surface porosity and smoothness into account. When looking at how much paint you should purchase. Start by measuring the length and width of the area. Once you have those measurements plug them into the formulas below. Divide that number by the coverage square foot of the paint you are wanting to use. That will give you the number of gallons that you should purchase. Remember to look and see if the paint requires single or multiple coats and if it needs a primer.
Drain Water
Now that you have selected the paint type and know the square footage of the interior, it’s time to drain the pool. Rent or purchase a submersible pump. As soon as the outside ambient air temperature drops below 85° F. Check the local code for where pool water can be drained and start pumping. If the outside ambient air temperature is above 85° F stop draining the pool. At these elevated temperatures, the interior surface can crack and lose its structural integrity. While the pool is draining, remember that you can start to prepare the pool for paint.
Prepare for Paint
Now that the pool has been drained, you can start to prep the interior for paint. Start by removing the perimeter return jets, pool/spa light, main drain covers, aerator fittings and any other item you don’t want painted. Using painters tape, carefully tape off all the tile line, step/bench tiles, return lines, and skimmer mouth. Once you have everything taped off it’s time to prime.
Primer Coat
Now that the pool has been drained and taped, it’s time to prime. Remember not all types of paint use a primer. So if you have paint that doesn’t use a primer, skip to the painting step. Roll the primer onto the interior surface of the pool using a 9” roller with a ½” nap, starting with the walls and ending with the floor. Once you’ve completed priming allow the prime to cure for 24 - 48 hours. Then it’s time to paint.
Painting Interior
The pool has now been drained, taped, and primed. It’s time for paint. The type of paint you choose will determine the number of coats. Start painting the walls first and finish with the floor. If the paint you are using requires a time period in between coats, make sure you take that time. It will allow the paint to cure and harden increasing its chemical resistance and life span. It is suggested for steps, shallow areas and wading pools, sprinkle sand on the coating before it dries to make the area slip-resistant.
Fill and Balance
Now that the pool is painted and the paint has cured, it’s time to fill the pool and balance the water. Depending on your area you may need to order a water truck to deliver. If you have a garden hose available, toss it in. The average pool should take anywhere from 36 - 48 hours to fill. Once the pool is full allow the fresh water to circulate for 3 - 4 hours. After the circulation period it’s time to complete the first water test of many on the new water. Make sure to test the water weekly to maintain proper water balance and overall pool health.
In The Swim Gunite Primer for Epoxy-Base Swimming Pool Paints
In The Swim Gunite Primer is a two-part epoxy primer typically used on fiberglass gel-coat, rough plaster, rough concrete, or sandblasted surfaces. Gunite Primer's heavy viscosity fills imperfections on the interior surface give a more uniform look. Gunite Primer should be rolled on with a paint roller. Coverage: Approximately 100-150 square feet per gallon. Should be applied liberally using a 1/2" nap roller cover. Pot Life: 4 hours at 85° F. Curing Time before rolling Super Poxy Shield 24 - 48 hours.
Determine Area Size
Determining the square foot of the area you are going to paint is important. This will help you figure out how many gallons of paint are needed to complete the job. It’s important to take the surface porosity and smoothness into account. When looking at how much paint you should purchase. Start by measuring the length and width of the area. Once you have those measurements plug them into the formulas below. Divide that number by the coverage square foot of the paint you are wanting to use. That will give you the number of gallons that you should purchase. Remember to look and see if the paint requires single or multiple coats and if it needs a primer.
Drain Water
Now that you have selected the paint type and know the square footage of the interior, it’s time to drain the pool. Rent or purchase a submersible pump. As soon as the outside ambient air temperature drops below 85° F. Check the local code for where pool water can be drained and start pumping. If the outside ambient air temperature is above 85° F stop draining the pool. At these elevated temperatures, the interior surface can crack and lose its structural integrity. While the pool is draining, remember that you can start to prepare the pool for paint.
Prepare for Paint
Now that the pool has been drained, you can start to prep the interior for paint. Start by removing the perimeter return jets, pool/spa light, main drain covers, aerator fittings and any other item you don’t want painted. Using painters tape, carefully tape off all the tile line, step/bench tiles, return lines, and skimmer mouth. Once you have everything taped off it’s time to prime.
Primer Coat
Now that the pool has been drained and taped, it’s time to prime. Remember not all types of paint use a primer. So if you have paint that doesn’t use a primer, skip to the painting step. Roll the primer onto the interior surface of the pool using a 9” roller with a ½” nap, starting with the walls and ending with the floor. Once you’ve completed priming allow the prime to cure for 24 - 48 hours. Then it’s time to paint.
Painting Interior
The pool has now been drained, taped, and primed. It’s time for paint. The type of paint you choose will determine the number of coats. Start painting the walls first and finish with the floor. If the paint you are using requires a time period in between coats, make sure you take that time. It will allow the paint to cure and harden increasing its chemical resistance and life span. It is suggested for steps, shallow areas and wading pools, sprinkle sand on the coating before it dries to make the area slip-resistant.
Fill and Balance
Now that the pool is painted and the paint has cured, it’s time to fill the pool and balance the water. Depending on your area you may need to order a water truck to deliver. If you have a garden hose available, toss it in. The average pool should take anywhere from 36 - 48 hours to fill. Once the pool is full allow the fresh water to circulate for 3 - 4 hours. After the circulation period it’s time to complete the first water test of many on the new water. Make sure to test the water weekly to maintain proper water balance and overall pool health.
Swimline 24-Feet Round Swirl Bottom Overlap Liner Standard Gauge
Swimline
Product description
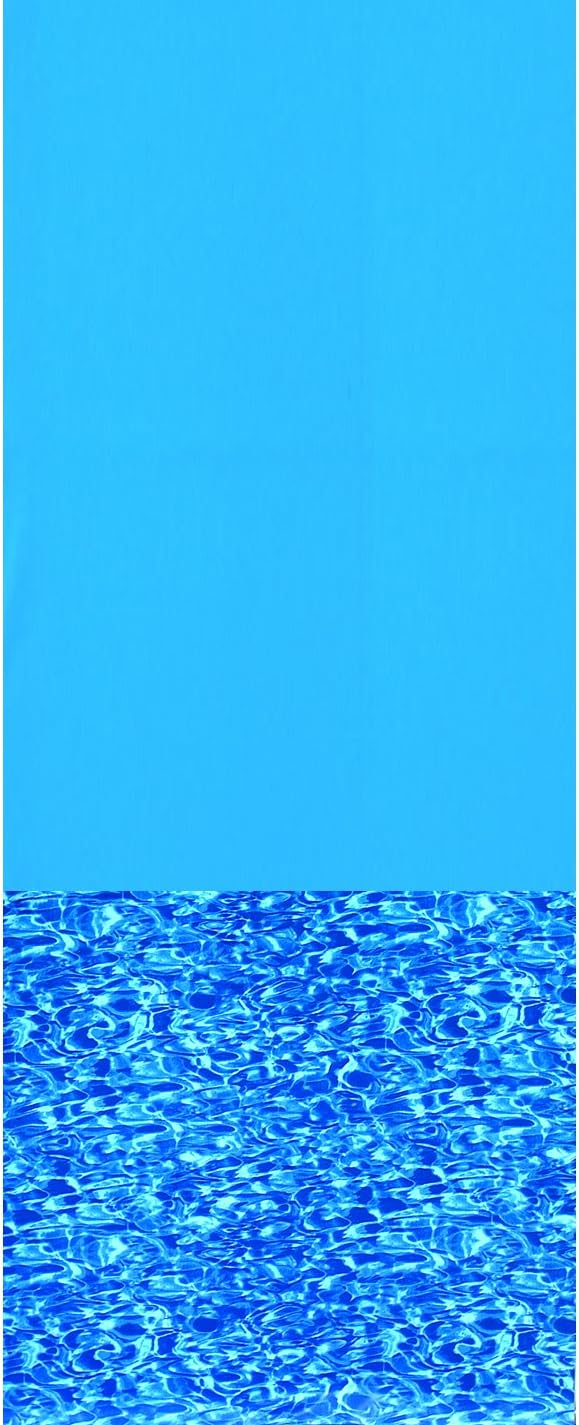
This premium above-ground pool liner is constructed of standard gauge vinyl and will maintain its beautiful appearance for years. Strong, double-welded seams will withstand winter’s worst. Its rugged construction allows the liner to be backed by a 15-Year Warranty. This liner will fit a 24 foot round above-ground pool, with either a 48 inch or 52 inch sidewall. Comes in a vibrant swirl bottom design.
- Constructed of durable, standard gauge vinyl
- Strong, double-welded seams
- Vibrant swirl bottom design
- Will fit either 48-inch or 52-inch sidewall
- Backed by a 15-year warranty
User questions & answers
| Question: | Will this fit an 18 foot round above ground pool |
| Answer: | If you buy the 18ft pool size, yes. The 15ft round will not fit an18ft round pool |
| Question: | Is this the 20 or 25 Gauge liner |
| Answer: | This is 20 gauge. |
| Question: | Does this liner fit an Intex pool that is 15x |
| Answer: | Yes it does |
| Question: | Our pool walk height is 54". Will this liner work |
| Answer: | It worked for ours and it is that same height. |

HARRIS 18' Round Overlap, Solid Blue, 20 Gauge Above Ground Pool Liner
Product description
Our Solid Blue Above Ground Round Overlap Pool Liners are easy to install and are built to last. Premium 20 gauge 100% virgin vinyl material will provide maximum protection against UV rays, superior durability, and dependable use. If your pool is equipped with a liner clip underneath the top ledge, then an overlap liner is best for you. Measuring your pool wall is important to do prior to ordering. Measure from the top rail to the bottom rail to determine if your pool wall is 48 inch or 52 inch.
- Overlap Liners made for 48-52 inch pool walls
- 20 Gauge vinyl liners have a 15 year warranty
- Superior cold crack resistance
- Double welded seams for extra strength and durability
User questions & answers
| Question: | Our pool is 15' across and 4' deep, is this liner large enough to fit it |
| Answer: | No... This liner is for a 24' diameter pool - you need a much smaller liner |
| Question: | I am confused. The listing says the liner is 15ft, but the answers say it is much larger - please clarify |
| Answer: | Mine was 18ft & it had a lot of overhang. My pool is 18x4. I'm ok with the fit. |
| Question: | Does it come with the clips to hold the liner in place |
| Answer: | No it doesn’t. I purchased the coping strips to help with that they work great |
| Question: | My pool is a 26 round pool. Is 27 big enough or do I need a |
| Answer: | A 27 round will be adequate for a 26 round pool. |
HARRIS 24' Round Overlap, Boulder Swirl, 20 Gauge Above Ground Pool Liner
Product description
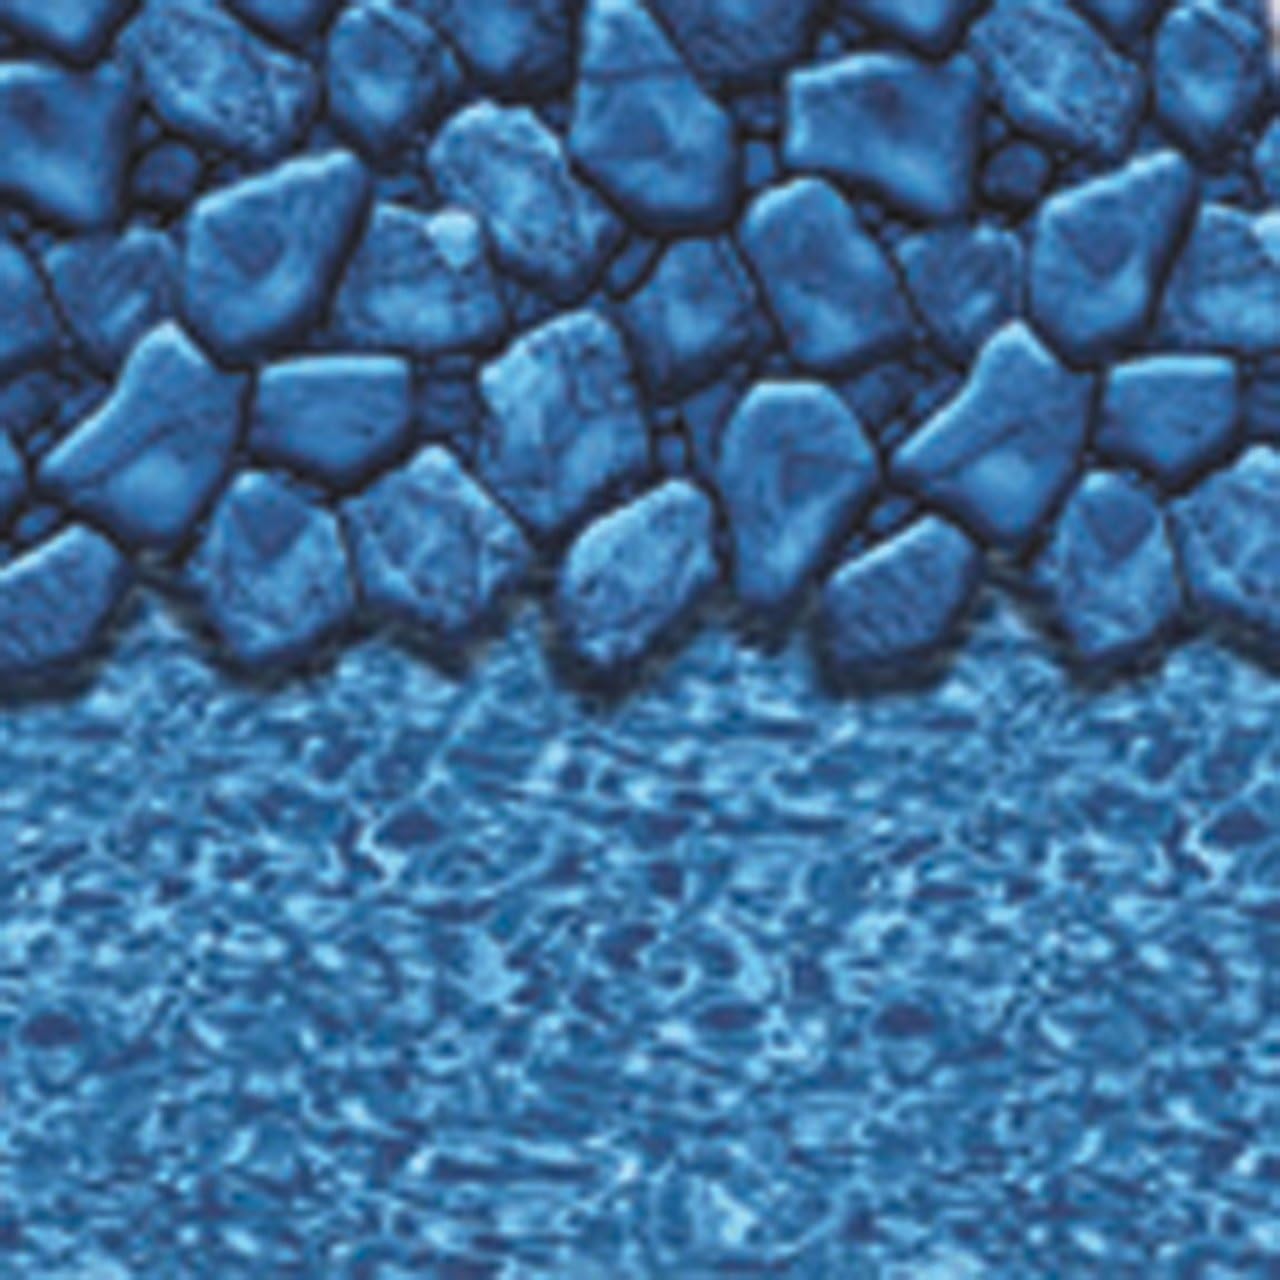
Our Boulder Swirl Above Ground Round Overlap Pool Liners are easy to install and are built to last. Premium 20 gauge 100% virgin vinyl material will provide maximum protection against UV rays, superior durability, and dependable use. If your pool is equipped with a liner clip underneath the top ledge, then an overlap liner is best for you. Measuring your pool wall is important to do prior to ordering. Measure from the top rail to the bottom rail to determine if your pool wall is 48 inch or 52 inch.
- Overlap Liners made for 48-52 inch pool walls
- 20 Gauge vinyl liners have a 15 year warranty
- Superior cold crack resistance
- Double welded seams for extra strength and durability
User questions & answers
| Question: | is the bottom plain blue or swirled |
| Answer: | It is swirled like the bottom of the pic |
| Question: | what is the thickness in mils of the wall and floor |
| Answer: | I dont know but tome it seems pretty thick, The pool man that put the linner in said that it was a real nice linner and said I got a great deal |
| Question: | Can this liner replace the intex Metal framed pools |
| Answer: | I have a metal frame pool but not an intex but dont see why not |
| Question: | Is this liner precut |
| Answer: | It's cut to size, but you'll have to cut the skimmer and return holes....super easy though. |

12 Foot Round Armor Shield Pool Floor Liner Pad
GLI
Product description
12' Round Liner Armor Shield
- Defends your liner against cuts and punctures from rocks, roots, grass and glass
- Cushions the floor of your pool creating a soft pool bottom for your feet to enjoy
- Resilient geotextile fabric permits moisture to safely pass through it
- Liner Shield is mold and mildew resistant
- Easily installs on top of soil or sand bed beneath a vinyl liner
User questions & answers
| Question: | Can I use this as a base for an inflatable hot tub |
| Answer: | It is thin but strong. We used it for our 12ft pool and its worked great. |
| Question: | My pool is 22ft round. What size should I use |
| Answer: | Mine was 12 round it is an exact fit, very little extra. If you have a 22 either find a 22 round or go up a size you may have to cut it. |
| Question: | What is the thickness of this pad |
| Answer: | It’s thin . you don’t feel that there’s padding but protects the lining of the pool . |
| Question: | Product dimensions, are 1x1x1 inches. That doesn't make sense. At the top it says "available in round shape and 27feet" Please clarify |
| Answer: | This listing is for an armor shield for a 27/28 foot round pool. The listed dimensions are incorrect. |

Smartline Cracked Glass 18-Foot Round Liner | Overlap Style | 48-to-52-Inch Wall Height | 25 Gauge Virgin Vinyl | Designed for Steel Sided Above-Ground Swimming Pools
Product description
Liner Knowledge:
- Overlap style is made to drape over the pool wall and is held in place with coping strips (not included)
- Does not require the presence of a bead receiver
- Lay out in the sun for at least 1-hour prior to installing
- Air temperature should be at least 70-degrees when putting in
- Be sure to measure your pool and wall height prior to ordering
- Will NOT work with Intex or Pop-Up pools
Liner Specifics:
- Size: 18’
- Wall Height: 48" or 52"
- Shape: Round
- Connection: Overlap
- Gauge: 25
- Material: 100% Virgin Vinyl
Liner Material:
- 100% virgin vinyl construction
- Our liners have been vulcanized, high pressure heat bonded and vacuum sealed
- Material has been RF vinyl welded with lap welded seams
- Durable liners free of impurities
Liner has a 25-year limited warranty against manufacturer material defects
- MEASURE TWICE, BUY ONCE – Whether installing for the first time, or replacing an existing liner, the Solid Blue pattern offers durability while not breaking the bank. Be sure to check the measurements of your swimming pool to assure the correct size is purchased. Pool height is determined by measuring the outside wall from the ground to underneath the top rail. Round pool size is determined by measuring from the center point wall to wall in order to obtain the diameter.
- PRETTY PLEASING PATTERN - The Cracked Glass pool liner provides a beautiful mosaic of blue glass pieces arranged around the top of your swimming pool. The North American cut material is hand-folded to prevent permanent creasing and excess wrinkling. Before installing, lay the liner out in the sun for a minimum of one hour to warm up the vinyl ensuring it is able to stretch when adding water. The best temperatures to install would be between 70-80 degrees.
- NO TROUBLE TO INSTALL - Overlap liners are draped over the walls of the pool during the installation process. Once the bottom seam is even near the cove, the liner is ready to be secured. This material is held in place through the use of coping strips prior to putting the top rails back onto the pool. Bead receivers are not needed for this type of liner. The liner is made to work with pools which have a flat bottom and wall heights of 48” or 52”. ***Will not work with Intex or Pop-Up pools***
- STAY COOL IN THE POOL – Enjoy the warm weather while spending quality time with family and friends. Your backyard aboveground pool will surely become the place to be during those hot summer days. Stay cool in more ways than one with the Cracked Glass liner.
- HIGH QUALITY MATERIAL - Swim care-free knowing your liner can tough it out through abrasion, chemicals and UV fading thanks to the use of Lamiclear technology. The layers are made of an acrylic top coat, a UV resistant print layer, and a 100% virgin vinyl base. This material is then welded and cut for a flawless fit and finish. A 25-year limited warranty is included protecting against defects in material and workmanship.
User questions & answers
| Question: | I want to replace my intex 18x 48 pool. What size liner should i buy |
| Answer: | I used the 48 to 52 inch in the swim liner. Then use the cabel line all the way around the top of the pool to hold the liner in place. This is the leaste expensive way to go even though intex says not made for the intex pool. My liner is going on three seasons with no problems at all. |
| Question: | Which gauge is thicker the 30 gauge |
| Answer: | Thank you for your question and interest. The 30 Gauge liner would be the thickest vinyl material offered in this listing with 20 being the thinnest. |
| Question: | what is the shipping weight, and size of packaging |
| Answer: | About 35-50lbs and 3’x 1’ x 4’ |
| Question: | Has anyone placed this on an intex pool or popup pool |
| Answer: | No. I would think it's too much weight for an intex pool. |
Product features
Don't Forget To Protect Your Liner!
SmartLine pool liners are very durable, but we suggest protecting your new purchase with a pool pad from Rhino Pad.
Rhino Pad is made from a special cloth fiber that is soft and durable. Defend your liner against cuts and punctures from rocks, roots, grass, glass and other harmful debris found on the ground. It will provide a flat base that gives an extra layer of armor for your swimming pool floor bottom prior to liner installation.

8-Foot Round Swirl Tile Liner | Overlap Style | 48-or-52-Inch Wall Height | 20 Gauge Virgin Vinyl | Designed for Steel Sided Above-Ground Swimming Pools
Product description
With the Swirl Tile liner print, rippling water wafts around your pool walls and floor, with a cascading array of rounded tiles bordering at the top.
Overlap liners are designed to fold over the top of your pool wall and do not require a bead receiver. Overlap liners are held in place with coping.
Liner Features:
- Size: 8'
- Wall Height: 48"/52"
- Shape: Round
- Connection: Overlap
- Gauge: 20
- Material: 100% Virgin Vinyl
About Our Liners:
- 100% virgin vinyl construction
- Our liners have been vulcanized, high pressure heat bonded and vacuum sealed
- Material has been RF vinyl welded with lap welded seams
- Durable liners free of impurities
Liner Limited Warranty:
The liner limited warranty is based on gauge. 20 Gauge = 20 Years
- MEASURE TWICE, BUY ONCE – Whether installing for the first time, or replacing an existing liner, the Swirl Tile pattern offers durability while not breaking the bank. Be sure to check the measurements of your swimming pool to assure the correct size is purchased. Pool height is determined by measuring the outside wall from the ground to underneath the top rail. Round pool size is determined by measuring from the center point wall to wall in order to obtain the diameter.
- PRETTY PLEASING PATTERN - Whether replacing a faded liner or starting fresh with the unique Swirl Tile design, this North American made liner is both high quality and affordable. The North American cut material is hand-folded to prevent permanent creasing and excess wrinkling. Before installing, lay the liner out in the sun for a minimum of one hour to warm up the vinyl ensuring it is able to stretch when adding water. The best temperatures to install would be between 70-80 degrees.
- NO TROUBLE TO INSTALL - Overlap liners are draped over the walls of the pool during the installation process. Once the bottom seam is even near the cove, the liner is ready to be secured. This material is held in place through the use of coping strips prior to putting the top rails back onto the pool. Bead receivers are not needed for this type of liner. The liner is made to work with pools which have a flat bottom and wall heights of 48” or 52”. ***Will not work with Intex or Pop-Up pools***
- STAY COOL IN THE POOL – Enjoy the warm weather while spending quality time with family and friends. Your backyard aboveground pool will surely become the place to be during those hot summer days. Stay cool in more ways than one with the Swirl Tile liner.
- HIGH QUALITY MATERIAL - Swim care-free knowing your liner can tough it out through abrasion, chemicals and UV fading thanks to the use of Lamiclear technology. The layers are made of an acrylic top coat, a UV resistant print layer, and a 100% virgin vinyl base. This material is then welded and cut for a flawless fit and finish. A 20-year limited warranty is included protecting against defects in material and workmanship.
User questions & answers
| Question: | How does this secure to the pool? Is there an adhesive or does it just sit loosely on the walls |
| Answer: | I put it on an 8 foot stock tank. I smoothed out the bottom and used large clips to help secure along the edge. Then I folded the flaps over, much like a trash bag. It is a tight fit and clings to the sides, you don't have to use anything to hold it down. |
| Question: | What is the color of the under side that you do not see? White, blue, pattern, etc |
| Answer: | The same color as the top. |
| Question: | i have an overlap liner now and want to change to a beaded liner. my wall measures 51 1/2" high so do i need a 52" beaded liner |
| Answer: | It goes by the wall height from very bottom of wall to top edge. You need a 52" beaded liner. |
| Question: | I have a pool that the liner just folds over and you put a plastic clip over the edge. Will this liner work that way |
| Answer: | This liner should work in either position. The bead will just sit and fold over top of the outside part of the wall and your clips will secure the liner. |
| Question: | Does this liner come with a warrantee |
| Answer: | The liner has a 25-year limited warranty against manufacturer material defects. |
| Question: | Does the liner have a hole for the Skimmer |
| Answer: | There are no holes for the skimmer or the jet. After you get water in the pool (1/2 way) you cut the holes yourself. It was a little scary, but ended up very easy. |
Product features
Don't Forget To Protect Your Liner!
SmartLine pool liners are very durable, but we suggest protecting your new purchase with a pool pad from Rhino Pad.
Rhino Pad is made from a special cloth fiber that is soft and durable. Defend your liner against cuts and punctures from rocks, roots, grass, glass and other harmful debris found on the ground. It will provide a flat base that gives an extra layer of armor for your swimming pool floor bottom prior to liner installation.

Liner Life Pre-Cut Swimming Pool Liner Pad, 18’ Round, White – Made of Strong, Durable Polyester Geotextile Material, Precut to Fit Perfectly, GP18R
Product description
The Liner Life Pre-Cut Pool Liner Pad is specifically designed to cushion and protect the bottom of your aboveground pool. Pre-cut for easy installation, this swimming pool padding is manufactured to fit most popular pool sizes, eliminating the need to measure, cut, and tape as one would with foam padding. Made of durable, high-quality polyester geotextile material, the Liner Life liner pad for swimming pools will help prevent grass, roots, rocks, or other sharp objects from damaging your pool’s liner. Plus, it will not only keep your pool protected, but it also improves swimmer comfort. Along with the added layer of cushioning, this pool liner pad prevents footprints from forming in the sand base beneath the pool liner for a consistently smooth swim. This Liner Life Pre-Cut Pool Liner Pad is perfectly sized to fit your 18’ round pool.
- ABOVEGROUND POOL LINER PAD – The Liner Life Pre-Cut Pool Liner Pad is specifically designed to protect the bottom of your aboveground pool.
- PRECUT TO SIZE – Liner Life pool padding is pre-cut for easy installation. It’s manufactured to fit most popular pool sizes, eliminating the need to measure, cut, and tape as one would with foam padding.
- PROTECTS POOL – Made of a high-quality, durable polyester geotextile material, this liner pad for swimming pools will help prevent grass, roots, rocks or other sharp objects from damaging your pool’s liner.
- EXTEND YOUR POOL’S LIFE – Protecting the bottom of your aboveground swimming pool with Liner Life will extend the life of your pool’s vinyl liner so you don’t have to change it as frequently.
- FITS 18’ ROUND POOL – This Liner Life Pre-Cut Pool Liner Pad is perfectly sized to fit your 18’ round pool.
User questions & answers
| Question: | Just bought an 18x9’ pool. What size should I buy to cover the bottom |
| Answer: | You can purchase one of several sizes and cut them down or even fold them over. GP1220OV is probably the best size and simplest to cut since we dont make a 18' X 9' |
| Question: | Is the pad one piece or does it have seams |
| Answer: | Ours has two seams. They aren’t bad once the pools is filled, but you should take care to keep them flattened to one side (or split in the middle) as you fill it. |
| Question: | If I have hard dirt should I still use sand before putting down this product |
| Answer: | We didn’t. Seemed to work just fine on the dirt. We have hard dirt as well. |
| Question: | If I have a 14ft round should i get the 15ft or 28ft pad |
| Answer: | Definitely a 15ft. We have a 22ft and I ordered the 24ft and it’s a bit big. |

24 ft Round Pool Liner Pad, Elephant Guard Armor Shield Padding
Product description
When you replace your pool liner....use Elephant Pad. Our Elephant Pad is made of durable, tear-guard weave. Liner Pad Helps To Protect and Prevent Rocks, Roots, & Nut Grass from punctures that would damage your liner. It comes pre-cut to fit your size swimming pool, just place under your vinyl liner using a sand base. Built in mold and mildew resistant inhibitors. Elephant pad is for undergrowth protection, not for cushioning. You will not be able to tell (or feel it) once it's installed; it is working from the bottom up to protect your liner.
- EASY INSTALLATION. Pre-cut to fit your size swimming pool.
- Helps To Protect and Prevent Rocks, Roots, & Nut Grass from punctures that would damage your liner.
- One piece construction with no cutting, taping, or measuring.
- Place Elephant Pad under your vinyl liner - always using a sand base.
User questions & answers
| Question: | Hi, mine is a 16x48. Do you have that one? Thanks |
| Answer: | Don't listen to the other person about it being a waste of money. He probably just can't afford it. We've had ours for years and its been awesome. Without it, your feet will hurt since you'll be on solid compacted sand, dirt or concrete. This helps with comfort and actually helps in your liner being more flexible with people walking on it. |
| Question: | This can be used for a pool that will be winterized |
| Answer: | This is a pad that goes underneath an above ground pool liner to protect the liner |
| Question: | Does the tv have to be bluetooth |
| Answer: | No. It doesn't. And we don't recommend using the TV while in the pool. Gets bad reception that way. |
| Question: | Is it made from real elephants |
| Answer: | African elephants only. They have larger ears and you can get more material out of them. Don't buy the ones with tusks. They can puncture your liner. |

Liner Life GP12R Pre-Cut Liner Pad for 12' Round GroundCloth, White
Liner Life
Product description
The Liner Life Pre-Cut Pool Liner Pad is specifically designed to cushion and protect the bottom of your aboveground pool. Pre-cut for easy installation, this swimming pool padding is manufactured to fit most popular pool sizes, eliminating the need to measure, cut, and tape as one would with foam padding. Made of durable, high-quality polyester geotextile material, the Liner Life liner pad for swimming pools will help prevent grass, roots, rocks, or other sharp objects from damaging your pool’s liner. Plus, it will not only keep your pool protected, but it also improves swimmer comfort. Along with the added layer of cushioning, this pool liner pad prevents footprints from forming in the sand base beneath the pool liner for a consistently smooth swim. This Liner Life Pre-Cut Pool Liner Pad is perfectly sized to fit your 12’ round pool.
- ABOVEGROUND POOL LINER PAD – The Liner Life Pre-Cut Pool Liner Pad is specifically designed to protect the bottom of your aboveground pool.
- PRECUT TO SIZE – Liner Life pool padding is pre-cut for easy installation. It’s manufactured to fit most popular pool sizes, eliminating the need to measure, cut, and tape as one would with foam padding.
- PROTECTS POOL – Made of a high-quality, durable polyester geotextile material, this liner pad for swimming pools will help prevent grass, roots, rocks or other sharp objects from damaging your pool’s liner.
- EXTEND YOUR POOL’S LIFE – Protecting the bottom of your aboveground swimming pool with Liner Life will extend the life of your pool’s vinyl liner so you don’t have to change it as frequently.
- FITS 12’ ROUND POOL – This Liner Life Pre-Cut Pool Liner Pad is perfectly sized to fit your 12’ round pool.
User questions & answers
| Question: | Will this help insulate the bottom of my inflatable hot tub |
| Answer: | No, it will not insulate the bottom of the hot tub, that is not the intended purpose of this product. SPQ Brands |
| Question: | Can this be cut down to a 8' round |
| Answer: | Yes. I cut mine down to 10' round last year and plan to do the same this year. I spread it out and put the pool on it and put in a little water so it would spread out. Then I cut it out around it. |
| Question: | Can you use this under pool on cement base |
| Answer: | It's just a thin pad... no cushion or anything. It's designed to keep things from puncturing your liner from underneath (like roots). Since yours is in a slab, that's not likely to happen. It WOULD make it slightly softer to walk on on the concrete, but otherwise unnecessary. I LOVE IT for MY purpose on top of a sand base? |
| Question: | I am considering buying this for a fruit tree hammock to keep my fruit from hitting the ground. How thick is the fabric? Can it be cut? Grommetted |
| Answer: | It is a large piece of felt fabric. It had seams where the bolt edges are sewn together to make a large swath and then cut round. Felt tens to stretch when pulled so grommets probably wouldn't do too well. It's not waterproof. Water will seep through this easily. It's made for padding and drainage under a pool and works well for that application, other than being able to feel the seams through the pool liner. It has very little shear/tear strength and would likely fail if holding weight. It is not cushioned enough to keep large fruit from bruising if laid on the ground but it will keep them off the dirt and easy to pick up. It's about 1/8 to 3/16 thick white felt mesh material. |
Latest Reviews
View all
Extreme Short Shorts
- Updated: 01.05.2023
- Read reviews
Patio Umbrella Sizes
- Updated: 05.07.2023
- Read reviews

Athens Travel Guides
- Updated: 16.06.2023
- Read reviews

Dog Gift
- Updated: 20.03.2023
- Read reviews

Harry Nilssons
- Updated: 21.04.2023
- Read reviews